


"Here to Help" is a support column written especially for Formstack's awesome, loyal customers. This post is part of a three-post series on streamlining business processes with online forms.
If you’re using Formstack for IT, great. But are you using your IT forms in the most efficient way possible? Processes like IT service request management can get messy fast if you don’t have a good system in place. But rest assured that there’s an easy way to create a seamless process for IT service requests so you can keep customers and internal teams happy.Combining the power of Formstack’s online forms with your preferred help desk integration and features like Data Routing can help you quickly streamline IT business processes and eliminate the stress of handling a large volume of urgent requests.Set up your own IT service request process with these easy steps:
Step 1: Create an IT Service Request Form

To get started, you need to create an IT service request form. Luckily, Formstack already has an IT service request form template available, so you don’t have to start from scratch! Just follow these quick, easy steps:
- Go to the IT Service Request template page, and click the Get this template button at the top.
- If you’re already logged into Formstack, an editable version of the template will automatically open in the form builder.
- Tweak the template using our Theme Editor to bring the form in line with your brand guidelines.
Step 2: Add a Help Desk Integration (Optional)
If you use help desk software to process requests, you can integrate your platform with your IT service request form. Formstack provides integrations for a few different platforms, including Salesforce Desk, Zendesk, and HelpSpot. Using one of these integrations is a great way to streamline business processes by quickly sending requests to your preferred software and auto-generating Support tickets in your system.
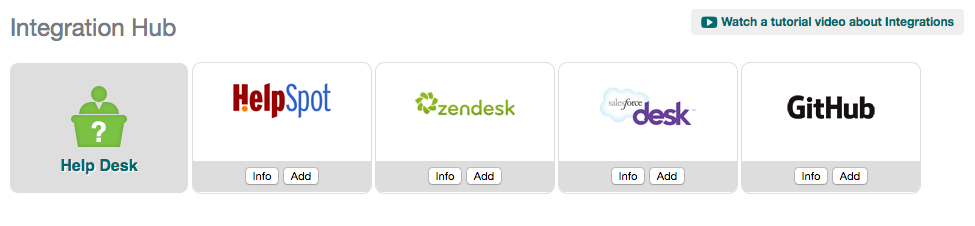
To add a help desk integration to your form, go to the Settings tab of your form and click Integrations on the left-hand side of the page. Choose Help Desk, click Add under your preferred integration, and follow the specific instructions for that integration.
Step 3: Add Data Routing
Data Routing is a feature that lets you route your form data to specific people and departments. You can use this feature to send submitted IT service requests to the right team members so information doesn’t get lost in the wrong person’s inbox.To set up Data Routing for your IT service request form, follow these steps:
- Go to the Settings tab of your form and click Emails & Redirects.
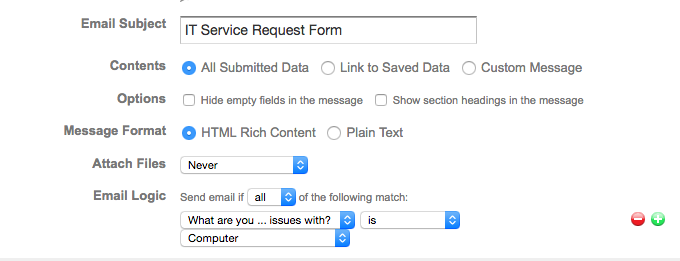
- Click on the + icon under Notification Emails, fill in your preferred email settings, and add a team member’s email address.
- Click on the Use Email Logic button at the bottom of the Notification Email Settings window. This will allow you to set conditional logic rules, so a form submission is sent only after specific conditions are met. For example, if you have one team member that specifically handles internet connection issues, you can set email logic to only send form submissions to that person if the Internet Connection problem was checked on the form.
Please Note: You must add team member emails and logic rules individually. You can learn more about Data Routing in this Support article.
Step 4: Share the Form
Once you have your form set up, it’s time to share it with the world! Formstack offers a wealth of embedding options to get your form in front of the right people. If you go into your Publish tab, you’ll find several options for sharing your form. The easiest options are in the “Quick Start” section. There, you’ll find your form’s unique URL, which can easily be shared through channels like email and social media. You’ll also find the embed code if you want to embed the form right on your business’s web page.
Want to learn more about managing your IT business processes and workflow with Formstack? Dive into our IT service desk solutions.

