


“Here to Help” is a support column written especially for Formstack’s awesome, loyal customers.
Online forms are a great way for your business to collect and manage important information. Whether you’re a marketer looking to capture lead data or a human resources professional looking to manage employee data, there’s a form that can help!And the best part? Your paperless information-gathering is not limited to text that can be typed into a form field. With Formstack, user submissions can include form attachments. This means you can easily collect resumes and cover letters on your job applications, photos on your contest entries, and more!Setting a form up to collect necessary documentation via a web form attachment takes just a few minutes. If you’re ready to start collecting files from prospects, customers, employees, job applicants, and other visitors, we can help. Here are three quick steps for creating an efficient file-sharing process:
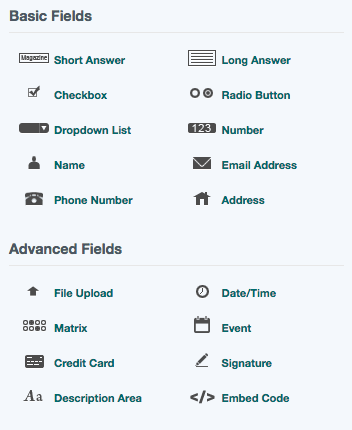
#1: Add a File Upload Field to Your Form
The first step is a no-brainer. To start accepting file attachments, you must add a File Upload field to your form. As with any form field addition in Formstack, you simply drag the File Upload field from the fields list in the builder and drop it onto your form.
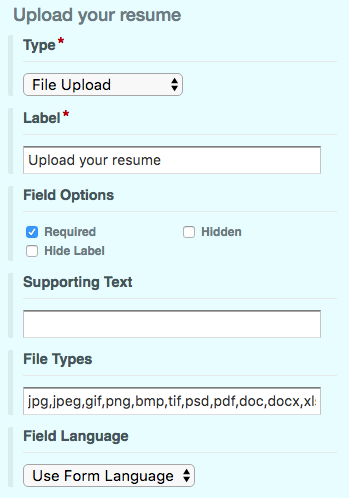
Once you’ve added the field to your form, you can give it an appropriate label, such as Upload your resume, and edit the accepted file types. By default, the File Upload field supports nearly 30 file types, including jpg, gif, pdf, doc, xls, mp3, wav, and zip. You can delete file extensions from the File Types list to allow only specific types.
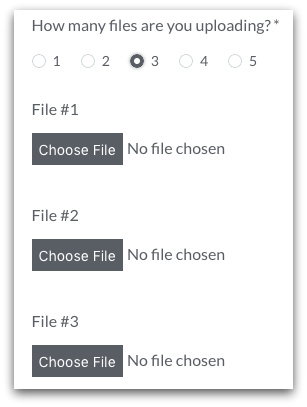
Note: Each File Upload field is limited to one upload, so you will need to add a separate File Upload field for each required web form attachment. Additionally, each submission is limited to 20 uploads and a total submission size of 25 MB. If you need to add multiple File Upload fields to accommodate the required number of form attachments, you can use Conditional Logic to create a more seamless experience.
Want to speed the process along and start accepting file uploads even sooner? Grab and customize this file upload form template.
#2: Integrate Your Form with a Cloud Storage App
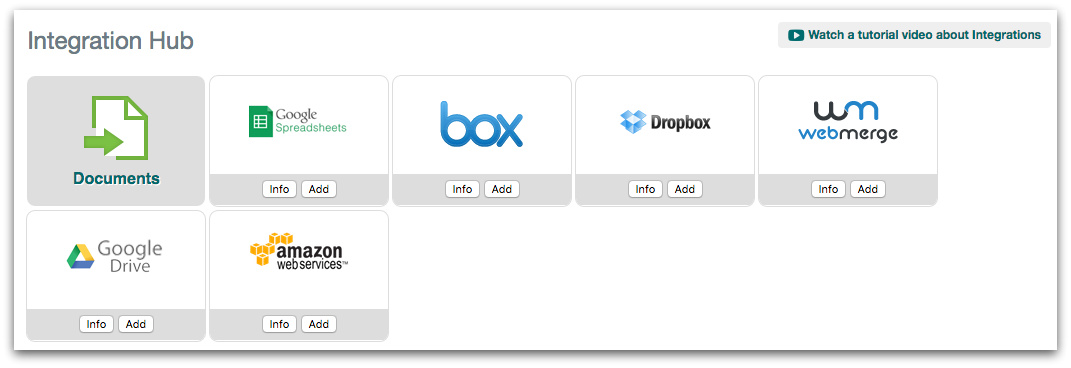
By default, all form attachments will be stored in Formstack’s secure database, where storage is limited based on plan level. For instance, the Silver plan allows 1 GB of storage, the Gold plan allows 2 GB of storage, and the Platinum plan allows 10 GB of storage.If you run out of account storage space, the File Upload fields on your form will be deactivated. To avoid deactivation, you can integrate your form with one of four leading cloud storage services: Box, Dropbox, Google Drive, and Amazon S3. Connecting your form to one of these apps allows you to send each web form attachment directly to the off-site storage account, which keeps it from counting toward your Formstack storage limit. (Note: A link to the off-site file will be available in your Formstack submission data.)To add a cloud storage integration to your form, go to Settings > Integrations > Documents, and click Add under the appropriate service. Then, follow the prompts on the screen to authenticate your storage account and enter necessary settings for the integration.
Note: Even if you have your Formstack data encrypted, the file attachments you collect and store in Formstack will not be encrypted. If you plan to collect sensitive documents, it’s best to integrate with Box or another off-site storage app for more secure file management.
#3: Adjust Your Form’s File Upload Settings
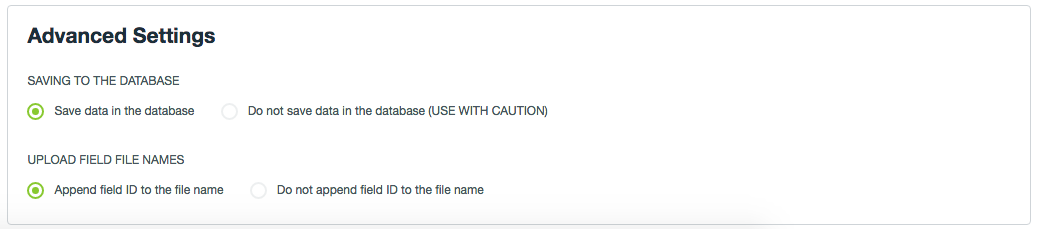
The final step for getting your form ready to accept file uploads is to adjust a couple back-end settings. These settings allow you to make decisions regarding uploaded file names and email notifications.First, you can choose whether to add the form field name to the uploaded file name. By default, the Field ID associated with the File Upload field will be appended to the uploaded file name. To adjust this setting, go to Settings > General and scroll down to Advanced Settings. There, you will see options for UPLOAD FIELD FILE NAMES.
Second, you can choose whether you want to receive file uploads via email. To make this choice, go to Settings > Emails & Redirects > Notification Emails and click to open the Notification Email Settings box. Next to Attach Files, you can choose to never receive form attachments in your notification emails, or you can choose to receive them only if they are less than 14 MB in size.
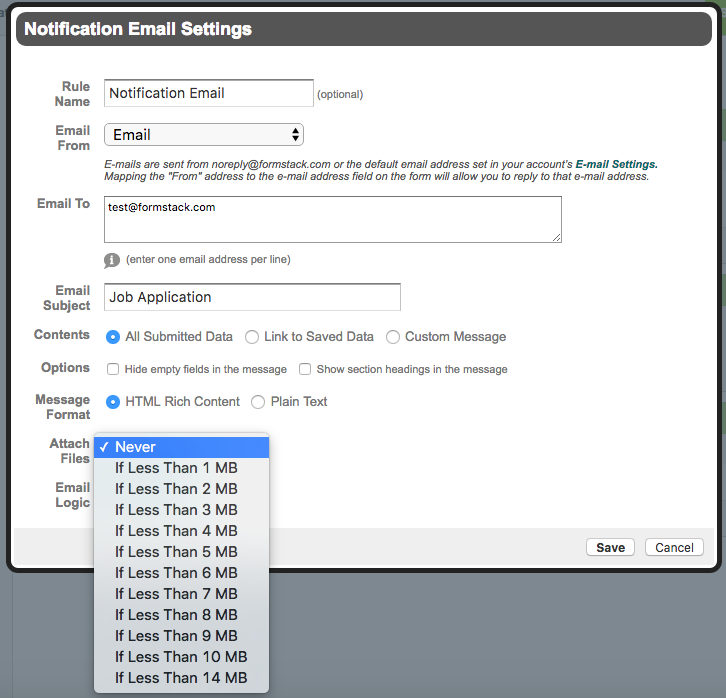
If you decide not to allow file upload attachments in your emails or if someone uploads a file larger than the allowed size, your emails will simply include a link to where you can view or download the files.For more information on collecting form attachments via File Upload fields, check out this Support documentation.
If you work in human resources, accepting file uploads on your online forms could be a huge time-saver. Learn how USA Sport Group takes advantage of web form attachments to collect necessary documentation from overseas job candidates.

