


"Here to Help" is a support column written especially for Formstack's awesome, loyal customers. This post is part of a three-post series on automating business processes with online forms.
If employees at your company do a lot of traveling, you likely have some sort of business expense reimbursement process in place. If that process involves strings of emails or (even less efficient) paper forms with attached receipts, there’s a better way! With Formstack, you can create a seamless digital reimbursement process that cuts down on work for your finance team and helps your employees get their money faster. Want to learn how you can shape up your process and keep your finances organized? Read on! Here are 4 simple steps for setting up an expense reimbursement process with Formstack:
Step 1: Create an Expense Reimbursement Form
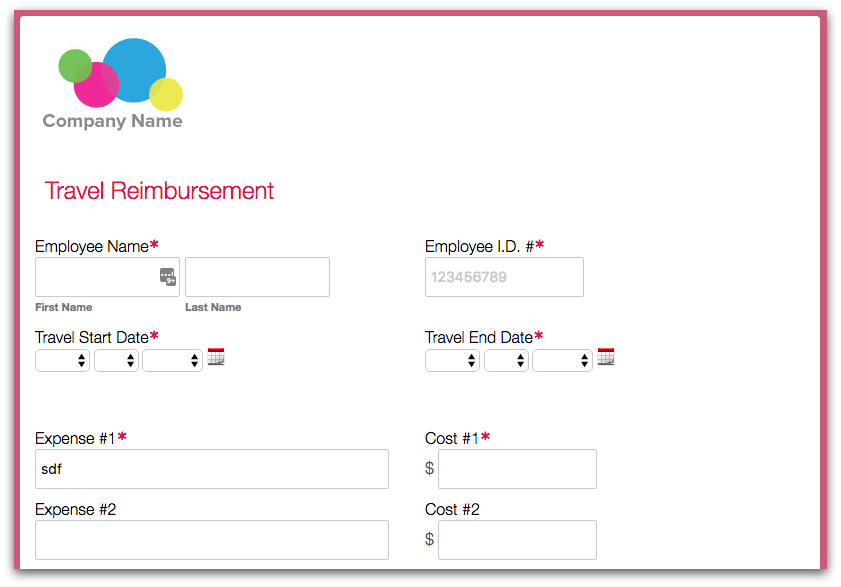
The first step is to create an expense reimbursement form. Formstack actually has a couple reimbursement form templates for travel expenses and mileage, so you don’t have to start from scratch! To create a travel expense reimbursement form, just follow these quick steps:
- Make sure you are signed into your Formstack account.
- Navigate to Formstack’s travel reimbursement form template page.
- Click the GET THIS TEMPLATE button near the top of the screen.
- When the form opens in your account, replace the generic logo image with your company’s logo (or remove the logo completely) and use the Theme Editor to make any desired style updates.
Step 2: Add Conditional Logic and/or File Upload Fields
Depending on your needs, you might find it beneficial to add Formstack’s Conditional Logic feature or File Upload fields to your expense reimbursement form. Conditional Logic can help you condense your form and only show the number of expense fields that each submitter needs. File Upload fields can help you gather necessary receipts for easier expense approval.To add Conditional Logic, follow these steps:
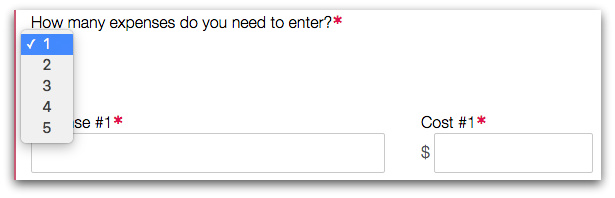
- Add a Dropdown List field to your form that allows employees to choose how many expenses they need to enter (I’d suggest allowing only five to ten expenses to be submitted per form).
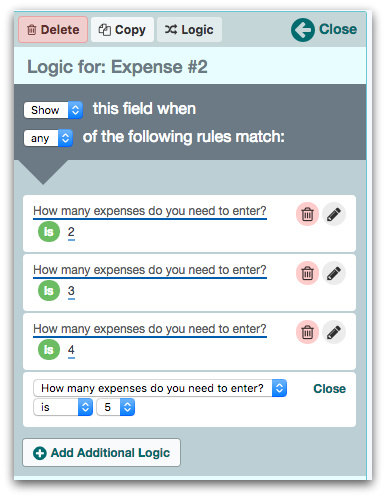
- Select the second Expense field and click the Logic button in the top left corner.
- Choose Use conditional logic and set logic rules that say to show the field when 2, 3, 4, or 5 are selected in the Dropdown List field.
- Select the second Cost field and set the same logic rules as you did in step 3.
- Follow steps 2 through 4 for all Expense and Cost fields on your form, setting logic rules accordingly (e.g., showing the third expense row only when 3, 4, or 5 are selected in the Dropdown List field).
To add a File Upload field to your form, simply drag the field onto your form from the left side of the screen. Also, consider updating the label to let employees know they should use the field to upload and submit their expense receipts.
Note: You can add a File Upload field for each expense and use Conditional Logic (as described above) to show the fields only when appropriate.
Step 3: Add Approval Workflow
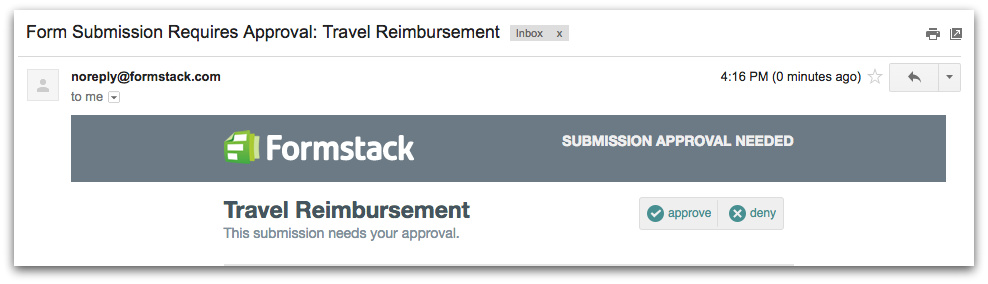
To fully streamline your expense reimbursement process, add approvers to your reimbursement form via Formstack’s Approval Workflow feature. This feature allows you to add individuals (such as managers or members of your finance team) to the form so they can review and approve expenses. Those added as approvers will receive an email notification when a request is submitted, and they can approve or deny the request right from the email.
For detailed information on implementing this feature, check out our Approval Workflow tutorial.
Step 4: Share the Form
The final step is to put your form to use! Make sure your employees have access to your expense reimbursement form so they can start using it to submit expense reimbursement requests—and you can start managing the process with ease!If you go to the Publish tab of your form, you’ll find several sharing options, including a direct URL and a website embed code.
Want to learn more about managing your financial processes with Formstack? Click here to dive into our finance and accounting offerings.

