


"Here to Help" is a support column written especially for Formstack's awesome, loyal customers.
How do you collaborate with people throughout your organization? If you’re using online forms for internal workflow, you know they can cut some serious time off your data collection processes. And Formstack goes a step further to offer features specifically designed to streamline processes at the office.If you have processes that require workflow approvals, we can help you get those sign-offs with little effort. Do you have job application submissions that need to be approved by HR and the hiring manager before interviews can start? Do you have PTO requests that need sign-off before they can become official? Simply set your form up with Approvals, and you can quickly and easily get the approvals you need.If you’re ready to eliminate excessive email threads and experience seamless collaboration, read on! I’m here to show you how to set up and use Formstack’s Approvals feature.
Setting up Approvals
To get Approvals up and running on your form, take these 3 basic steps:
Step 1: Add Approvers to Your Form
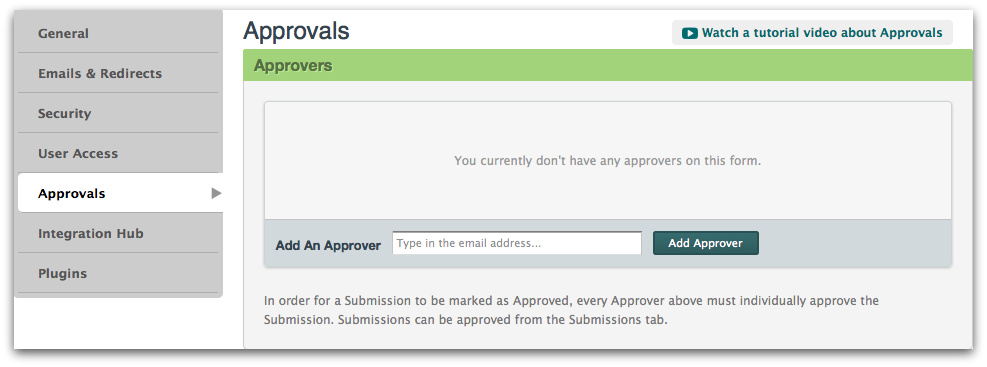
Adding approvers to your form is a breeze. Simply go to your form’s Settings tab, select Approvals, type an approver’s email address in the available box, and click Add Approver. (Note: If the approver you add does not already have a Formstack account, an account will be created when that person is added as an approver.)
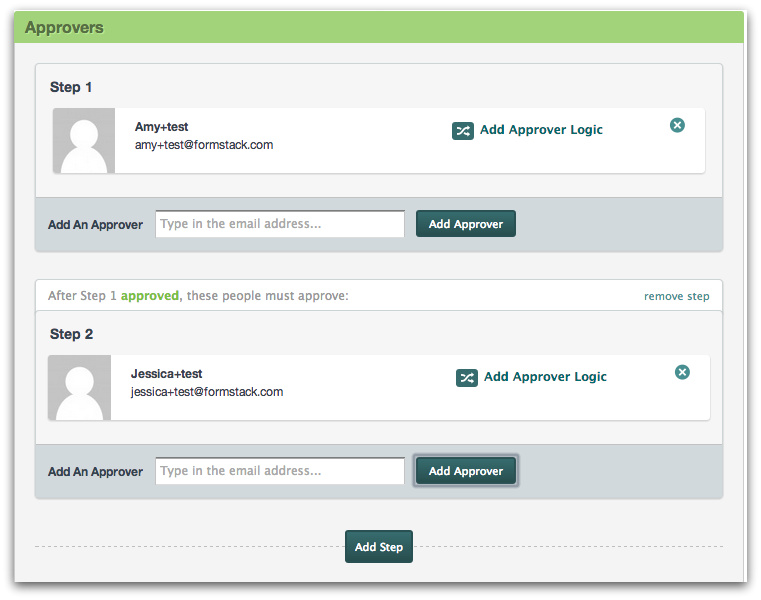
Adding someone as an approver gives that person the ability to approve or deny submissions. When a user submits the form, those added as approvers will be notified via email so they can review the submission and approve, deny, or add notes for their team regarding the status of the submission.You can add as many approvers as you want to a form, and you can set up multi-step workflow approvals if need be. To add multi-step approvals to your submissions, add your first approver as described above. Then, click Add Multiple Steps. This will bring up the option to add additional approvers in the flow. The submission will only be emailed to approvers in Step 2 after the approver in Step 1 approves.
Step 2: Set Approver Logic
Once an approver has been added to a form, you have the option to set logic for that approver to dictate when he or she will be required to approve submissions. For example, you may only need approval from specific individuals based on their department. In the image below, you can see that Joe Jack only needs to be included in the approval process if the form is submitted to the sales department.
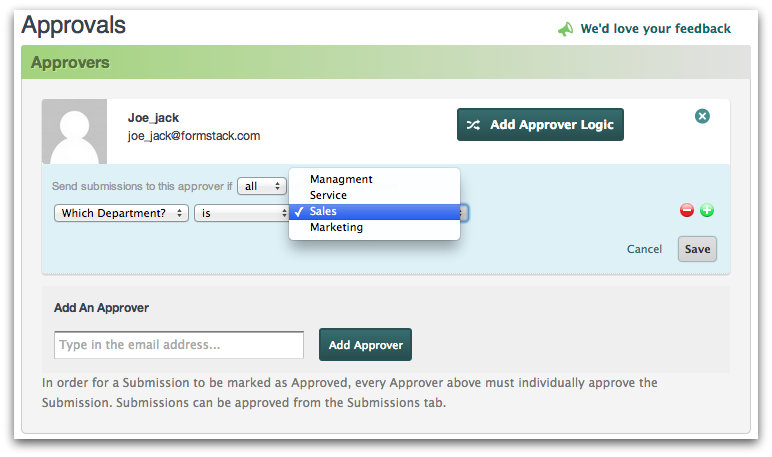
Note: Multiple logic rules can be added for an approver by clicking the green + symbol next to each logic line to add more. Additionally, the only fields eligible for approver logic are Dropdown List, Checkbox, Number, and Radio Button fields.
Step 3: Check Email Settings
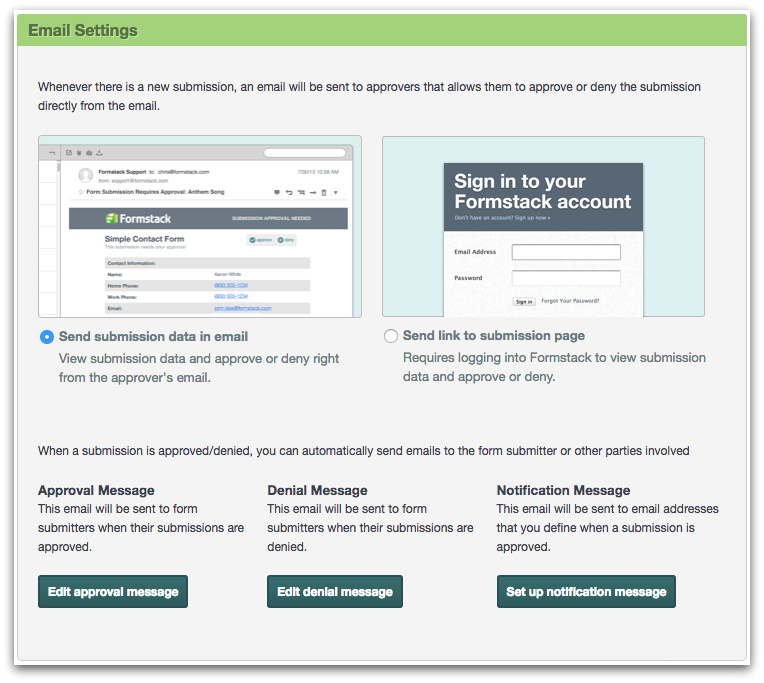
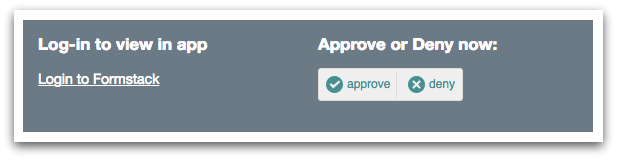
Whenever your form receives a new submission, an email will be sent to approvers to notify them that a submission is ready for their review. Under Settings > Approvals > Email Settings, you can choose to allow approvers to approve or deny submissions right from the email or to require them to log in to Formstack to approve or deny.Additionally, you can choose to send three types of emails based on the workflow approvals:
- An approval message can be sent to form submitters when their submissions are approved.
- A denial message can be sent to form submitters when their submissions are denied.
- A notification message can be sent to those you specify to notify them of submission approvals.
Using Approvals
Once Approvals is set up and your form submissions start rolling in, you can put the feature to use in 3 key ways:
Use 1: View Submissions
In most cases, approvers will be able to view submissions right in the notification emails they receive. However, if you require your approvers to log in to Formstack to approve or deny submissions, the notification emails they receive will only contain a link to the submissions.Submissions and approval status can always be viewed by logging in to Formstack and going to the Submissions tab for the form.
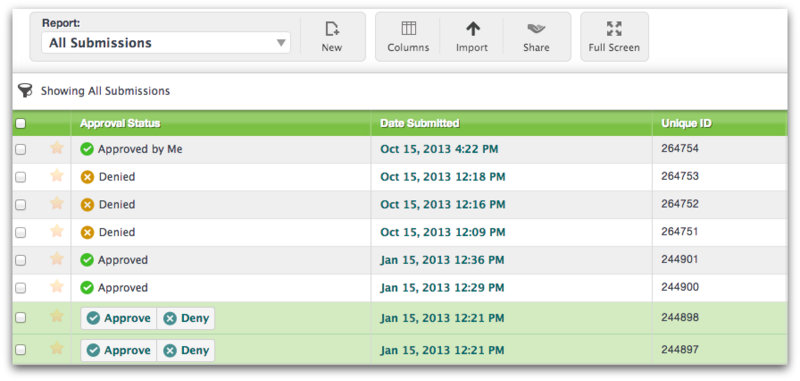
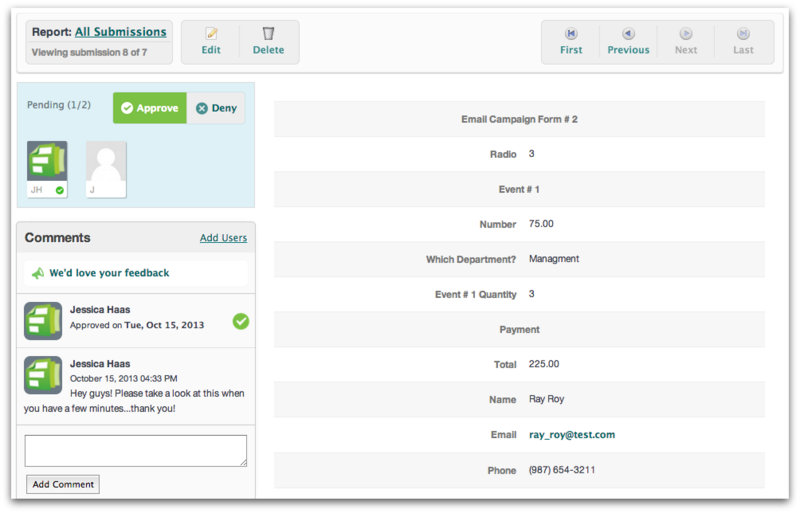
You can also view approval status and notes left by other approvers by clicking on each individual submission in Formstack.
Use 2: Approve or Deny Submissions
If approvers can see the submissions in their approval notification emails, they can approve or deny those submissions right from the email.
This ability to forgo logging into Formstack and navigating to the Submissions tab is a big time saver! However, approvers can always approve or deny from within the app as well by clicking the Approve or Deny buttons under Submissions > Approval Status or within the individual submission (see screenshots under Use 1).
Note: In order for a submission to be marked as approved, every approver must individually approve the submission.
Use 3: Skip Approvers
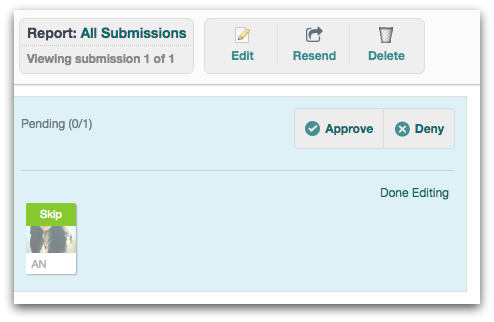
If you need to skip an approver for any reason, anyone who is an admin on the form or account can do so. To activate a skip, go into the form’s Submissions tab and click the submission in question. Under the approval status in the upper-left corner of the submission, click the edit icon next to the approver you would like to skip. Then click the "Skip" option to remove that person as an approver on the individual submission.
For more information on this feature, check out our detailed Submission Approvals Support doc. And to take a closer look at one company’s successful use of Approvals, click here.

