Document generation in the legal world is a must-have. By auto-populating letters, contracts, and other types of legal documents, attorneys and paralegals can save countless hours. Another way lawyers can save time (and their sanity) is by using a practice management system, like Clio.
With Clio, law firms can easily manage their clients, matters, and billing. Add Formstack Documents into the mix and you can automatically populate any type of legal document right from your Clio account.
In this example we’re going to show you how to generate a Letter of Engagement when a new Matter is added to Clio. We’ll even show you how you can automatically print and mail (via USPS) that letter with a service called Lob.
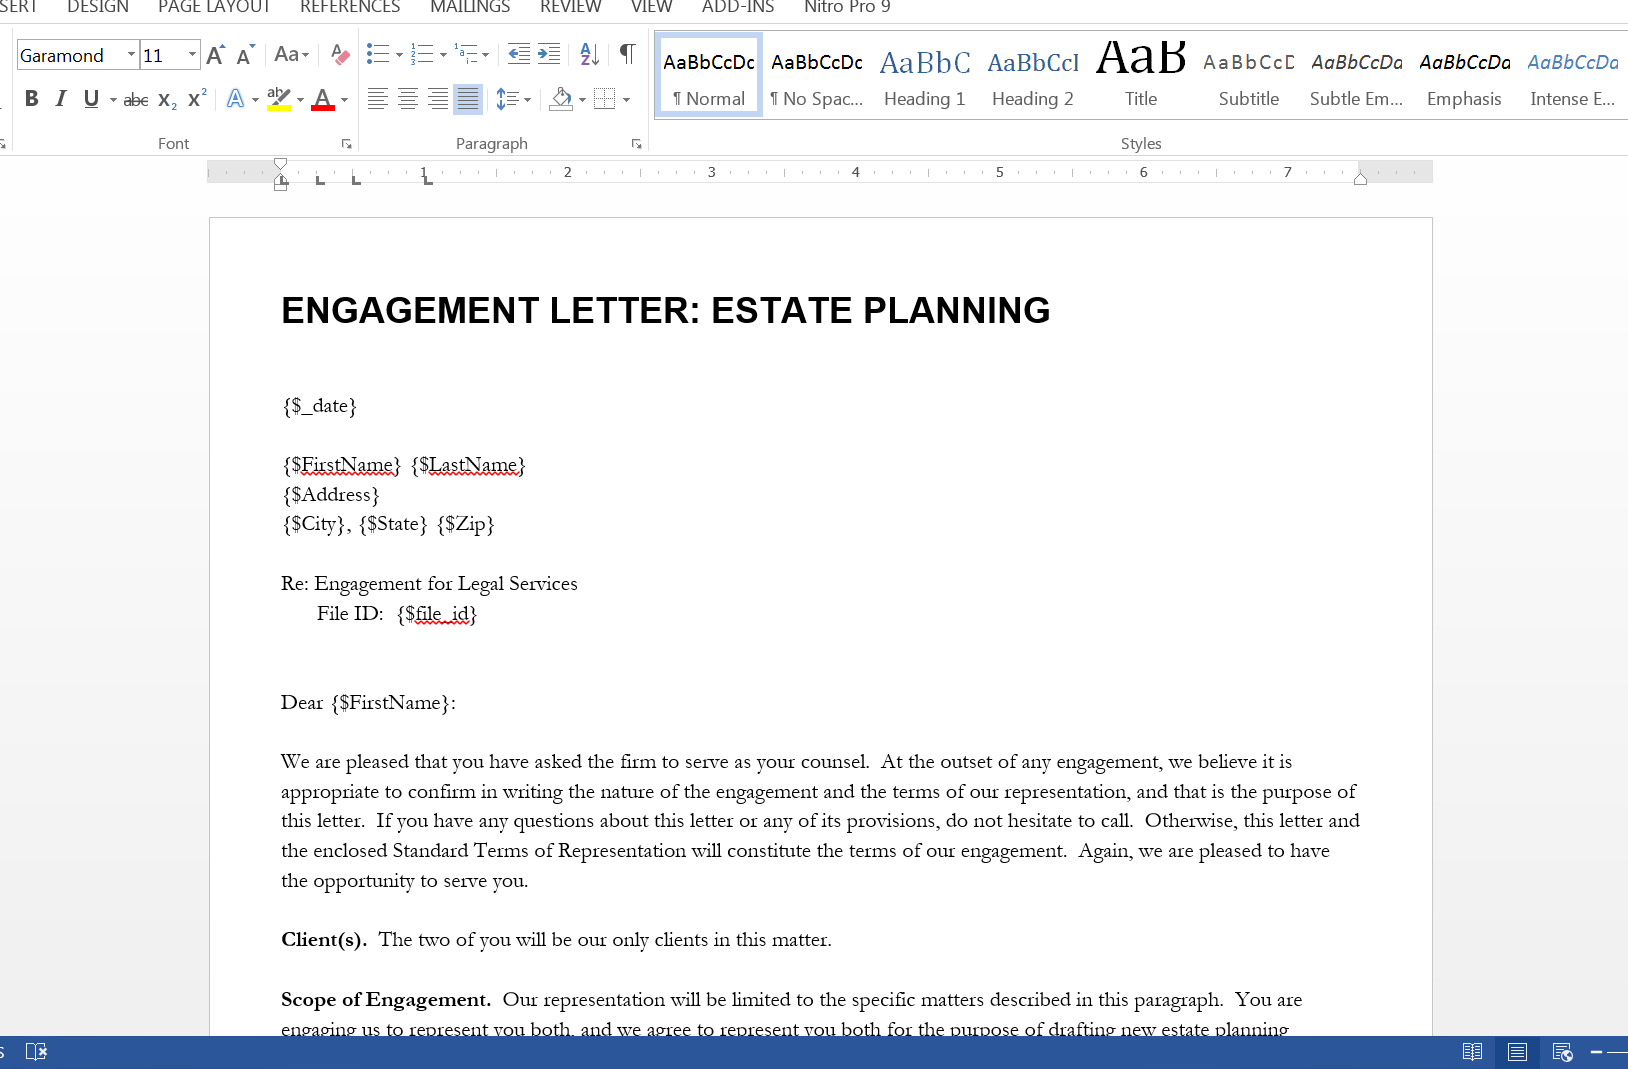
To get started, we’re going to setup our letter template. We’re going to use a Word document as our template file. Inside our template we’re going to add merge field tags like {$FirstName}, {$LastName}, {$Address}, etc. This indicates where in your document you want to populate the data from Clio.
Once you have your document all setup, we need to upload it to Formstack Documents. Under the Documents page, click New Document, give it a name, and click Next. On the next screen, choose Office Document, then pick the file to upload from your computer.

After uploading the document, we’re going to update a few settings for our document. We need to make sure we send a PDF to Lob, so go ahead and pick PDF for the “output”. Then we’re also going go name or document so the client’s name is in the file name. This will make it easy to track in Lob.
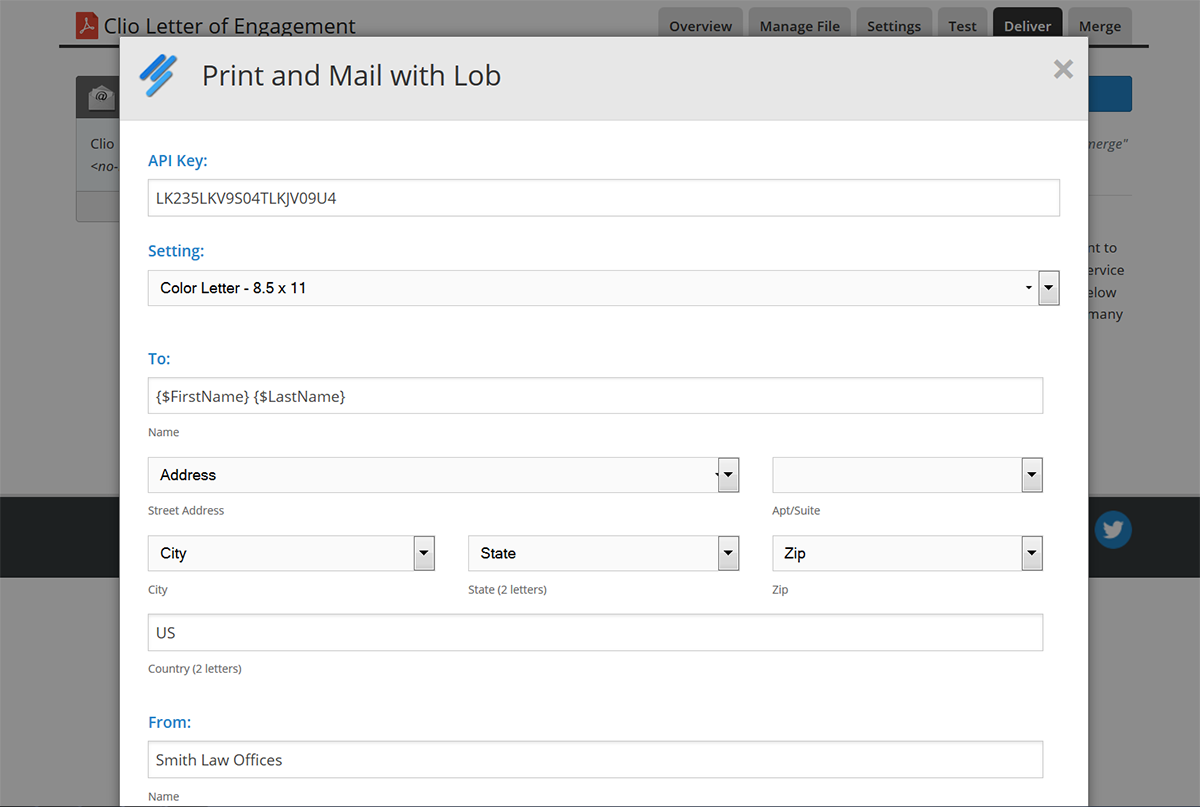
Next, let’s go to the Deliver tab. This is where we are going to setup our integration with Lob so that our letter is automatically mailed to our client. Go ahead and click New Delivery then pick Lob.
For the Lob settings, you’re going to need to pick the merge fields for the name and the address of your client. You need to use separate merge fields for each part of the address (street, city, state, etc). Then for your address, you can pick <> then type in the actual address. You don’t need to use merge fields for those.
Now that we have our delivery saved, we’re ready to setup the integration to Clio. To help with the integration, we’re going to use a service called Zapier. With Zapier you can easily (and automatically) send data from Clio to Formstack Documents based on various “triggers” and actions.
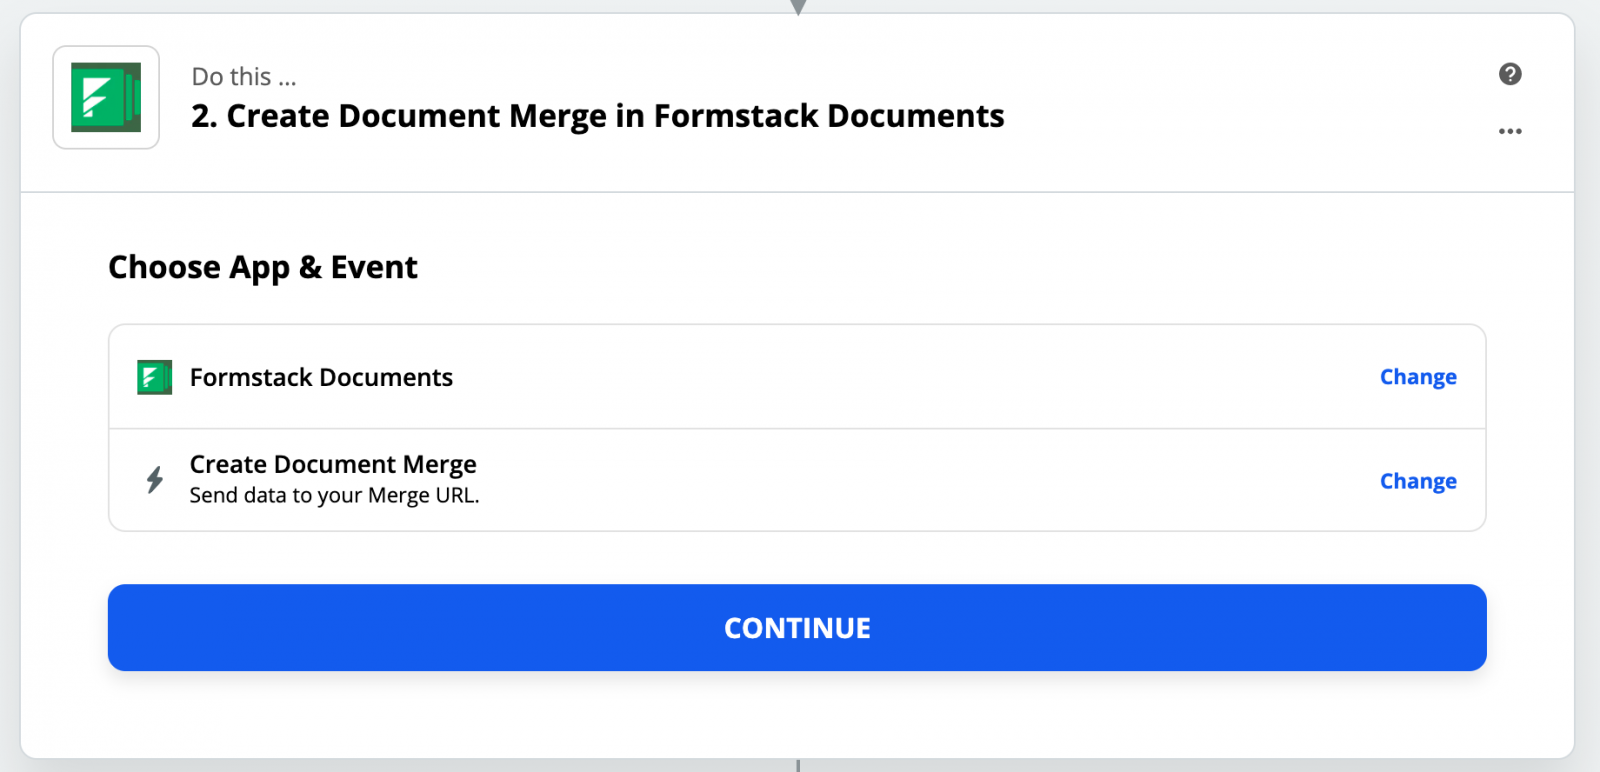
Go ahead and login to Zapier and create a new Zap. You’ll want to select Clio as the trigger service, then choose New Matter. For the action, you’ll choose Formstack Documents then Create Document Merge.
Continue the setup process in Zapier. It will ask you to authenticate Clio and Formstack Documents. You can also setup filters if you only want to send the letter if a certain condition is true. Keeping moving along until you get to the section to choose your Formstack Documents document.
Zapier is going to give you a list of your Formstack Documents documents. Go ahead and pick your Letter of Engagement document and then a list of your merge fields will be loaded below. For each of the fields, you’re going to want to add the corresponding Clio fields to the box below. This will ensure your Clio data ends up in the correct spot in your letter.
Perfect, we’re ready for a test! The last section in the Zap setup allows you to test the Zap with sample data from Clio. Follow the instructions in that section to send a test merge to Formstack Documents and your letter will be generated. You can check Lob to see what the letter looks like, but we also recommend setting up an email delivery to your office so you can get a copy.
If you need to make any changes to your letter, simply update your Word file then upload the new version under the Manage File tab inside Formstack Documents. The changes will be instant.
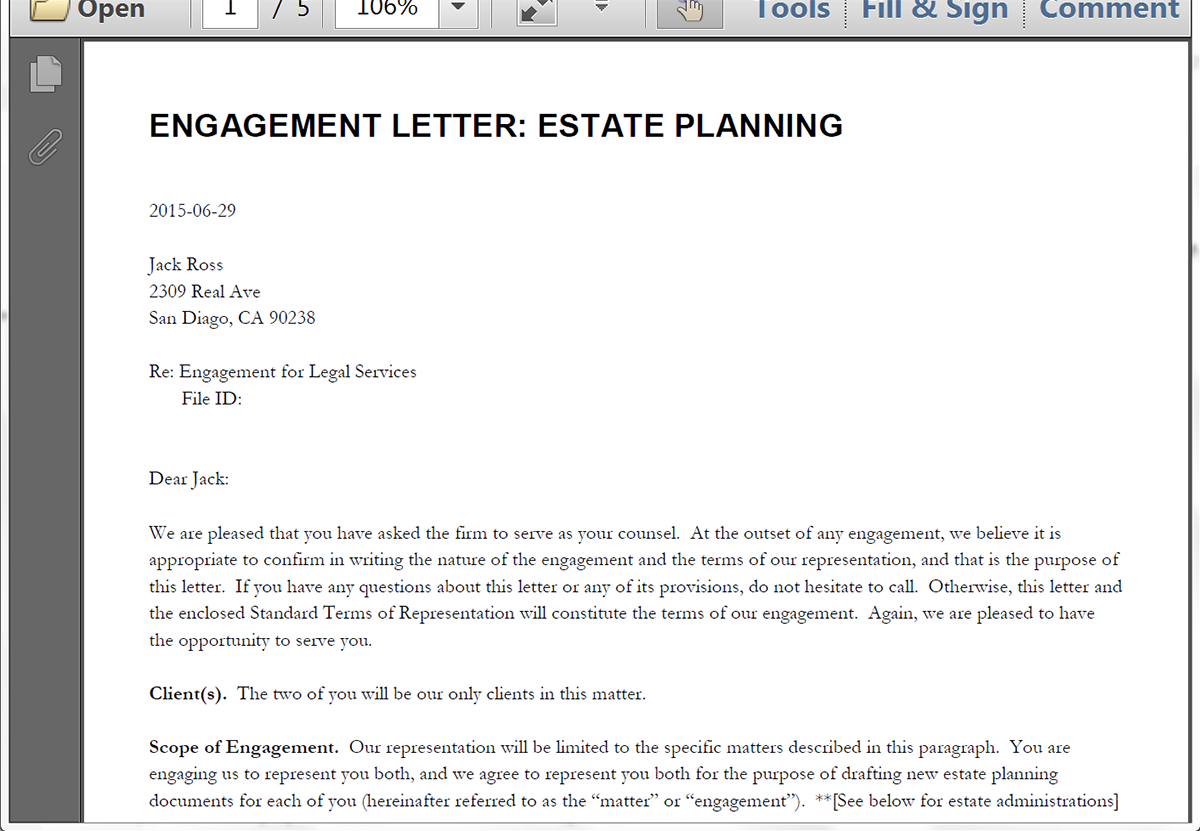
Here’s what our letter looks like: