


With a Business Automation tool like ONTRAPORT, you can setup workflows and automations that can save your entire team countless hours. From tracking new leads to marketing automation, ONTRAPORT has you covered.
Add Formstack Documents to your automation processes and you can instantly populate all kinds of documents with data that you have saved in ONTRAPORT. From contracts and letters, to proposals and invoices, Formstack Documents can save countless hours of paperwork and allow your team to focus on what they do best.
In this example, we’re going to show you how to automatically mail a welcome letter to a contact in ONTRAPORT. This letter will be personalized to the contact and will automatically be printed and mailed (in a real envelope) using Lob.
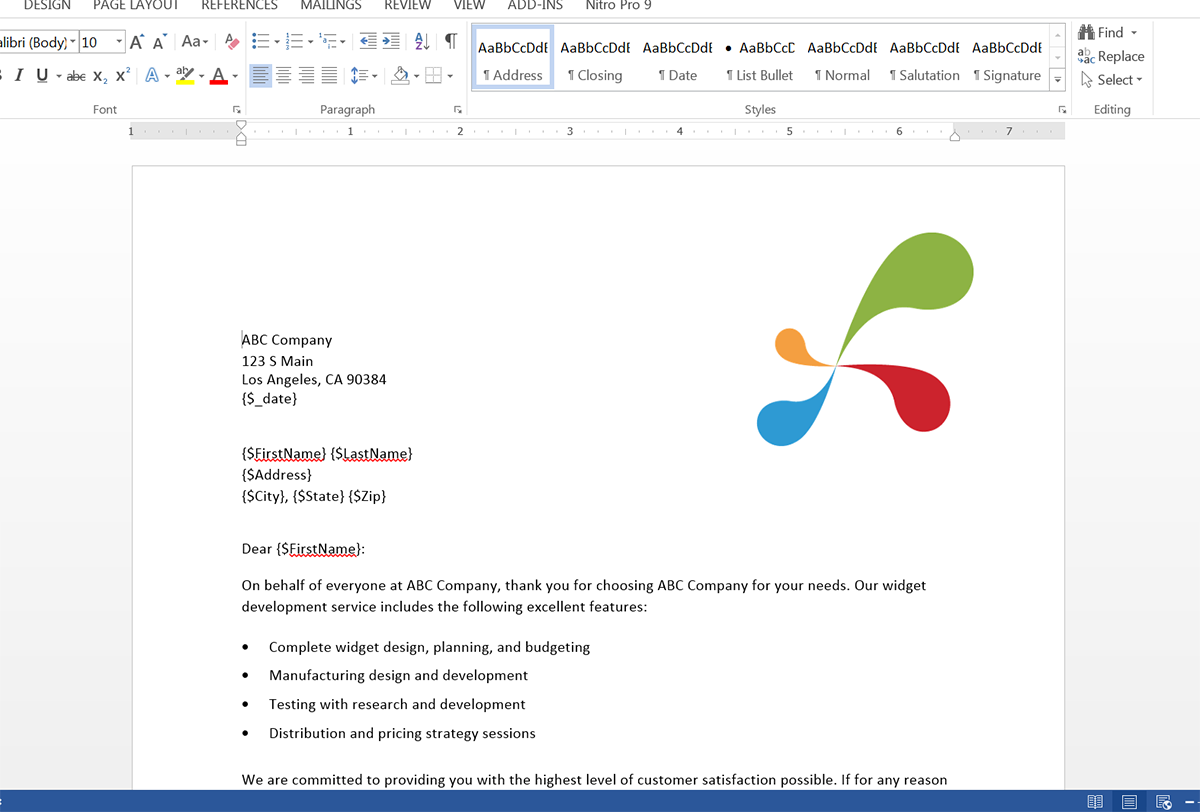
To get started, we’re going to setup the template for our letter using a Word document. Inside Word, we’re going to add the repeating details of our letter like our logo, address, and the basic content. Then for the spots that we want to insert our contact’s information, we’re going to use merge fields that looks like {$FirstName}, {$Address}, {$City}, etc.
These merge fields are just like any other text in the document and you can name them anything you’d like (but no spaces or special characters).
Here’s what our letter template looks like:
Once we have our template finished, we need to upload it to Formstack Documents. From the Documents page in Formstack Documents, click the New Document button and enter a name. On the next step, choose Office Document as the document type and then pick the file from your computer.

After you have uploaded your template, you’ll be taken to the Settings tab where you can modify various options like the type of file that is generated and the name of the file. For this example, we’re going to generate a PDF and we’re going to include the name of our contact in the name of the PDF file.
Next, we’re going to setup the delivery of our document so that it is automatically sent over to Lob for printing and mailing. Under the Deliver tab, click the New Delivery button and choose Lob from the list. After you enter your Lob API Key, you’re going to need to pick the address fields for the To address, then enter in your From address.
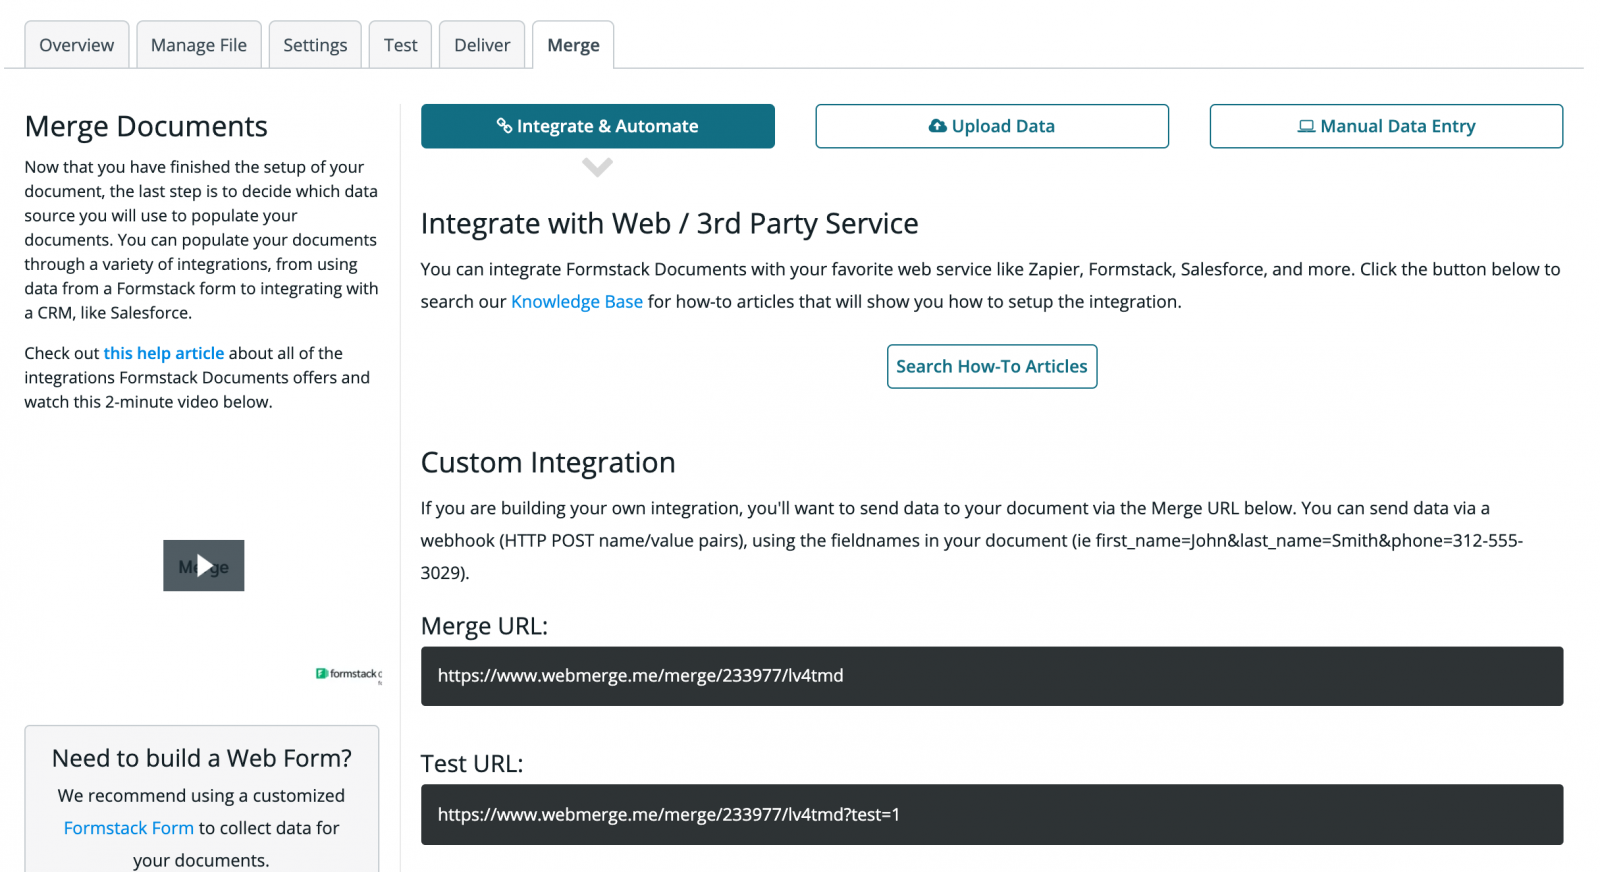
After you have saved your Lob delivery, we are done with the setup process inside Formstack Documents and we’re ready to integrate with ONTRAPORT. But first, we need to grab the Merge URL for our document under the Merge tab. This will be used in ONTRAPORT.
Inside ONTRAPORT, we’re going to setup an automation so that when we add a contact to a certain Sequence, it will trigger the data to be sent over to Formstack Documents and the letter will be generated. So let’s go ahead and go to Contacts > Sequences and create a New Sequence.
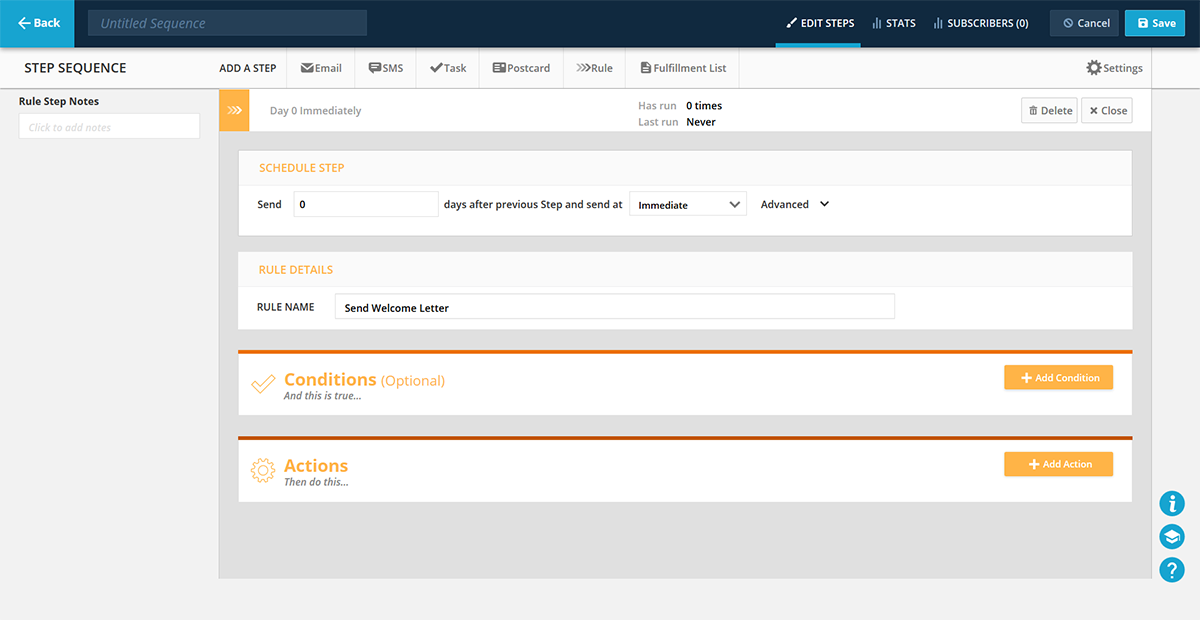
We’re going to create a new Step Sequence using a Rule. We’re going to call the rule “Send Welcome Letter” and we’re going to send immediately.
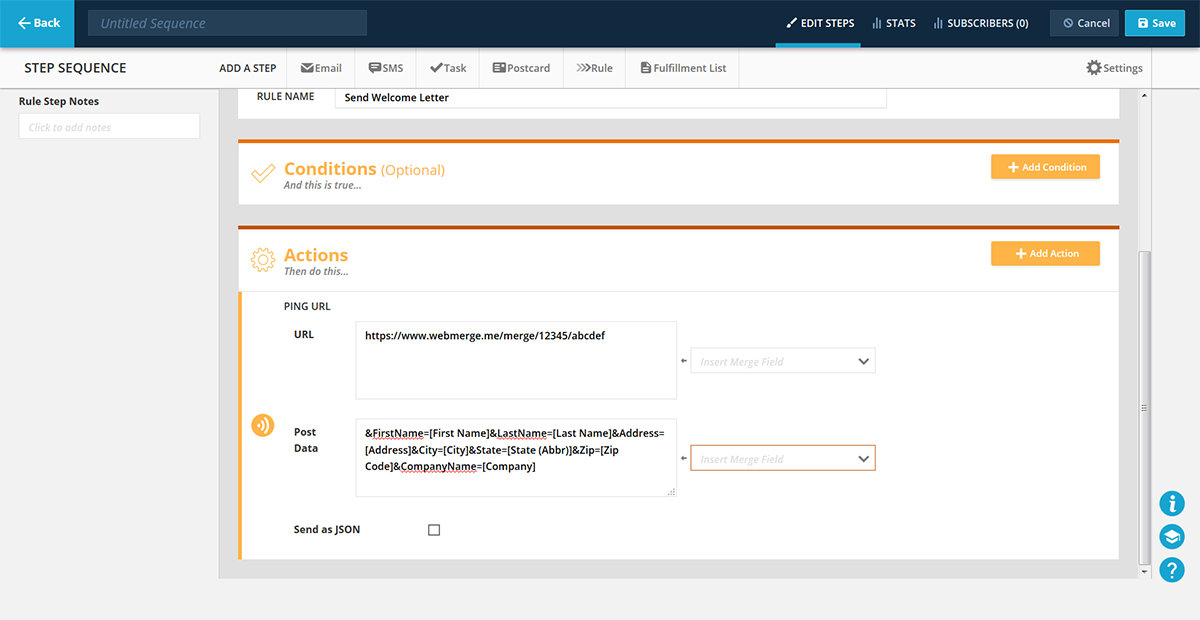
Next, we’re going to add an Action to our Sequence. For the type of action, we’re going to choose Ping URL which is located under Sites/Pages section in the + Add Action dropdown.
For the URL, we’re going to enter our Merge URL for our document. For the Post Data, we need to add name/value pairs for each of our merge fields matched up with the ONTRAPORT fields. This looks like this:
&FirstName=[First Name]&LastName=[Last Name]&Address=[Address]&City=[City]&State=[State (Abbr)]&Zip=[Zip Code]&CompanyName=[Company]
The part before the “=” is our merge field name, then after the “=” is the ONTRAPORT field.
Once you have your Ping URL action setup, let’s go ahead and save the sequence and we’re ready to run a test! Open up one of your test contacts and then send put them in your Send Welcome Letter sequence. This will trigger the automation to send the contact info over to Formstack Documents and your letter will be generated and sent over to Lob for mailing.
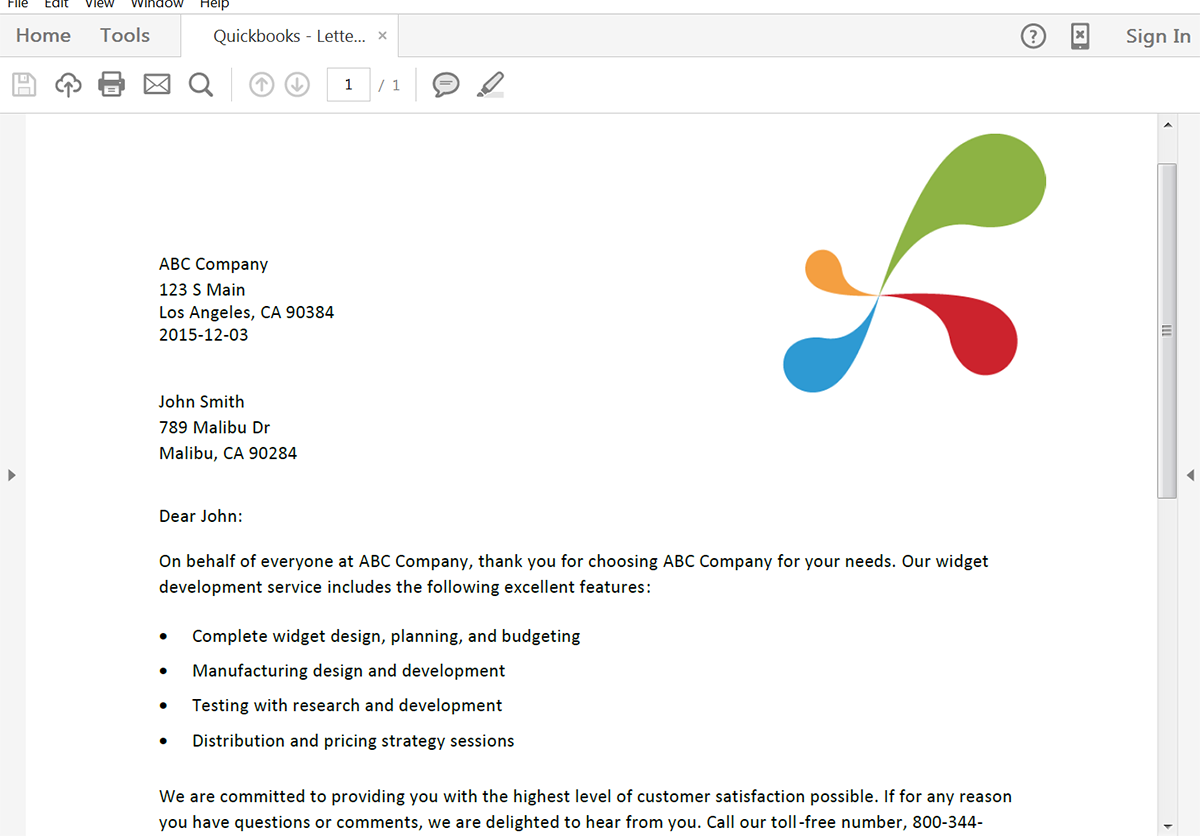
Here’s what our letter looked like ready to mail:
Congrats, you’re all finished! You can now instantly populate all kinds of documents from your ONTRAPORT data. Check out the video below to learn more about leveling up your document generation process with Formstack Documents.


