


Who needs this tutorial?
For your sales team, time is a precious commodity. They need to connect with prospective customers quickly and often as they move through the funnel. What if you could anticipate the needs of your prospective customers and provide them with helpful resources before they interact with sales? It’s no secret that educated customers are easier to work with and close on deals sooner than customers who are poorly informed about your product or service.
Today, we’d like to share a tutorial that shows you how to automatically send your customers the resources they need to get informed about your product before they talk to a sales person. This process will save your business time and money, plus help your sales teams close deals quickly thanks to well-educated sales leads.
Before you get started…
You’ll need a couple of things to get started with this customer registration workflow.
Salesforce account
Formstack Salesforce app
Formstack Documents Salesforce app
4 Steps to Creating an Excellent Customer Registration Process
Today, we’re going to use Formstack as an example. With Formstack’s suite of workplace productivity tools, customers have the ability to customize the products, features, and add-ons they use to enhance their work. We want our sales team to know what prospective customers need before their first conversation. To capture this information, we’ll house a Formstack Salesforce app form on our website where leads can select the products or features they’re interested in and receive resources about those products.
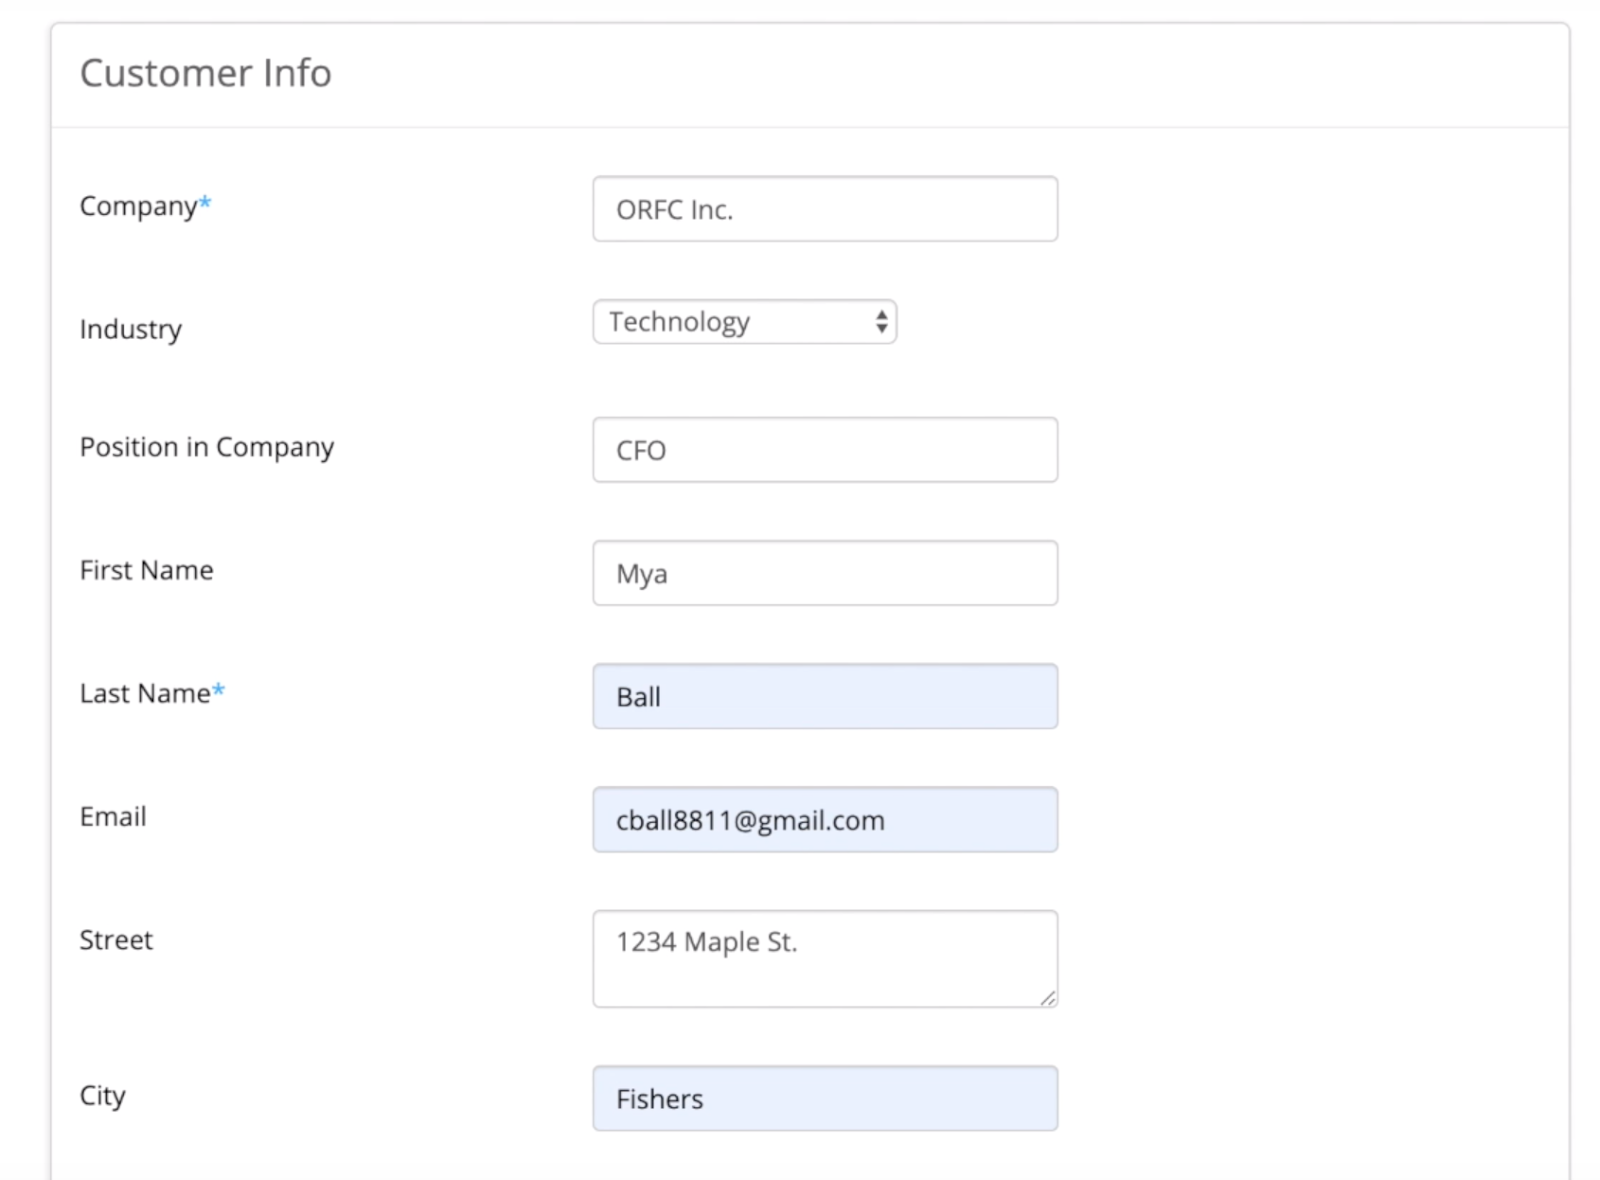
Step 1: Build your form.
Formstack makes setting up forms in Salesforce app easy and intuitive. If you need some help getting started, check out this article on our customer support page. For this tutorial, we’re going to include a multi-picklist field that outlines Formstack products, features, and add-ons a customer might be interested in learning more about. We’ll also use this field to set up Conditional Logic on our Formstack Documents document so our customers only receive relevant information.
Learn More:Check out this tutorial to embed your Salesforce app form on your website.
Step 2: Prepare your document.
Next, within Salesforce, navigate to the Formstack Documents integration, and select “New Document.” In this example, we’re going to use the “Edit in Office Online” to create our resource document. We’re titling our document “Helpful Links.” In this document, we’re going to use Conditional Logic to send relevant links to our clients based on the products they identified interest in. Our document is made up of links to our resource center, YouTube tutorials, blog posts and more. While we’re only using links in this example, you could use Conditional Logic to add text, images, and more to your document.
Conditional Logic can be a bit tricky, but we’ve made the logic for this tutorial really simple. We’re using “If” statements to provide specific information to our customers. Our “If” statements for this example are outlined like this:
{if strstr($PicklistName, “Choice Title”)}
Here are a few of our final “If” statements in practice:
{if strstr($LearnMore, “Formstack Forms”)}
{if strstr($LearnMore, “Formstack Sync”)}
{if strstr($LearnMore, “Salesforce app”)}
{if strstr($LearnMore, “Conversion Kit”)}
Learn More: If you’re interested in learning more about Conditional Logic in Formstack Documents , check out this support article.
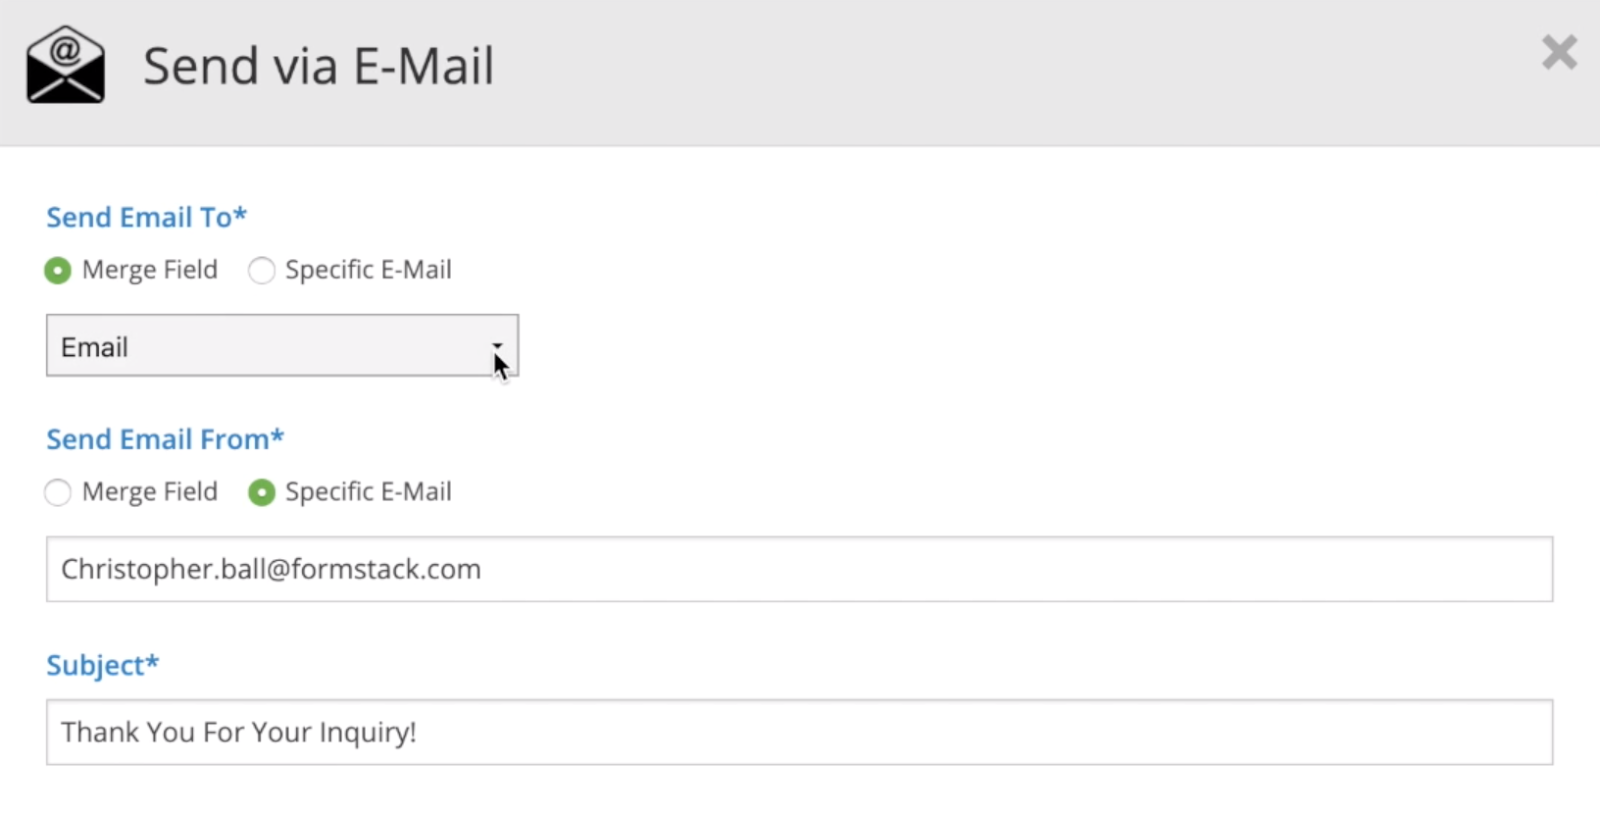
Step 3: Create your email delivery.
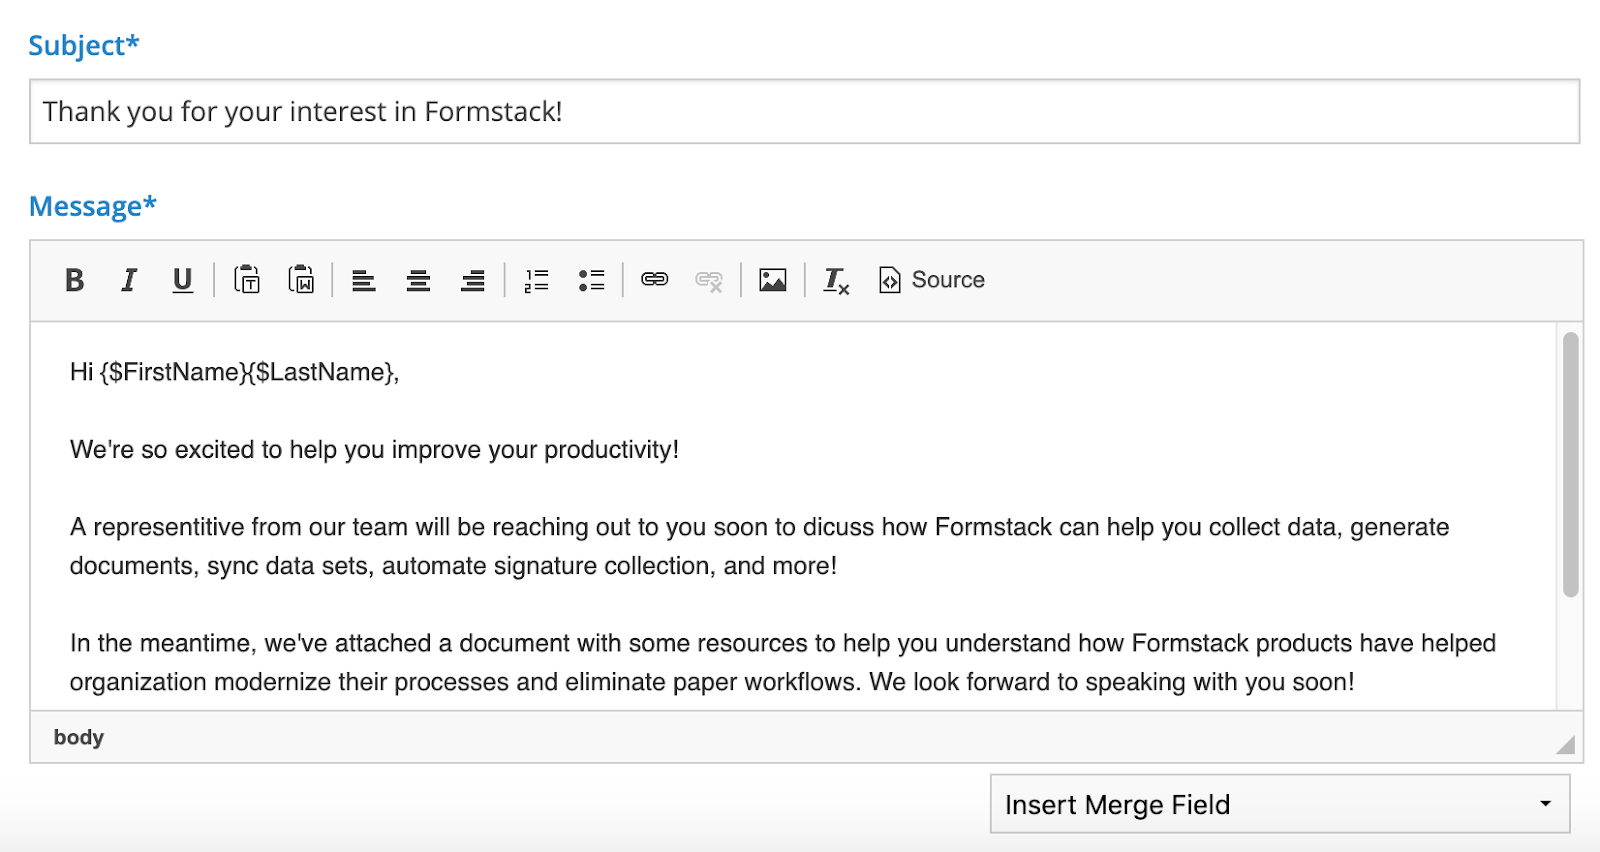
Now, it’s time to set up our delivery so that our customers receive their “Helpful Links” document right after they submit the initial form. Navigate to the “Deliver” tab, and select “Create New Delivery.” Under “Send Email To,” select “Merge Field,” and scroll down to “Email.”
We’ll also use merge fields in the body of our email to automatically customize our communication.
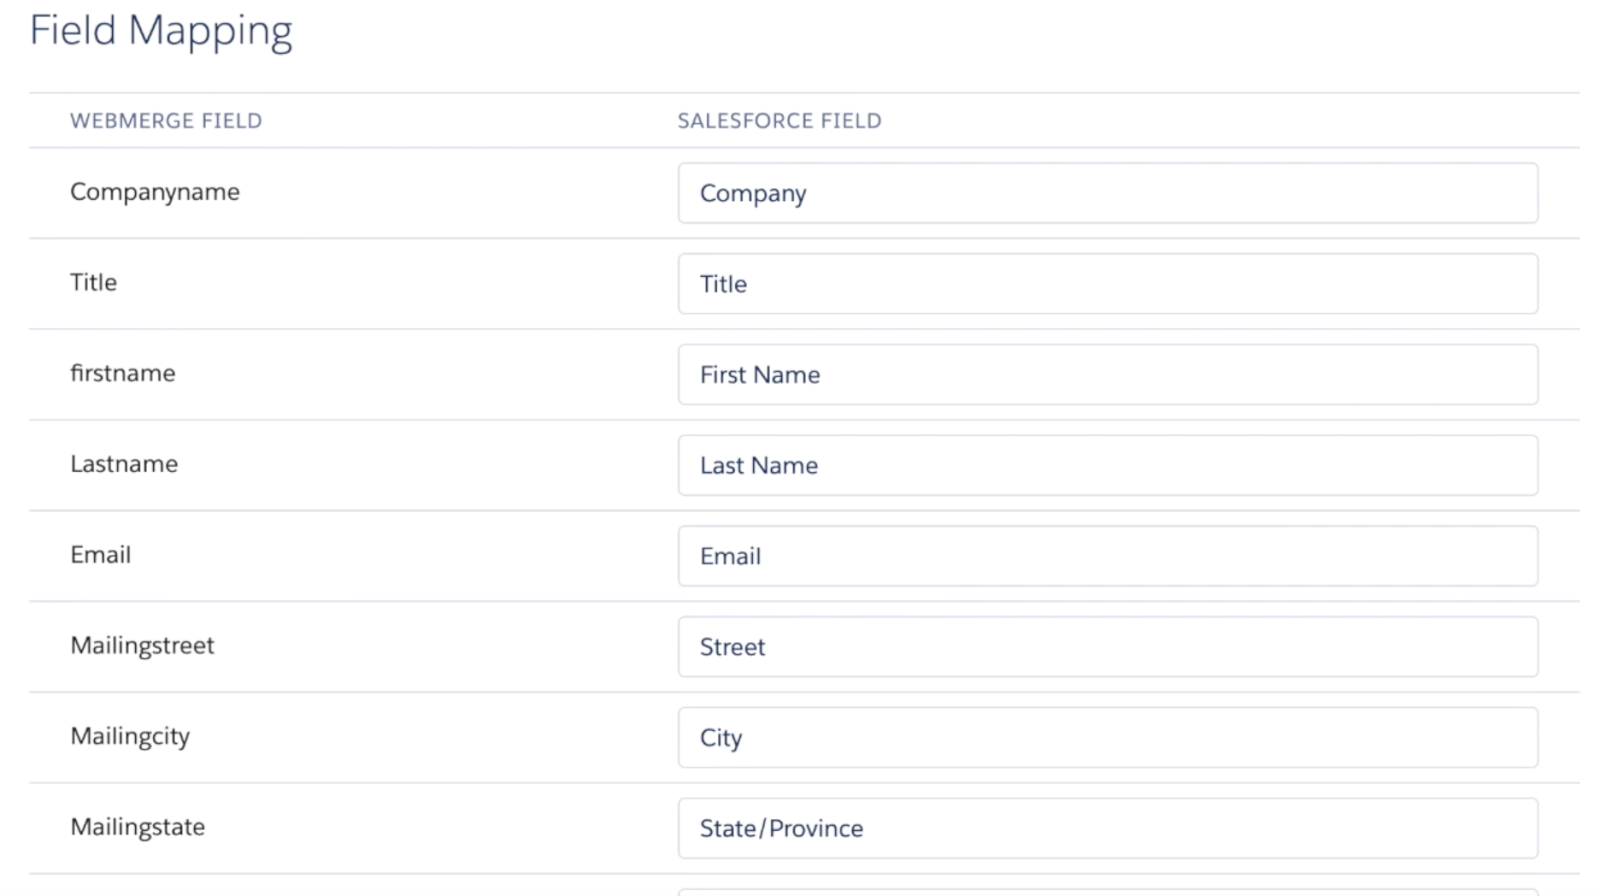
Step 4: Update your mappings.
Now, we need to make sure that fields from our Salesforce Object and our form are properly mapped to our Formstack Documents document. Staying within the Formstack Documents Salesforce integration, navigate to “Formstack Documents Mappings,” and select your “Helpful Links” document. Title your mapping and add an optional description. Under “Salesforce Object,” scroll down and select “Lead.”
Before you leave this section, make sure to grab your “Mapping ID.”
Step 5: Create your Salesforce Process Map.
Take the “Mapping ID” number from the top of your mapping. Take that ID into the Salesforce Process Builder. This process map will be pretty simple. Start by selecting “Lead” and let Salesforce know that you want this process to start “only when a record is created.”
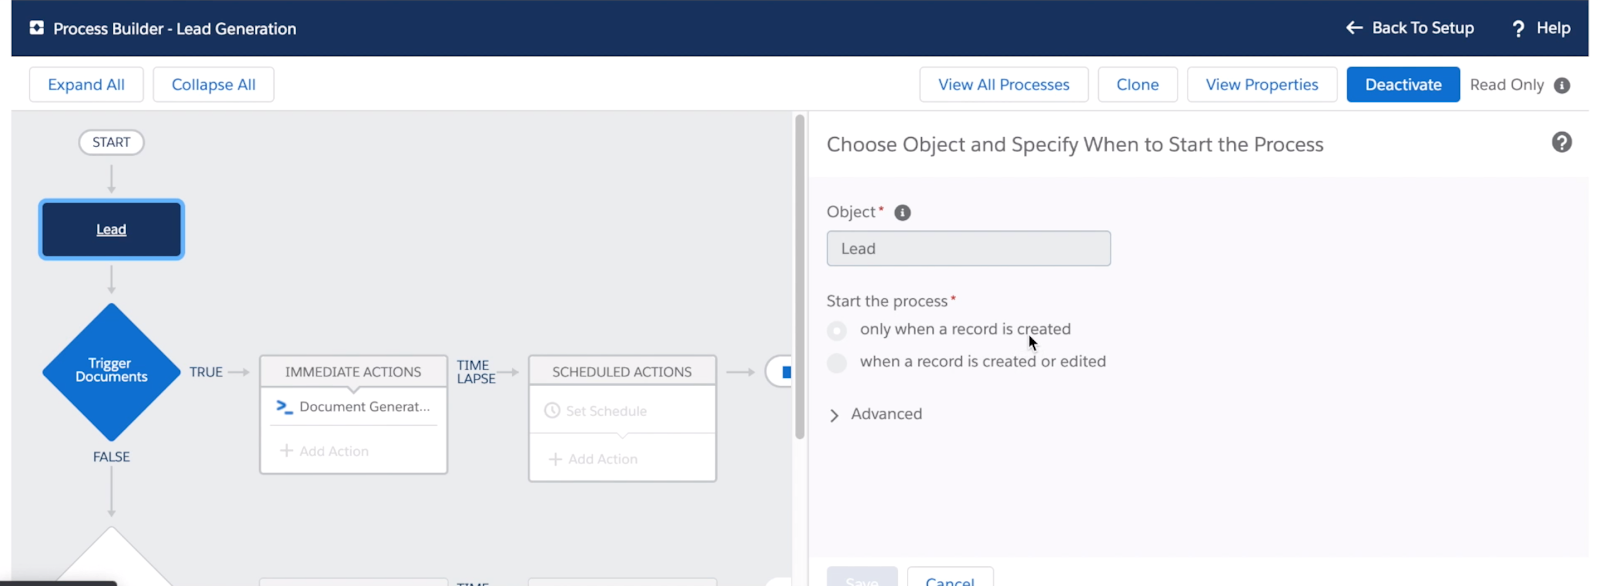
Next, we’ll add the “Trigger Documents” criteria.

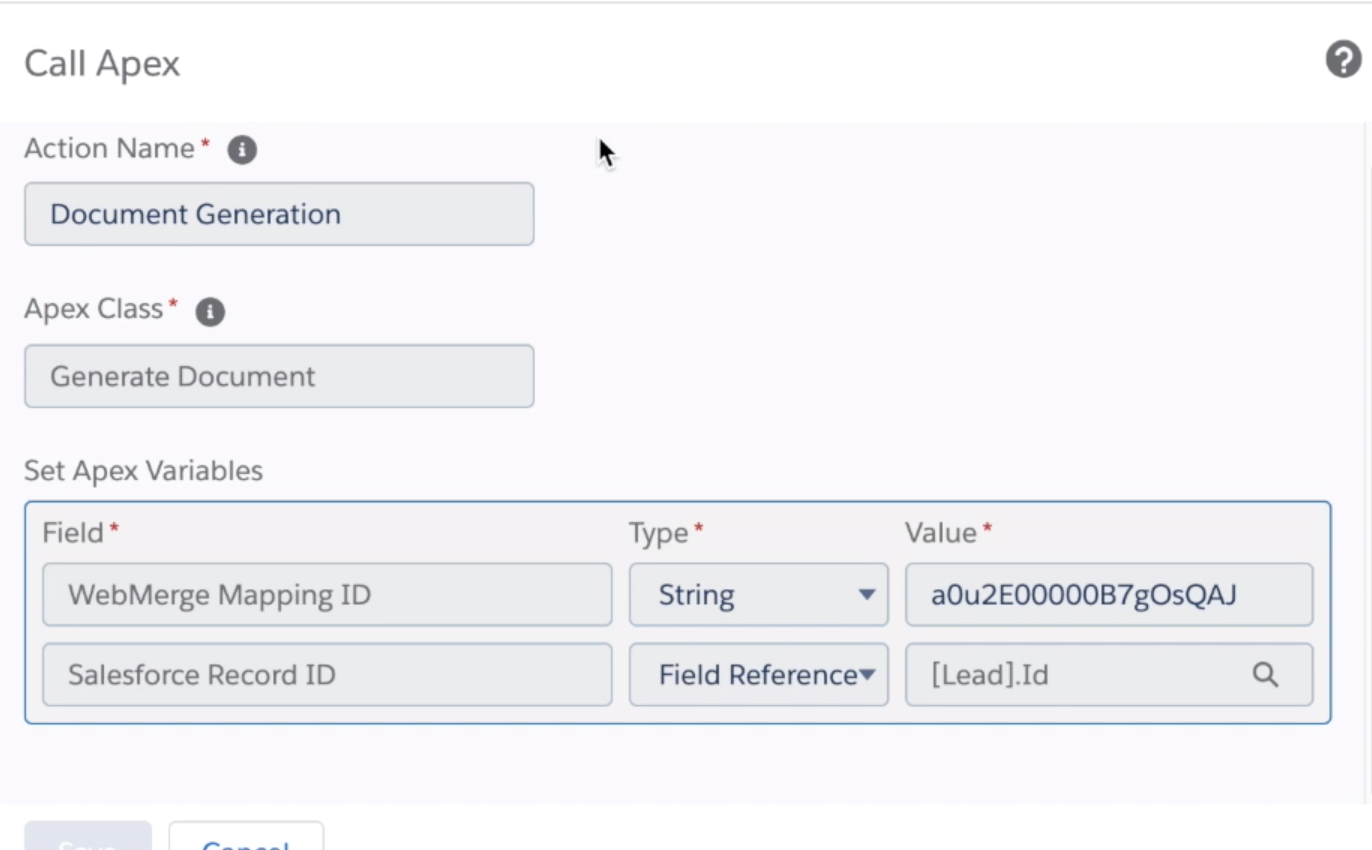
Lastly, we’ll add a Call Apex. This is where we’ll add our Formstack Documents Mapping ID.
We’re done! If this is your first time connecting the Formstack and Formstack Documents Salesforce apps or you have questions, our customer support team is always happy to help. If you’re ready to get started using this automated customer registration, try out a 14-day free trial.

