


Imagine you’re working to implement a new process for your sales team. Any time you change the way you connect with customers, you need to do everything you can to ensure communication is clear and well-received. If you confuse, you lose.
When changes happen, you need a way to measure how satisfied your customers are with your sales process changes. But your sales team is already stretched thin. How do you gather customer feedback without adding another action item to their already lengthy to-do list?
Enter Formstack.
Today, I’d like to show you how to automate your customer feedback process using Formstack for Salesforce. In this example, you’ll learn how to automatically generate an email with an embedded form linking to a net promoter score (NPS) survey. This email will be triggered when a Salesforce opportunity is moved from “Negotiation” to “Closed Won” or “Closed Lost.”
We’ll get started in the Salesforce Object Manager. Here, we’re going to be dealing with two objects: Opportunity and Feedback.
Read More: 5 Mistakes Killing Your Survey Conversions
Step 1: Update the Opportunity object
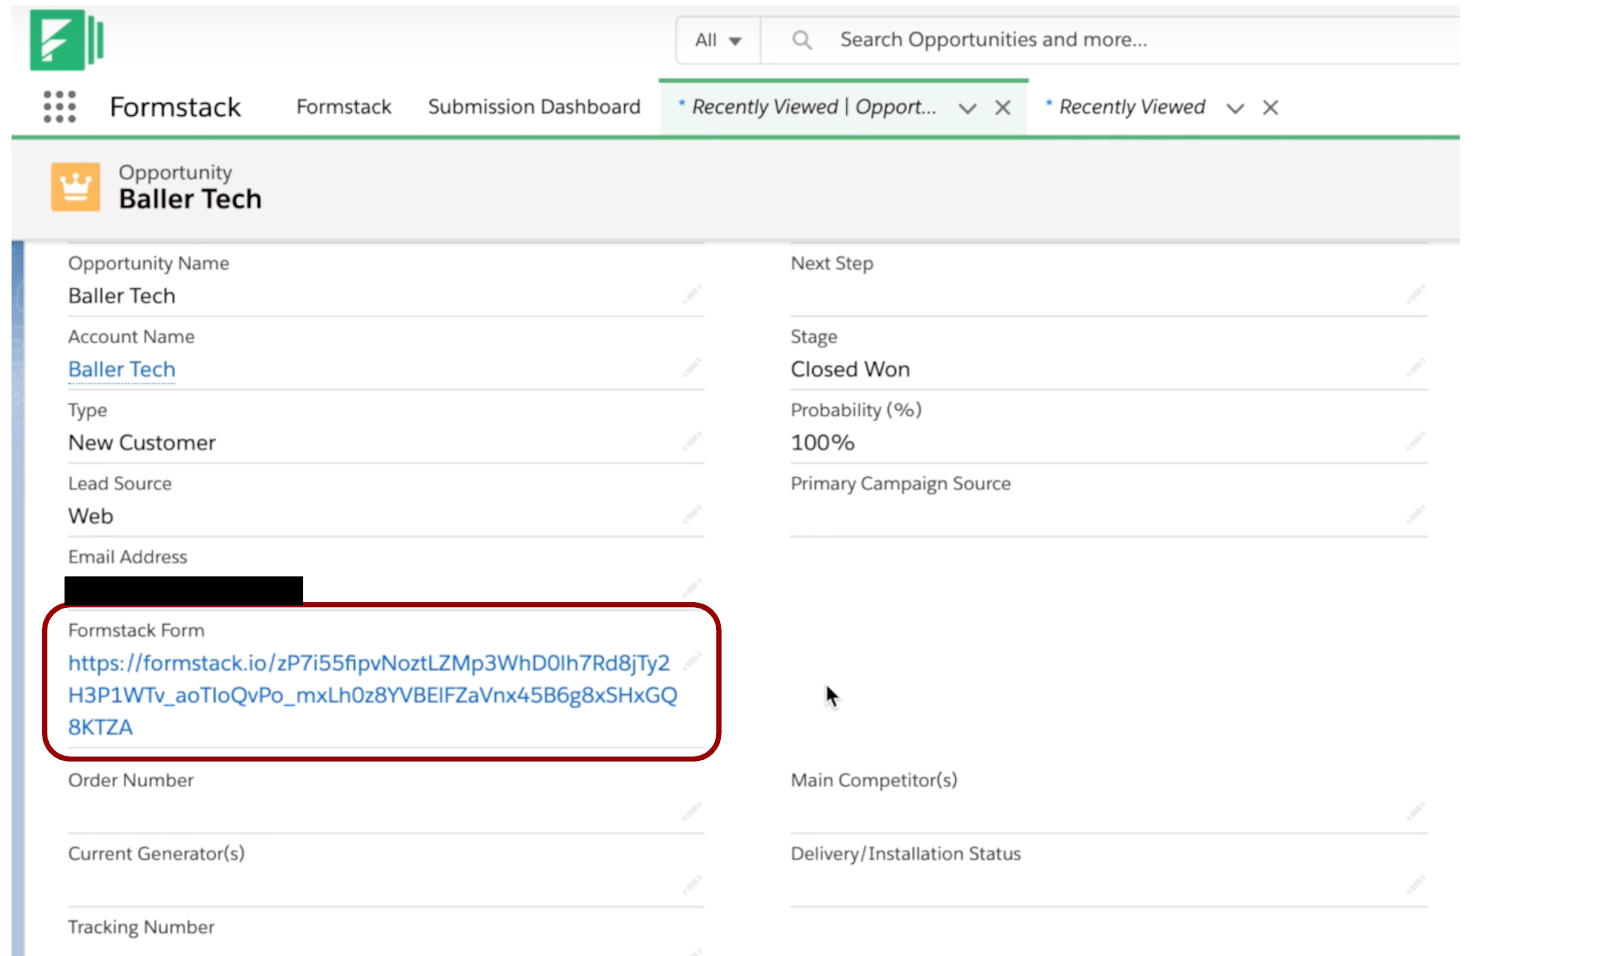
Within your Opportunity object, you need to have a couple of fields set up. Make sure all of your opportunities have a “Contact” field. This field will help with personalizing and automating your emails. Second, you’ll want to set up a “Form” field.
In this example, we’re calling the field “Formstack Form.” This will be a URL-based field that will appear on our Salesforce Opportunity object. When the customer email is generated, we’ll pull from this field to add our NPS form link to the body.
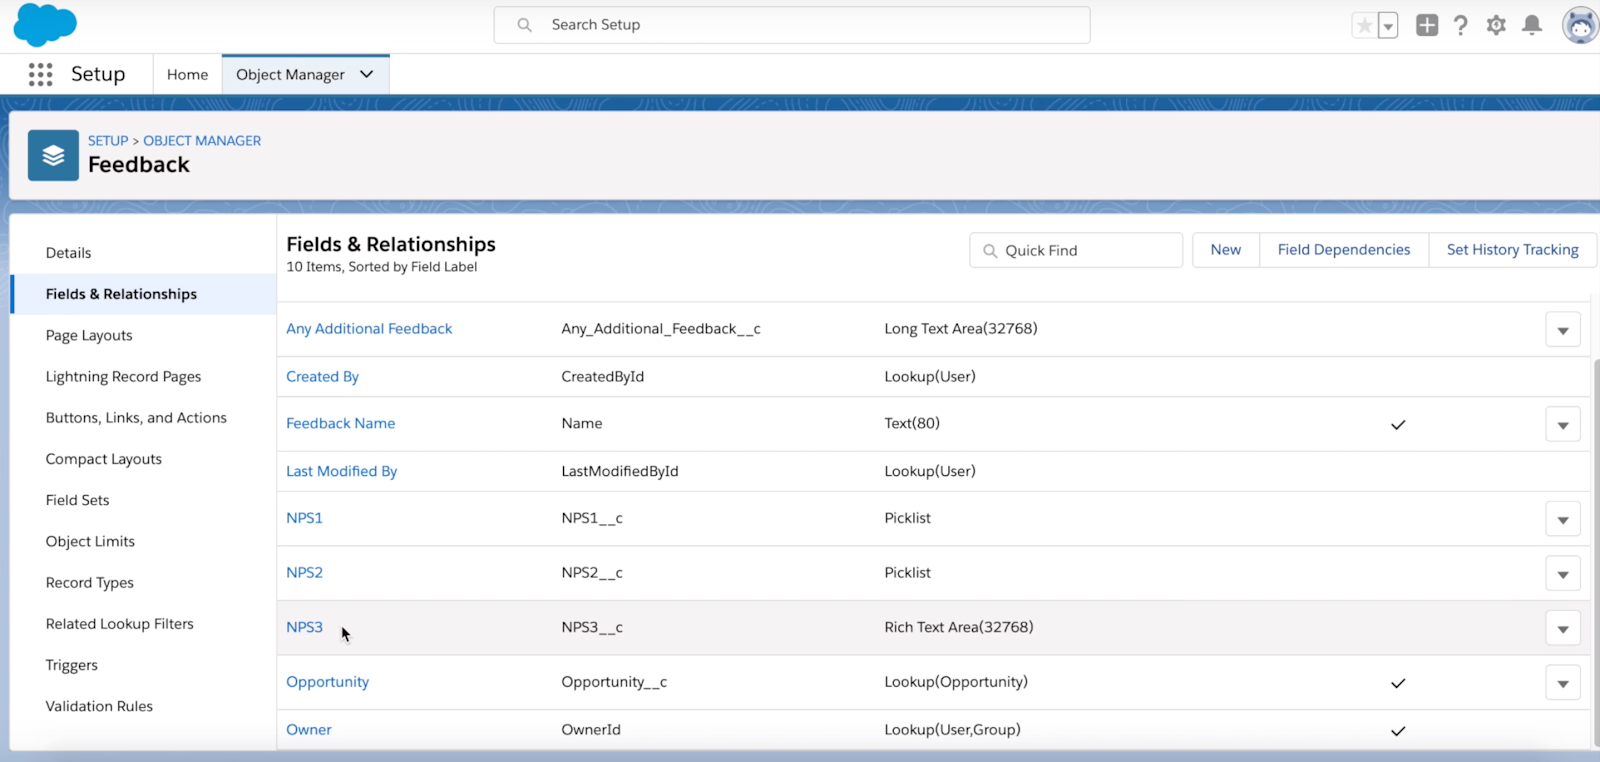
Step 2: Update the Feedback object
Next, we’ll create a Feedback object. Using our Feedback object, we’ll pull a few different fields into our form. Within our Feedback object, we’ll create three fields so we can add our questions in later.
- NPS 1 - Picklist
- NPS 2 - Picklist
- NPS 3 - Rich text area
Step 3: Build your form.
Navigate to your App Launcher and select Formstack. If you haven’t already downloaded Formstack, you can find us in the Salesforce AppExchange.
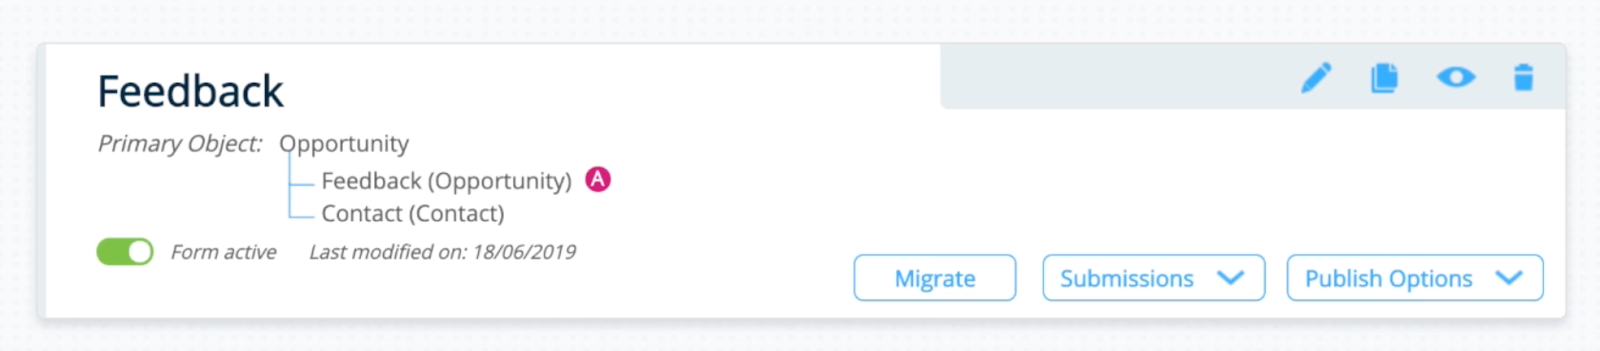
Within Formstack for Salesforce, select “Create New Form” to get started. Set the Primary Object as Opportunity.
Several of our fields will be prefilled for our customer: close date, name, email address, and stage.
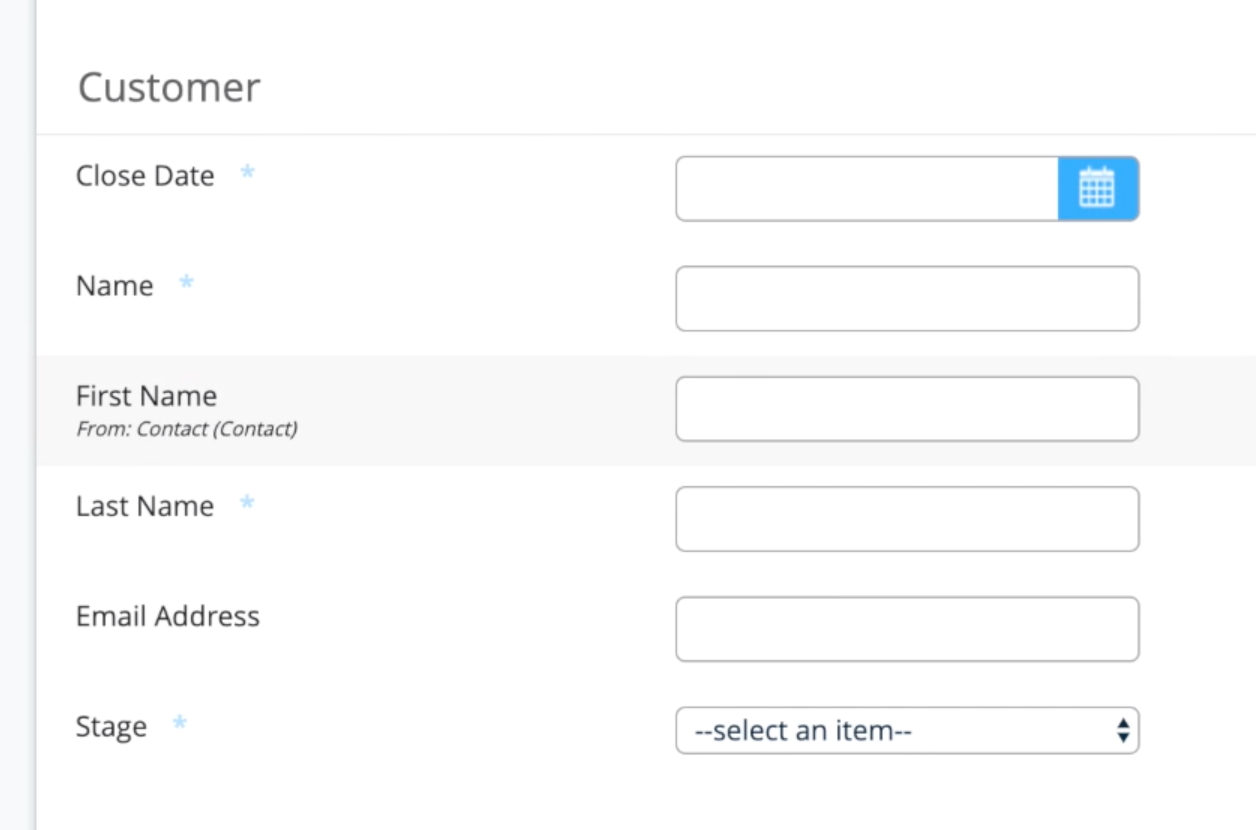
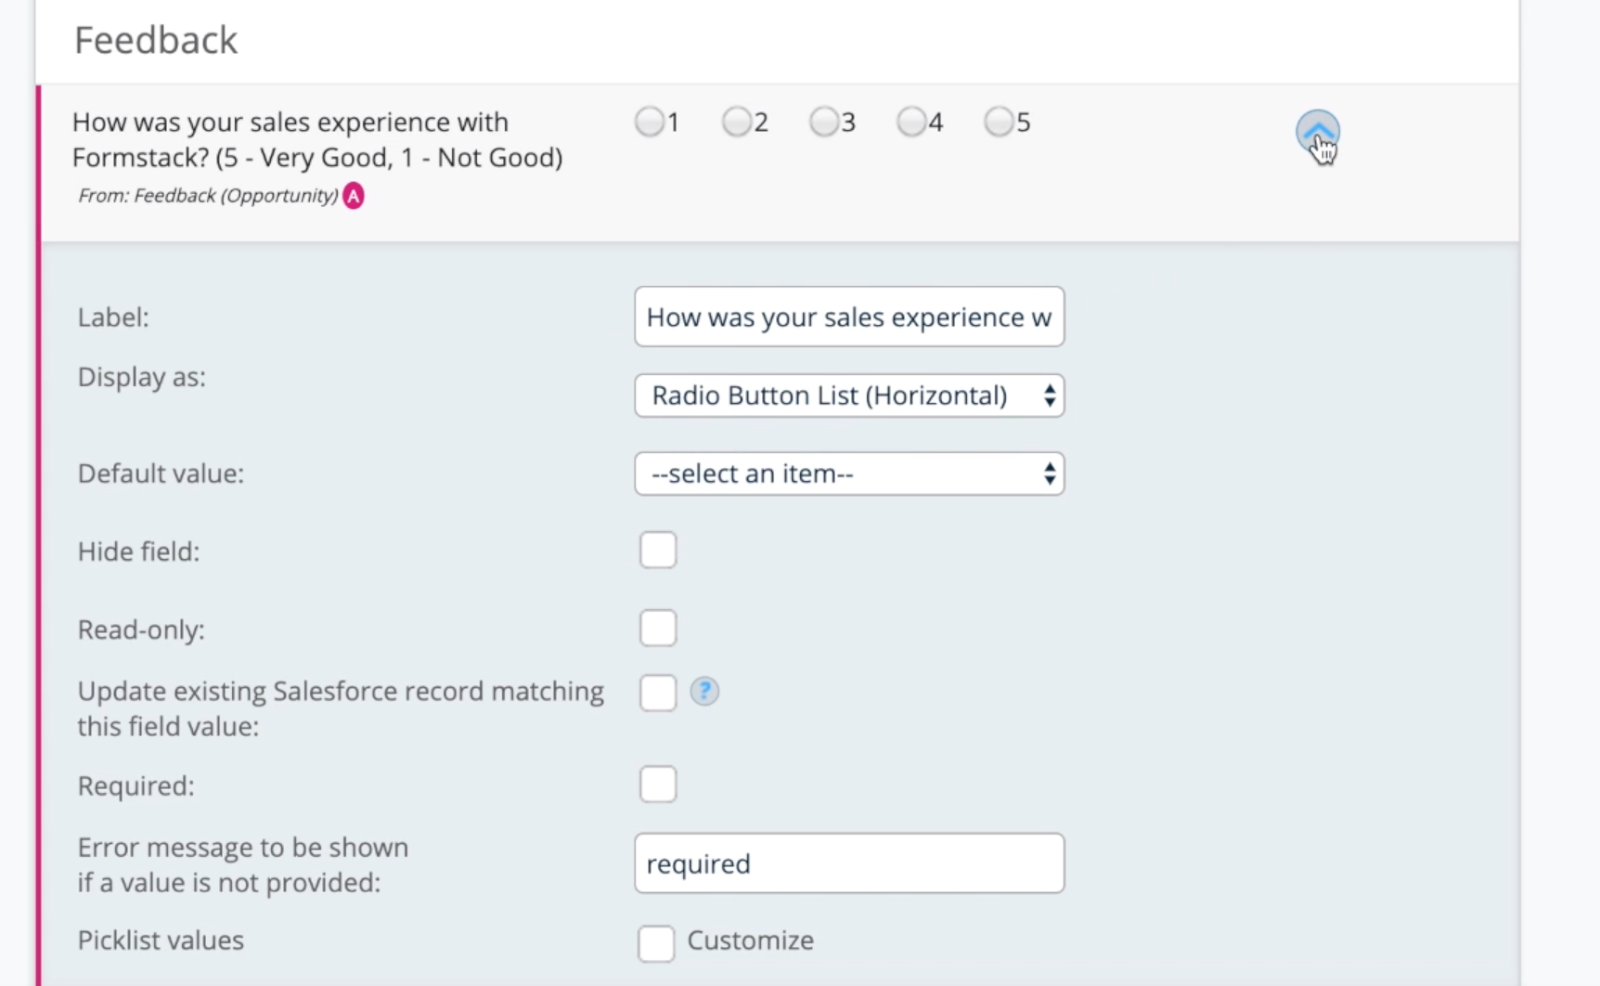
There are a few fields that we’ll need to update so that we’re collecting the information we need to enhance our sales process. This is where our new “Feedback” object comes in. We’ll use our “Feedback” object to update our NPS 1, NPS 2, and NPS 3 fields. Here, we’ll update the title of each of these fields to reflect the question we’d like to ask. We changed our title to “How was your sales experience with …”
Once you’ve updated your form with questions, you can navigate to the “Edit” tab and customize the format of your form with your organization’s logo and branding.
Read More: The Dos and Don’ts of Survey Design
Step 4: Finalize your form
It’s time to turn on our Dynamic Prefill so that our email and form populate with details for each specific customer. Select the form you created so that it populates for new records. You can also take a second to apply this form to new records or update existing records.
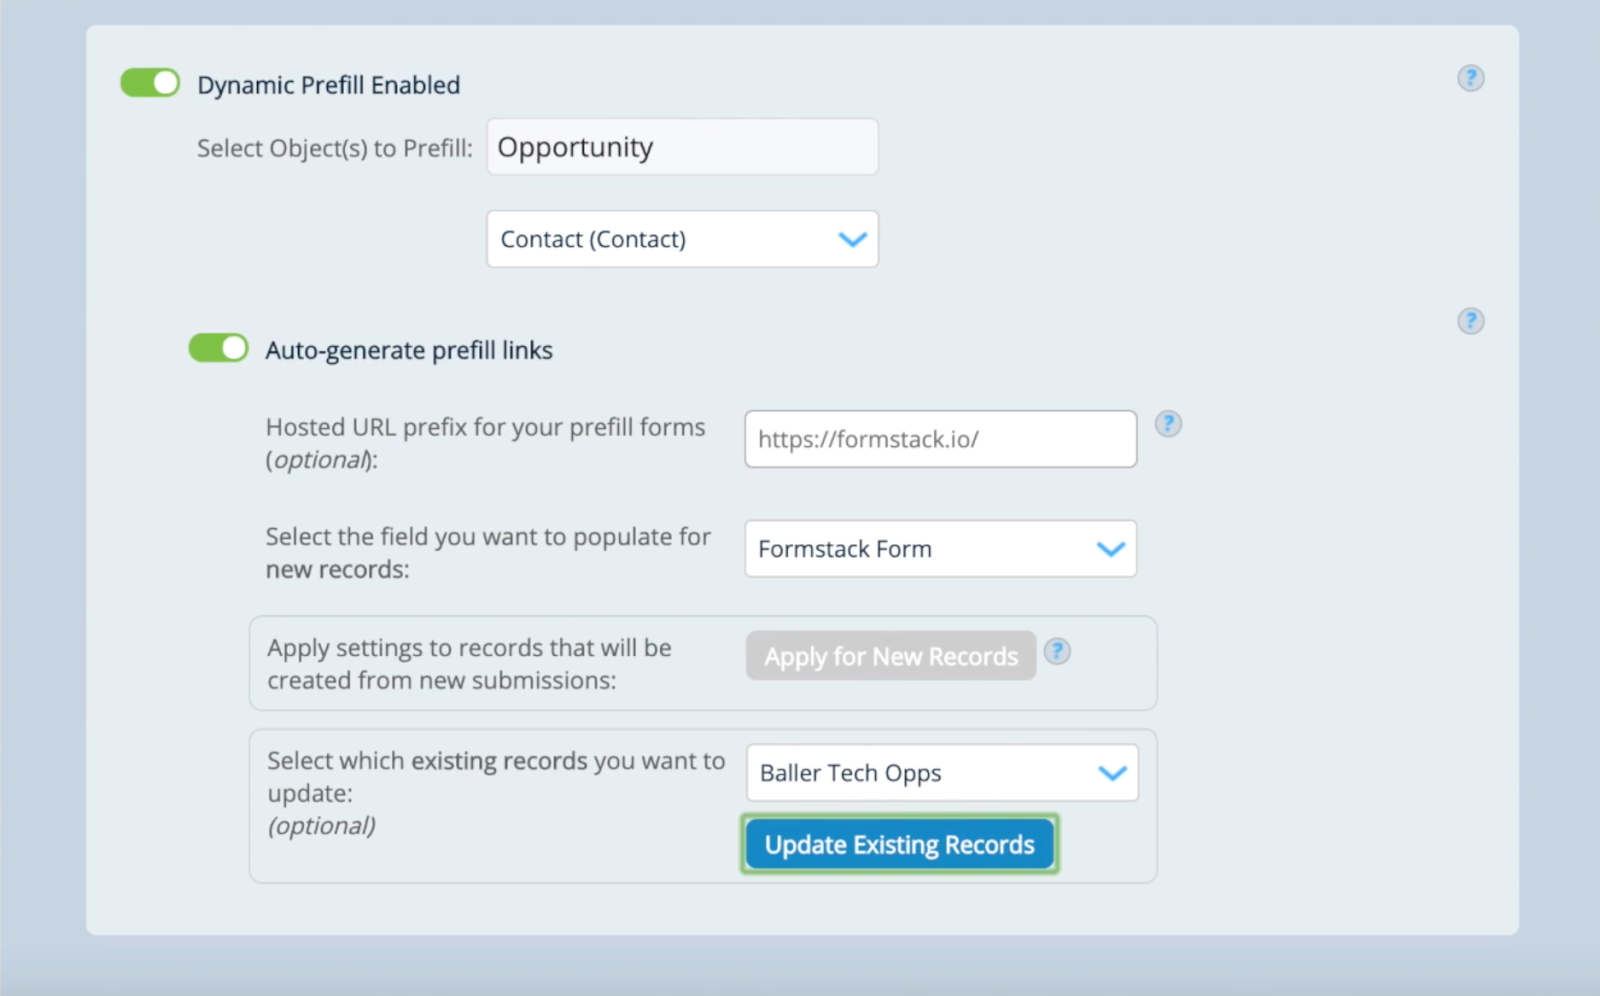
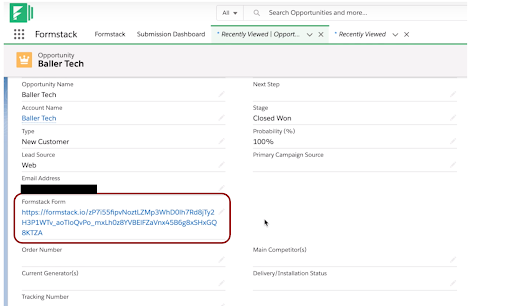
In this example, we chose to update existing records so the link to our survey appears on existing records. Your record will now look something like this:
Step 5: Automate your email
First, we’ll set up an email template. Navigate to “Setup” and select “Classic Email Templates.” You have a lot of flexibility on how you set up your email, but, in this example, we’re using HTML because it allows us to hide the full form link in our email and add our logo.
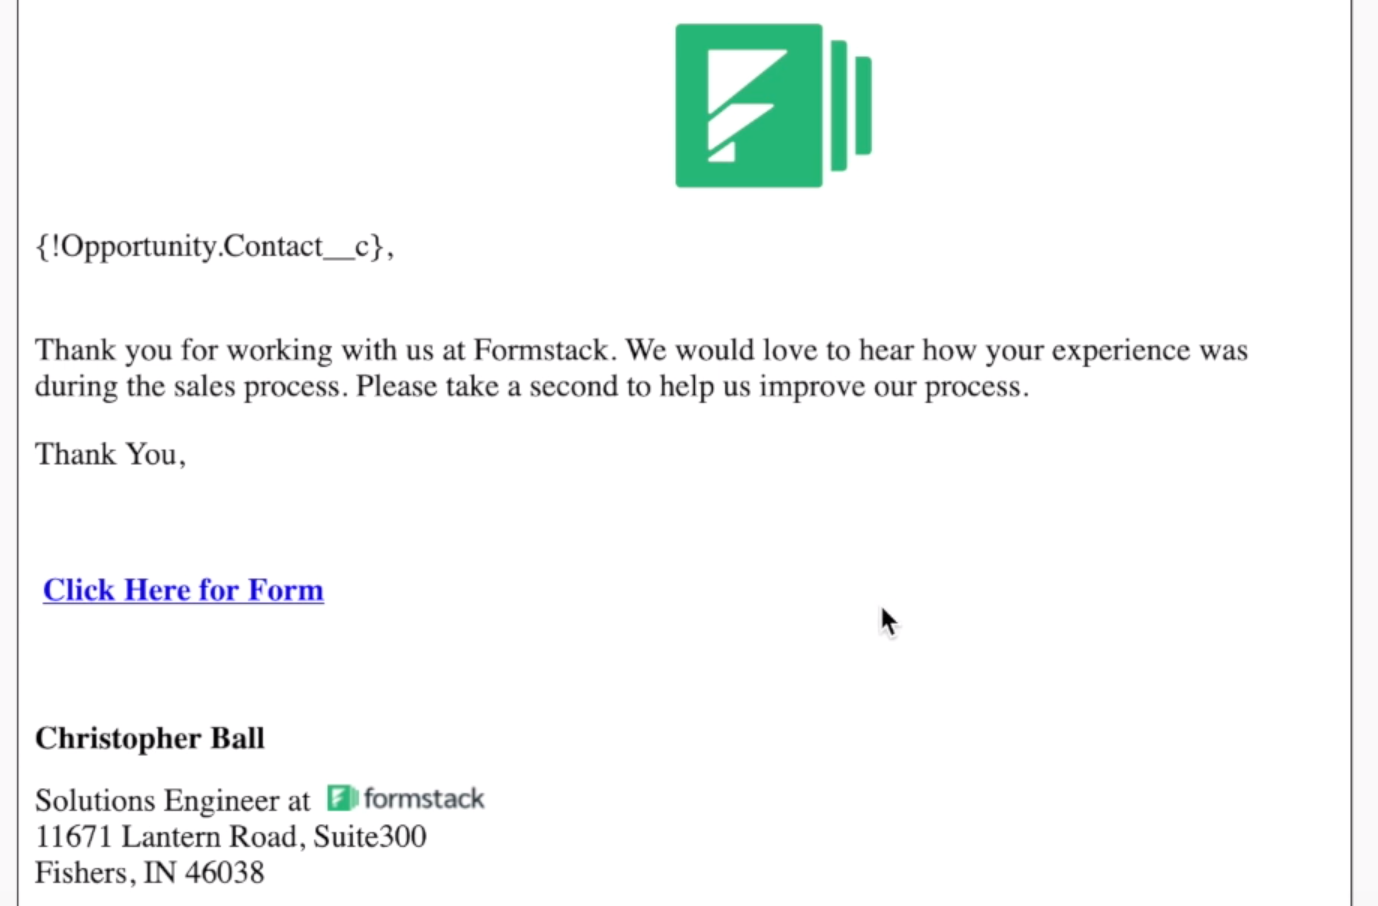
After you set up your template, you need to create an email alert. Within “Setup,” select “Email Alerts.” Title your alert so you and your other Salesforce users understand the alert’s purpose. Pull in the email template you just created and identify your “Selected Recipient.”
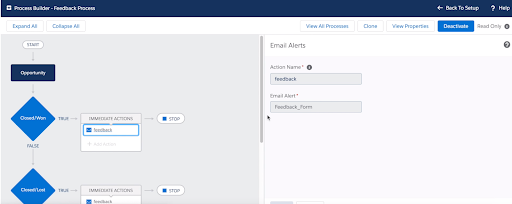
Step 6: Establish Trigger
It’s time for the last step! Stay within Setup and navigate to the “Process Builder.” Here Salesforce gives you an easy-to-use flowchart to set up your process. For both “Closed Won” and “Closed Lost,” we’re using the same email template. However, you could set up a completely separate template to capture information about why customers may have decided to move forward with another organization. Here’s what the process looks like when we finished:
You’re done! You created a completely automated and customized process for collecting customer feedback. This process isn’t limited to customer feedback. You can use it to send emails with all kinds of forms! What processes could you automate today with Formstack for Salesforce?
If you’re ready to update your customer feedback process, you can find Formstack on the Salesforce AppExchange. Try it today!

