You’ve made the phone calls, you’ve gone to the appointments, you’ve answered their every question, and you finally got the “yes” you’ve been working for! Now it’s time to finish the sale and get paid as quickly as possible. Formstack Documents can help!
With Salesforce, you kept track of the Opportunity and all the related data around who the customer is, what they are buying, and what they are going to pay. In this example, we’re going to show you how you can use Formstack Documents to generate an invoice from your Opportunity data and email it directly to our customer with just a click of a button.
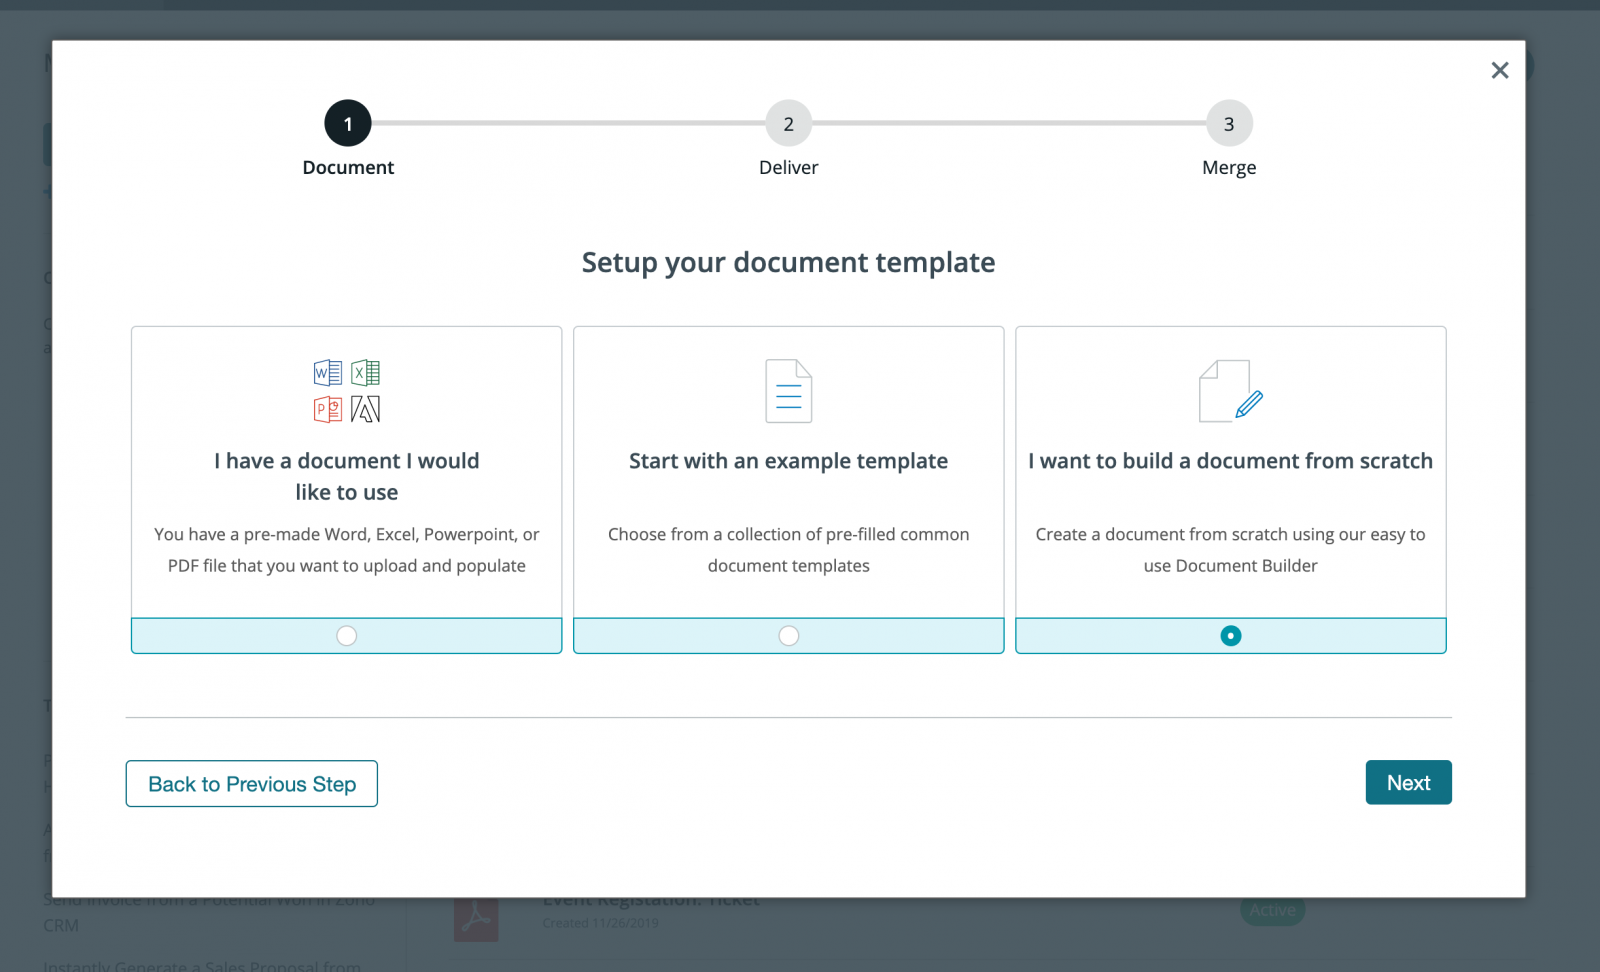
To get started, we’re going to setup our invoice template in Formstack Documents. We are going to use the online document builder to create our template. From the Documents page in Formstack Documents, click New Document. After you give it a name, click Next and then you’ll select the “Build Your Own” option.
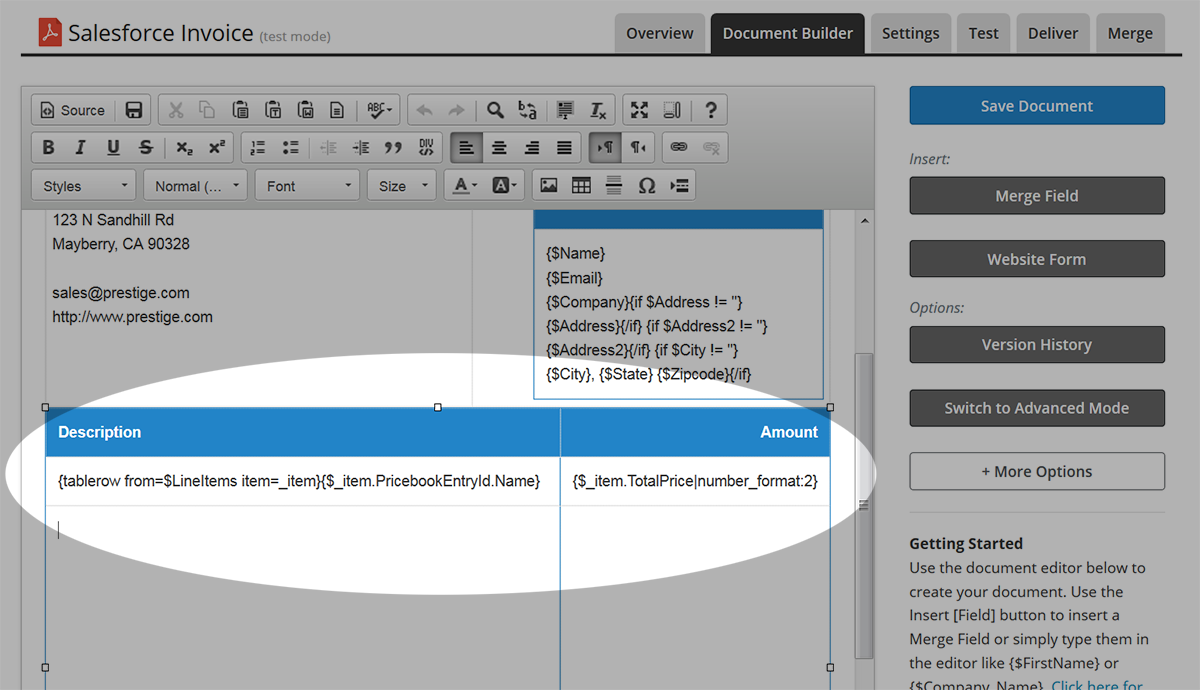
On the next step, the document builder will open and you’ll be able to setup your document. We’re going to add a logo, our address, and then merge fields for our customer’s information. To add merge fields, simply type in merge tags like this: {$FirstName}, {$CompanyName}, {$InvoiceNum}, etc. You can use letters and numbers, but no spaces.
Our opportunity has a number of line items associated with it and we’ll want to include those in the invoice as well. To handle the line items, we’re going to use the {tablerow} tag that will loop through the list and print the details in a table. Inside the loop we’re going to reference the individual fields using the Salesforce API Name for that specific field we want. This will be considered a “subfield” and can be referenced using a “dot” like this: {$_item.TotalPrice}. This will grab the “TotalPrice” field from the product.
Now that we have our template setup, let’s save it and then we’ll be taken to the Settings page. In the settings, we can change things like the File Name. We’re not going to make any changes to the settings and we’ll move on to the next step, the Deliver tab.
On the Deliver tab you’re going to see an email delivery already setup. This is a default that is created when you create the new document. We’re just going to edit this email delivery so that it is sent directly to our customer.
For the To address, we’re going to pick the merge field we setup for the email address of our customer. If you don’t have an email address in your template, you can choose <> then type in a new field like {$EmailTo}.
Update the other settings so they are to your liking.
Great work! That’s the last step in the setup process on the Formstack Documents side. Let’s jump back into Salesforce and setup the integration for our invoice. If you haven’t already, make sure that you’ve installed the Formstack Documents managed package from the AppExchange.
In order to send data to our invoice we need to setup a new Mapping. This will map the opportunity fields to your invoice fields so that the data goes into the correct spots on your invoice. From the Formstack Documents Mappings tab, click the New WebMerge Mapping button.
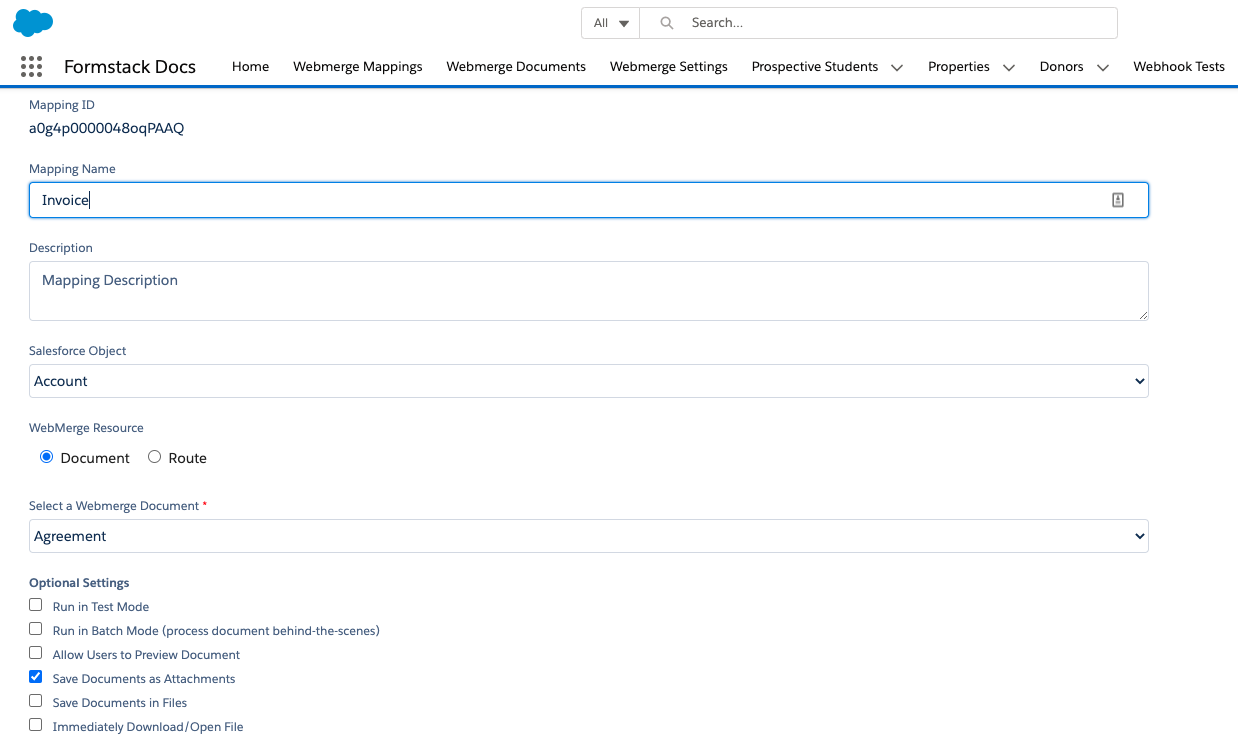
On the New Mapping page, it’s going to ask you to give it a name, pick a Salesforce object, then pick your Formstack Documents file. We’re just going to call this mapping “Invoice”, we’re going to be using the Opportunity object, and we’ll pick our invoice template from the document dropdown.
Once you’ve selected the Formstack Documents file, click the Next button and you’ll be taken to a page that has a few of the same settings at the top, but you’ll also see a Field Mapping section. This is where you are going to map (or “match”) up the Salesforce fields to your merge fields. For each merge field (listed on the left), you need to choose the corresponding Salesforce field (listed in a dropdown on the right).
After you’ve mapped all of the fields, go ahead and Save & Activate the mapping. This will make the mapping available when you click the Formstack Documents button on the Opportunity record.
When you click the Formstack Documents button, you’ll be taken to a page for you to choose the Invoice template. If you don’t have any other templates hooked up to the Opportunity object, it will automatically pick the Invoice template for you and you’ll be redirected back to the Opportunity record.
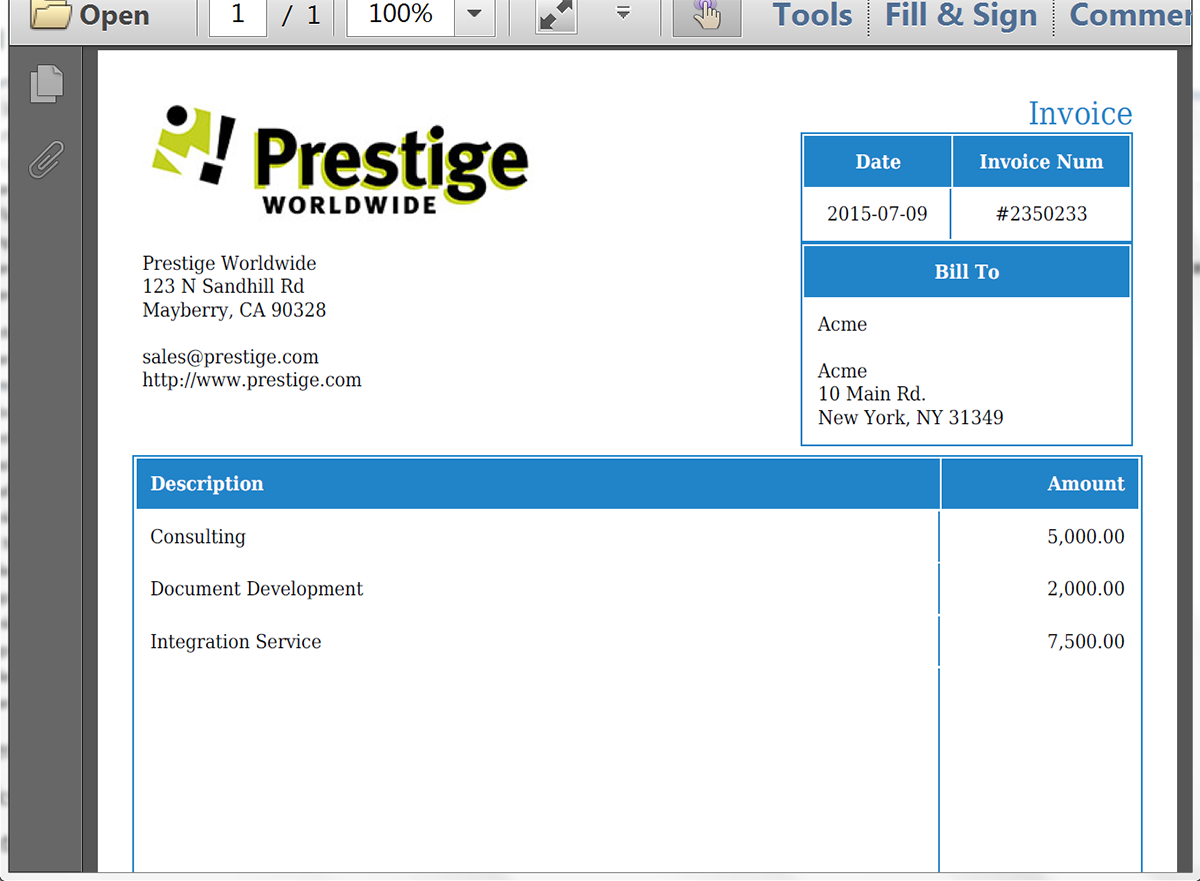
Here’s what our test invoice looked like: