DocuSign is one of the leading digital signature platforms globally and we’re excited to announce that you can now send your Formstack Documents documents directly to DocuSign to collect signatures! Like our other e-signature integrations, you can send documents out to multiple signers, CC other parties, plus collect any additional information from the signers. All of this is seamless with Formstack Documents and DocuSign combined.
To demonstrate how this integration works, we’re going to show you how to create dynamic contracts (we’ll show/hide certain sections based on conditions for each contract) from Salesforce, then we’ll send that contract over to DocuSign for signature.
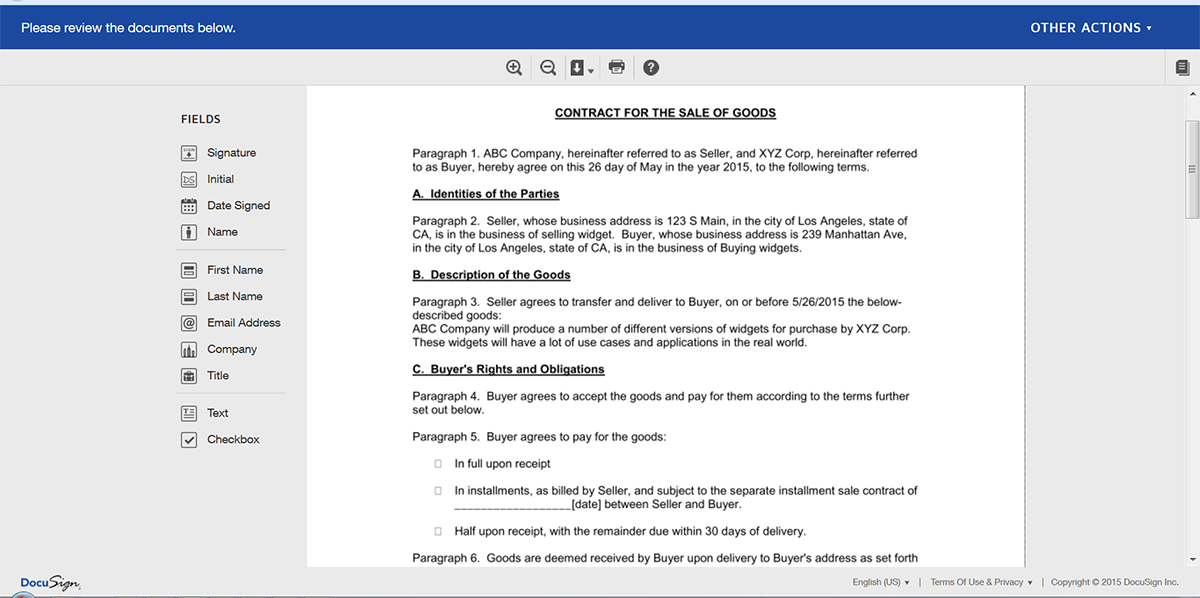
To get started, let’s setup our contract template in Formstack Document. This template is where we’ll define the merge fields that we’ll be populating with data from Salesforce. For this example, we’re going to setup our template using Word and then we’ll upload the file to Formstack Documents when we are finished.
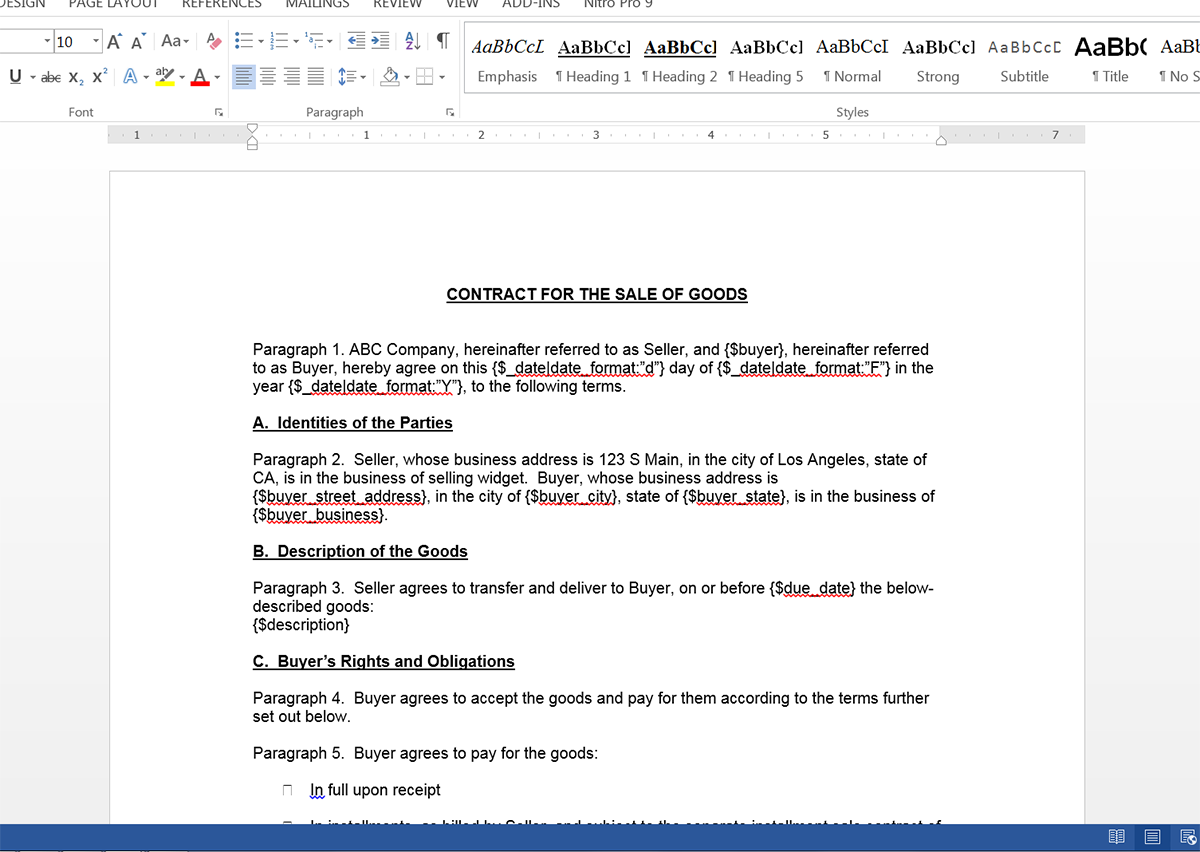
In our document (template) we define our merge fields with text tags (just type them into the Word document) like {$CustomerName} or {$Billing_Address}. Here’s what our contract looks like:
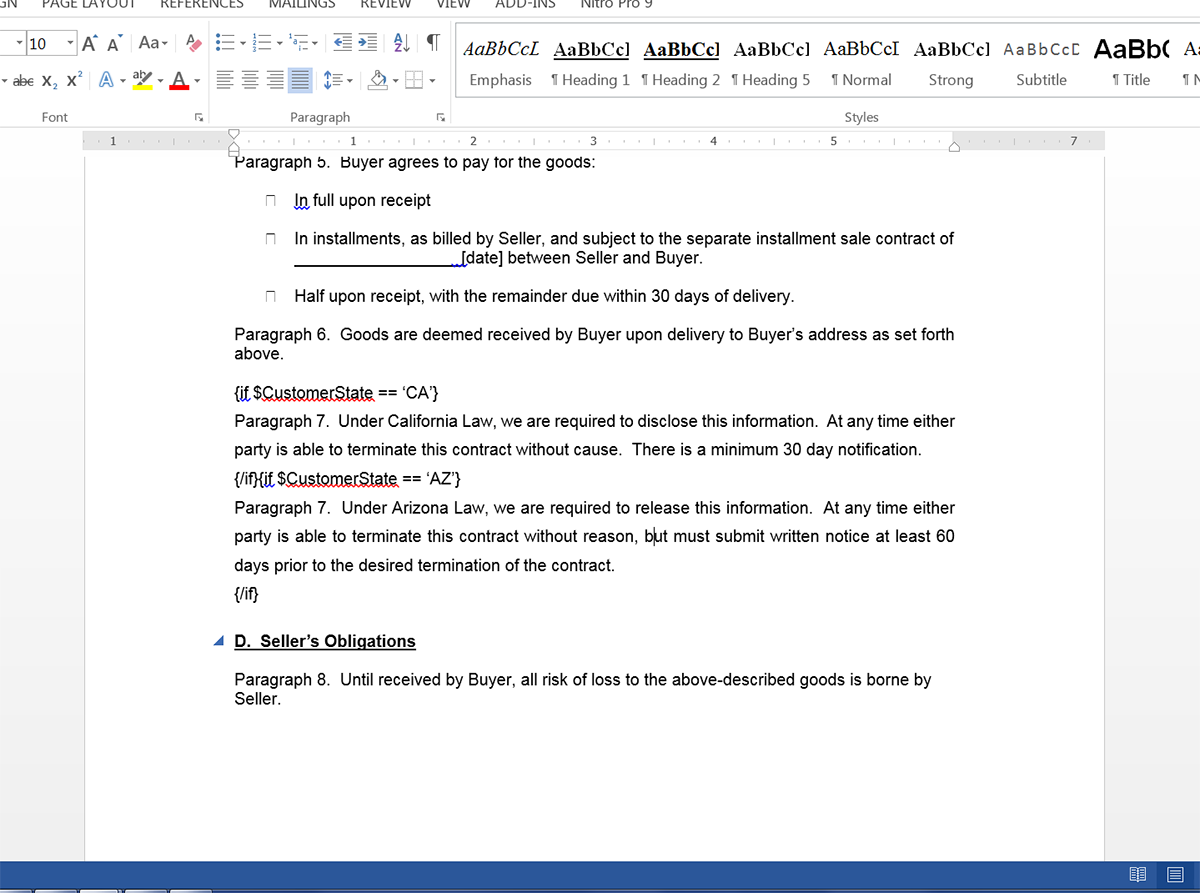
Now, let’s take a look at how we can make this contract more dynamic and only show certain sections depending on the state where the customer is located. For this we’re going to use some simple “if” statements that will determine the state. For example:
{if $CustomerState == ‘CA’}
Under California Law, we are required to disclose this information. At any time either party is able to terminate this contract without cause. There is a minimum 30 day notification.
{/if}{if $CustomerState == ‘AZ’}
Under Arizona Law, we are required to release this information. At any time either party is able to terminate this contract without reason, but must submit written notice at least 60 days prior to the desired termination of the contract.
{/if}
Here’s what this looks like inside the rest of our contract:
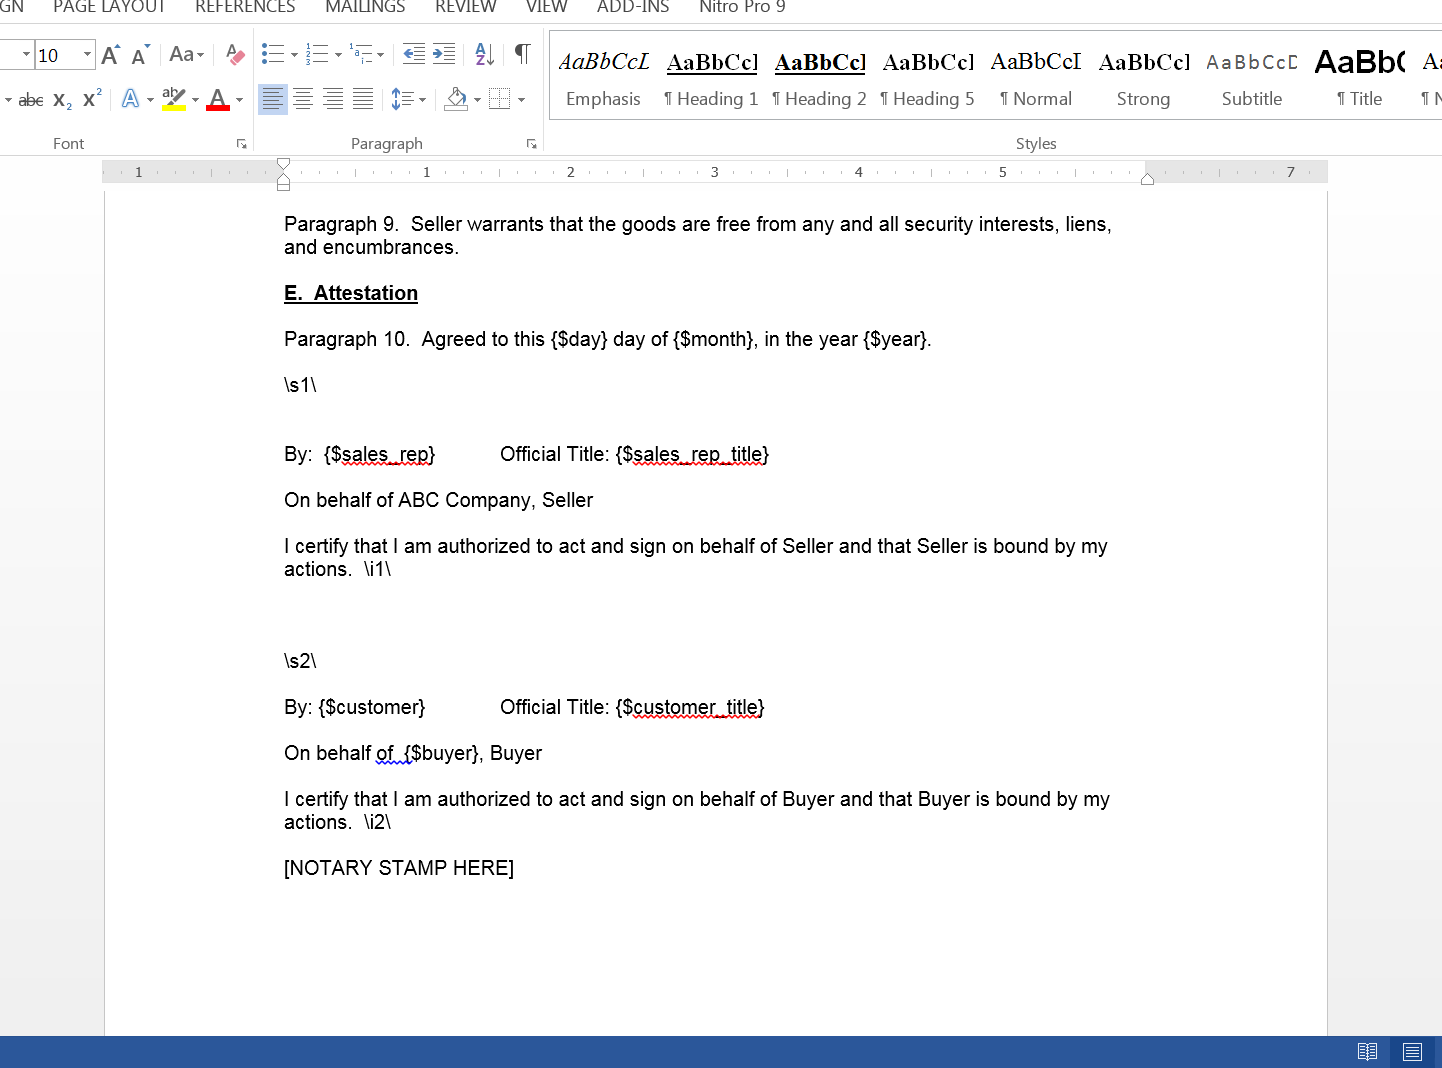
We’re also going to define where we want the signatures to go inside our contract. We can do this with special text tags defined by DocuSign. In our signature block, we’re going to use anchor tags like: \s1\ and \s2\. For more information, click here.
Once you’ve finished up the contract, log into Formstack Documents and create a New Document and choose Office Document as the document type. This will allow you to upload your Word document to Formstack Documents from your computer. Go ahead and upload your file.
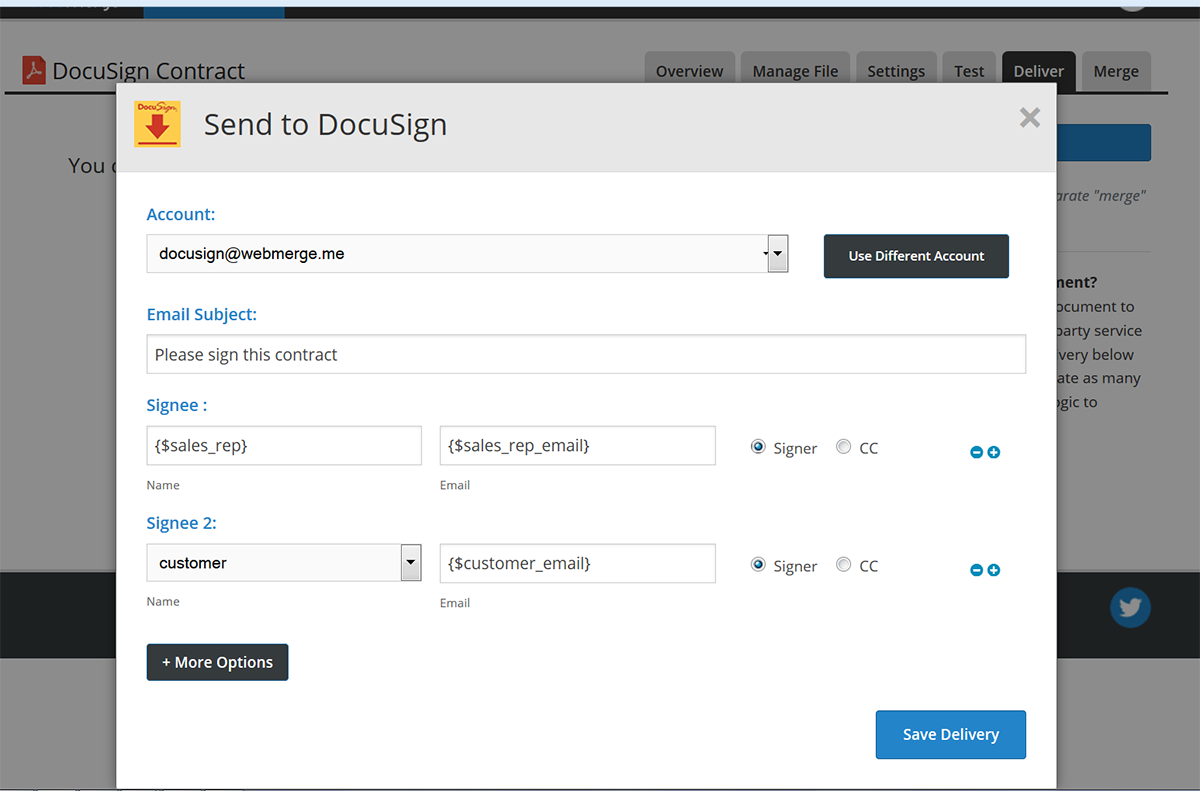
Great, now we’re ready to get this contract hooked up to DocuSign so that we can get it signed by our customers! Under the Deliver tab inside Formstack Documents (after you’ve edited any settings in the setup process), go ahead and add a New Delivery then choose DocuSign.
First, you’ll need to login to your DocuSign account. This will give Formstack Documents access to upload documents to your account. Go ahead and enter your login information and click the button. Once you enter the correct login information, the page will refresh and you should see the options to setup signers.
Go ahead and select the name and email address for the signers you want included on this contract. If you do not have any merge fields in your document for the signer name or email address, select <> from the dropdown, then type in the merge field like {$signer_name} or {$signer_email}. This will add those as merge fields to your merge process (it will not place them inside your document).
Once you have DocuSign setup, our last step is going to be hooking up Salesforce to send information to Formstack Documents to generate the contract. We’re going to use the Formstack Documents managed package to integrate our Salesforce org with Formstack Documents. Inside the package, you are going to setup a new Mapping for this contract. We are going to hook up the mapping to our Opportunity object and select our new Contract from the document dropdown.
Go ahead and click the continue button and on the next step, you’re going to see a list of the merge fields that are in your contract. For each merge field, you need to select which Salesforce field that “matches” up to.
After you’ve saved the field mapping, go ahead and Save and Active the mapping. This will activate the mapping and make it available for users in your Salesforce org to use.
Now it’s time for a quick test! Jump over to one of your opportunities (we suggest using a test opportunity) and click the Formstack Documents button on that record, then select the new Contract mapping that you just setup. This is going to send the opportunity information over to Formstack Documents and we’ll generate the contract then hand it off to DocuSign. You should receive an email from DocuSign with a link to sign the document.