


"Here to Help" is a support column written especially for Formstack's awesome, loyal customers. This post is part of a three-post series highlighting popular, but complex, Formstack features. Post last updated July 12, 2022.
If you’re like most people, you spend a lot of time prepping and tweaking your online forms to ensure high submission rates. But do you consider what happens after someone submits your form?
With Formstack’s confirmation and notifications, you can take control of a responder’s experience upon submission. Submit actions are activities (such as displaying a form thank you page) that take place after someone hits “Submit” on your form.
Submit actions can be a highly beneficial part of the form experience, but they are easy to neglect. To help you get up to speed on form submit actions, I’m here to break them down piece by piece.
Read on to discover all you need to know to enhance your online forms with custom submit actions.
Benefits
First things first: You’re probably wondering why you should use submit actions in the first place. What’s in it for you (or—more importantly—your customers)?
In short, a lot. Here are two great reasons to use submit actions:
- To streamline your online forms. Automating form submission actions can eliminate a lot of manual work and help you create seamless processes.
- To create a customized form experience. Displaying custom messages or sending your customers to specific landing pages is a great way to create personalized, customer-focused experiences.
Examples
When it comes to Formstack’s form submit actions, you have a few options:
1. Display a Custom Confirmation Message for Users
By default, a basic form thank you page will be displayed after someone submits your form:

If you want to take this a step further, you can choose to display a custom message instead:
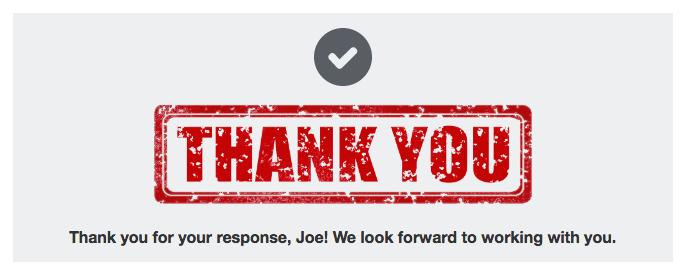
Using Formstack’s simple HTML editor, you can type up your own message and even include your own images or gifs. You can also choose to insert field IDs from the form for further customization—so that a user’s name, for example, will populate into the custom message (as shown above).

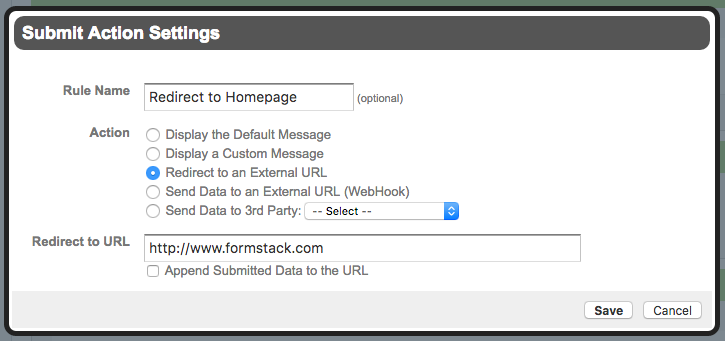
2. Redirect Users to an External URL
Another option is to send your responders to another website or web page through a form submit redirect. For example, you could send people to your website homepage after they submit your form.
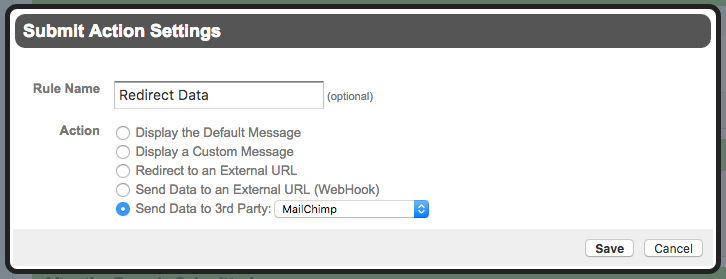
3. Send Submitted Data to a Third-Party App or External URL
The third type of form submit action involves routing the submitted data to another app or URL. This gives you the option to take the data submitted through your online forms and automatically pass it into another system, such as a payment processor or an email platform.
Notes
Before you start adding submit actions to your online forms, make sure you understand the following:
- When you add a third-party integration to your form, a redirect submit action for that integration is added automatically. This means you won't need to manually add submit actions for sending data to third-party apps.
- It is possible to have more than one submit action on a form, but there are limits. For example, you can redirect the submitted data from a single form to multiple third-party apps (which requires multiple submit actions). But you can’t redirect someone to an external URL and display a custom form thank you page. In other words, only one URL redirect or message action will execute per form.
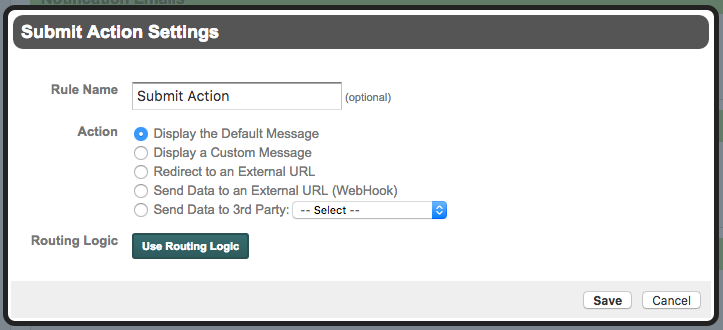
- If you want to include different submit actions based on user responses on the form, you can do so using routing logic. If your form contains an option field (such as a Radio Button or Checkbox field), you will see a “Use Routing Logic” button at the bottom of the Submit Action Settings Box. Click that button to set up Conditional Logic rules for your submit actions. For example, you could include a field on an order form that asks users to indicate how they would like to pay. If they select “Check,” you can display a custom message with instructions for paying via check. If they select “Online,” you can redirect them to PayPal or another payment processor.
Setup
Are you ready to start adding submit actions to your form? Great! You can do so with just a handful of quick steps:
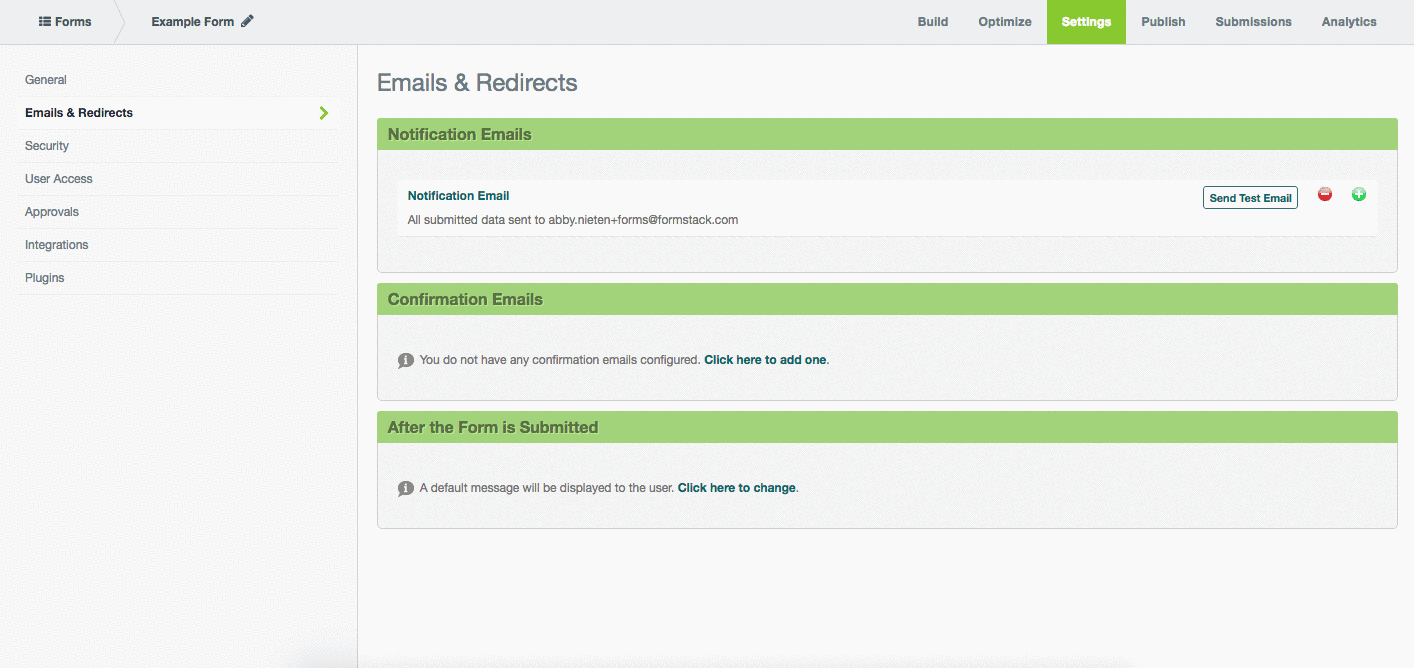
- Once you are in the appropriate form, navigate to Settings > Emails & Redirects > After the Form is Submitted.
- If you haven’t added any custom Submit Actions (or integrations) to your form, you will see this:

3. To add a Submit Action, select Click here to change.
4. When the Submit Action Settings pop up, select the appropriate option under Action.
5. Complete the necessary steps in the Submit Action Settings box and click Save. (For example, if you are setting up a custom message, type your message and add any desired images or formatting. If you are redirecting to an external URL, type or paste the appropriate URL into the box next to Redirect to URL.).
6. Once your action has been added, you should see it under After the Form is Submitted in the Emails & Redirects area of the Formstack app.

7. To add more actions to the list, you can select the green plus sign to the right of the existing action. To remove the action, you can select the red minus sign.
That’s it! For a more visual display of these steps, check out the gif below, which shows how to set up a custom thank you message submit action.
For more information on adding submit actions to your online forms, check out our Submit Actions Support doc.
Want a closer look at a form submit redirect example? Click here to learn about using a submit action to pre-populate form fields.

