


Who needs personalized thank you letters?
It’s the spookiest time of year!
Do you know what’s scarier than ghosts, goblins, and witches? Failing to set up an effective lead nurture strategy after your sales team attends an event or conference.

Conferences are costly and time-consuming. If you’re not taking the time to follow up with conference leads, you could be wasting money and losing sales. This Halloween, we’d like to show you how you can avoid this nightmare with an automated document workflow.
Using Formstack Forms and Formstack Documents makes this workflow a snap. Simply connect your event lead capture form to your Formstack Documents account. Once the attendee hits submit, their information will be sent to Formstack Documents, where we’ll set up a customized email. With delayed delivery, we send out our email the Monday after the event to ensure the highest chance of it being read.
What You Need for the Automated Document Workflow
- A thank you letter template with merge fields ({$FirstName}, {$DealName}, etc.)
- Formstack Forms account
- Formstack Documents account
- Formstack Documents API Key and Secret
Tutorial Outline
This tutorial covers the following features:
- Building a Formstack Form
- Conditional Logic for Forms
- Using the Formstack Theme Editor
- Exporting Forms to Formstack Documents
- Uploading Images in Formstack Documents
- Adding Conditional Logic in Formstack Documents
- Setting Up a Delayed Delivery
5 Steps to Document Automation
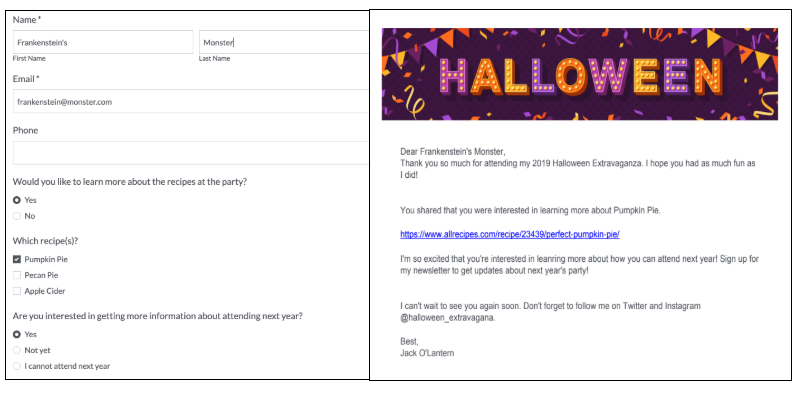
For this example, we’re going to be sending thank you letters to everyone who attends our 2019 Halloween party! There will be a lot of food to try at our event, so we want to give attendees a chance to learn more about the recipes they’re interested in. Based on their interests, we’re going to send them an email with the recipe attached and a link to where they can sign up for next year’s party!
Learn more: Planning to host your own event? Check out this blog post to use Formstack Documents as an automated ticket generator.
Step 1: Build your form.
To get started, we’re going to log in to our Formstack Forms account and build the form we’d like our attendees to fill out.
Building forms with Formstack is really easy. With the drag-and-drop form builder, you simply pull in the fields you’d like to appear on your form.
We’re going to add in a couple of features to make sure our form is really easy to use. We need to ensure that we capture our attendee’s email so that we can send their thank you letter electronically after the party. So we’re going to make the name and email fields required.
To make our form as short as possible and keep attendees from abandoning it, we’re going to use Conditional Logic so they only see the fields that are relevant to them.
We want to keep our form on theme, so we’re going to add a header. To add your header, navigate to the Style tab in the upper left-hand corner. Here, you’ll see that you have a lot of options to tweak the look of your form. Scroll down to Advanced Styles, and select General. Under Form Header, you can upload your image.
Step 2: Connect to your Formstack Documents account.
Navigate to the Settings tab, and select integrations. Here, you’ll see the Formstack Documents integration right at the top. Open the integration settings, and add your API Key and Secret. This will connect your Formstack Forms and Formstack Documents accounts. We’re going to use the form we just built to create our document. Under Document Settings, select “Create new document using this form.”
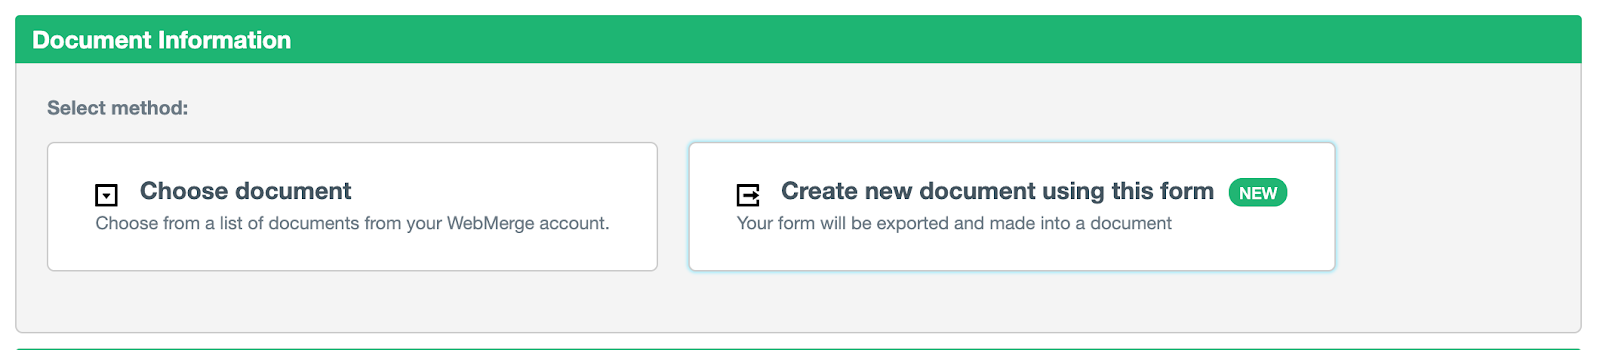
Select “Customize your document in Formstack Documents.”

Step 3: Customize your document.
Selecting “Customize your document in Formstack Documents” will direct you back to your Formstack Documents account, where you can create your letter using fields from your form.
This feature pulls in all of the field headers as well as the merge fields. We don’t want our questions to appear on our document, so we’ll need to make a few edits.
First, we’ll add our Halloween header to our document. Simply select the image icon, and choose “Upload.” This way, you can pick any image saved on your computer and upload it to your letter.

Since we had Conditional Logic on our form, we’re going to want to add it to our document as well. With Formstack Documents, it’s super easy! Under Options, select “Insert” and a dropdown list will appear. Here, you’ll see the If/Else Statement option. This is how we’ll add logic to our document. Simply enter in the field name and value, and Formstack Documents will add the logic to your document with an ellipsis, which indicates where you can add the information or text you’d like to appear.
Note: Merge fields are case sensitive.
Lastly, we want to include email address, but we don’t want the email address field to appear in our letter. To get around this, we’ve added the field in white text at the bottom of our letter so it can’t be seen.
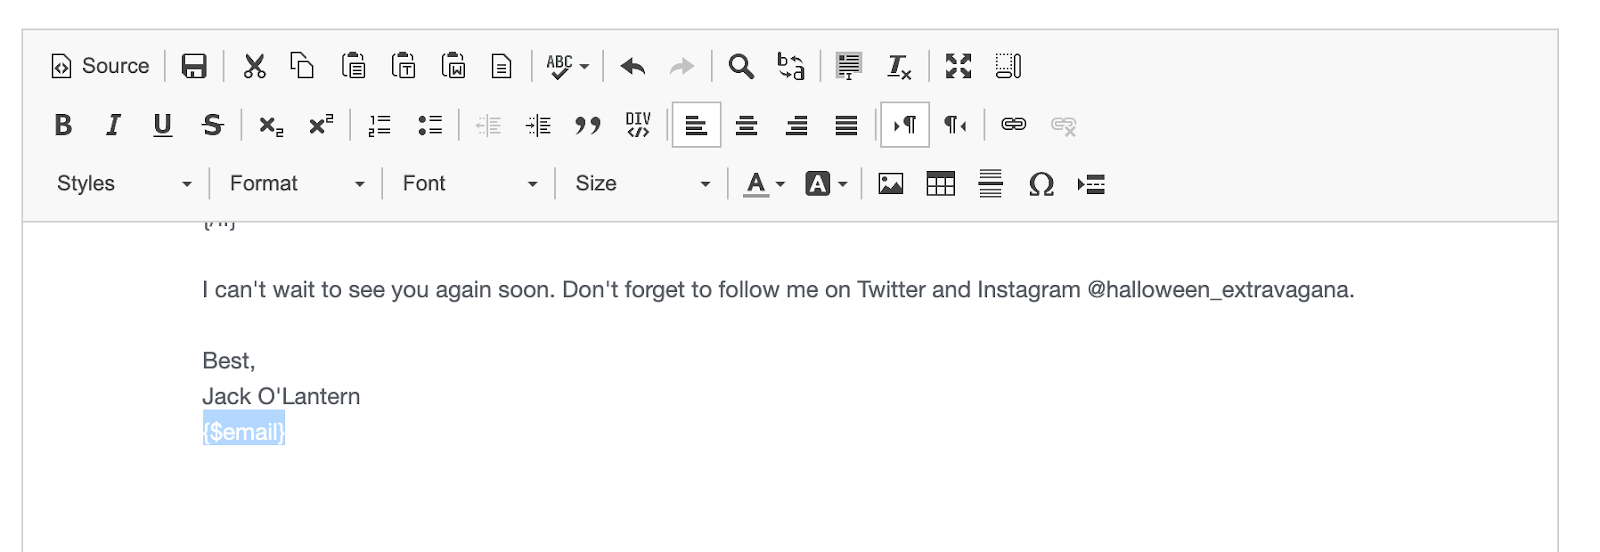
Here’s a peek at our final document:
Step 4: Set up your delivery.
Within Formstack Documents, navigate to the Deliver tab, and select “New Delivery.” A list of all Formstack Documents delivery options will appear, but for this tutorial, we only want to send our attendees an email.
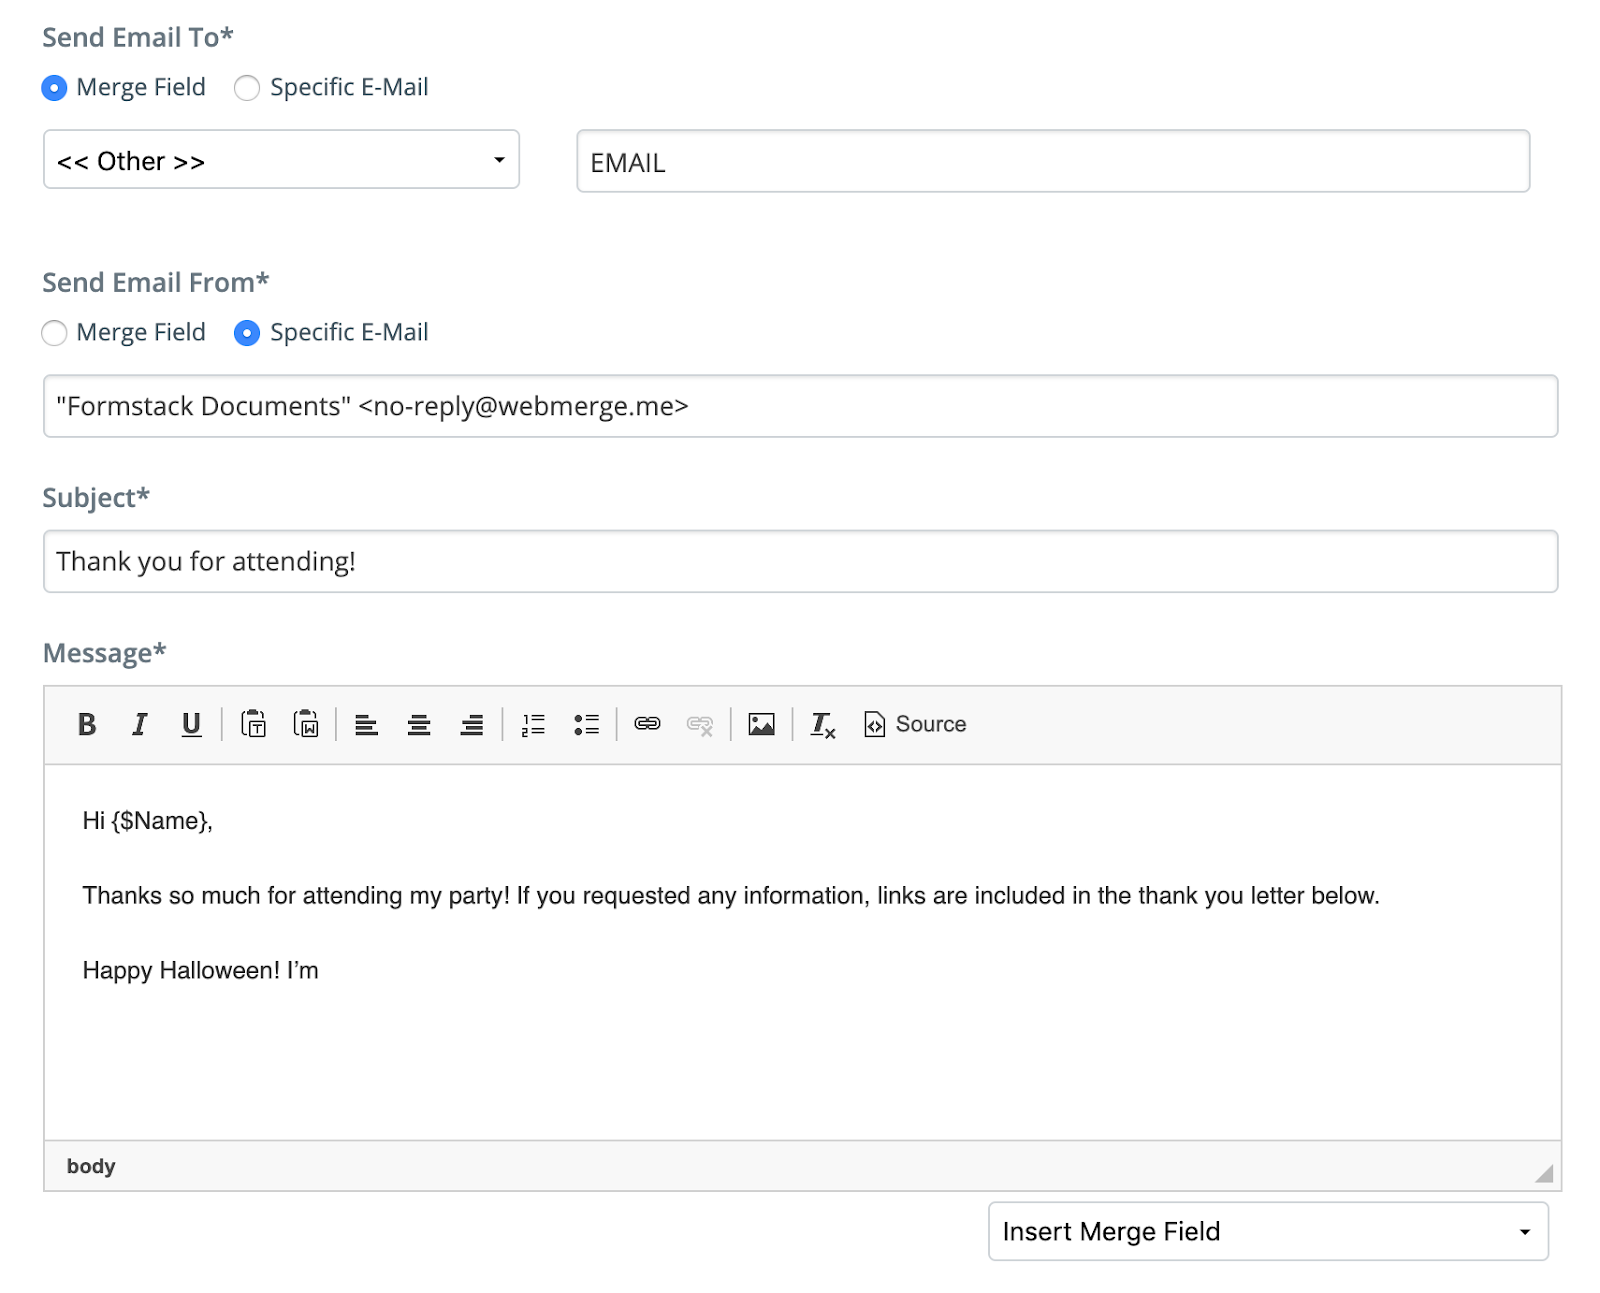
For the Send Email To field, select Merge Field, and scroll down to Other. This selection will make a box appear where you can type EMAIL. This will populate the field based on the information attendees provided on our form.
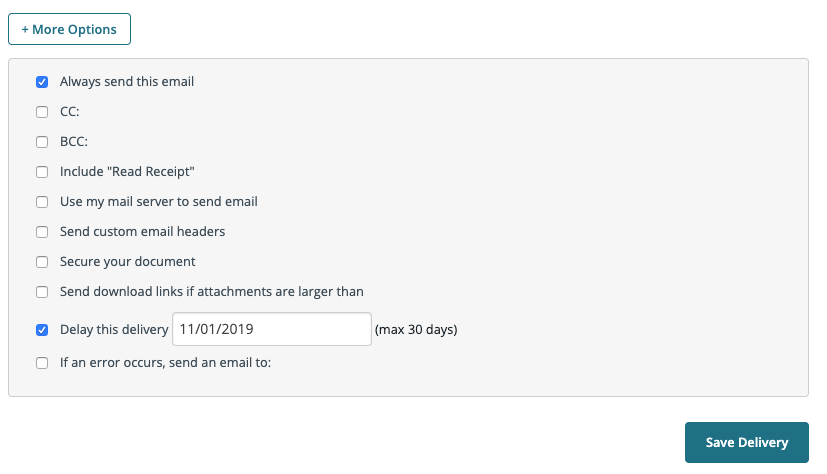
Now, we don’t want our email to go out right when our attendee hits submit. We want them to receive the email in a couple days when they have a chance to review their email. We’ll use the delayed delivery option to send our letter later. Scroll down to More Options, select “Delay this delivery,” and enter the date you want your letter to send.
Here’s a look at our final email.
Now, you’re ready to run a test! Navigate back to your form, and enter your information to make sure everything is working smoothly.
Now, you’re ready for your event!
Check out the video below to learn more about leveling up your document generation process with Formstack Documents.


