


Spending time preparing for customer/prospect presentations can be a daunting and time consuming task. You’ve got to find all the right data, prepare the demo, and setup a nice presentation. More than likely, the presentation is the same template for each customer, but it takes a lot of time to go through and update the information. There’s a better way!
In this example we’re going to show you how you can use Formstack Documents to instantly generate a PowerPoint presentation from an Opportunity you have in Salesforce. This will save you hours!
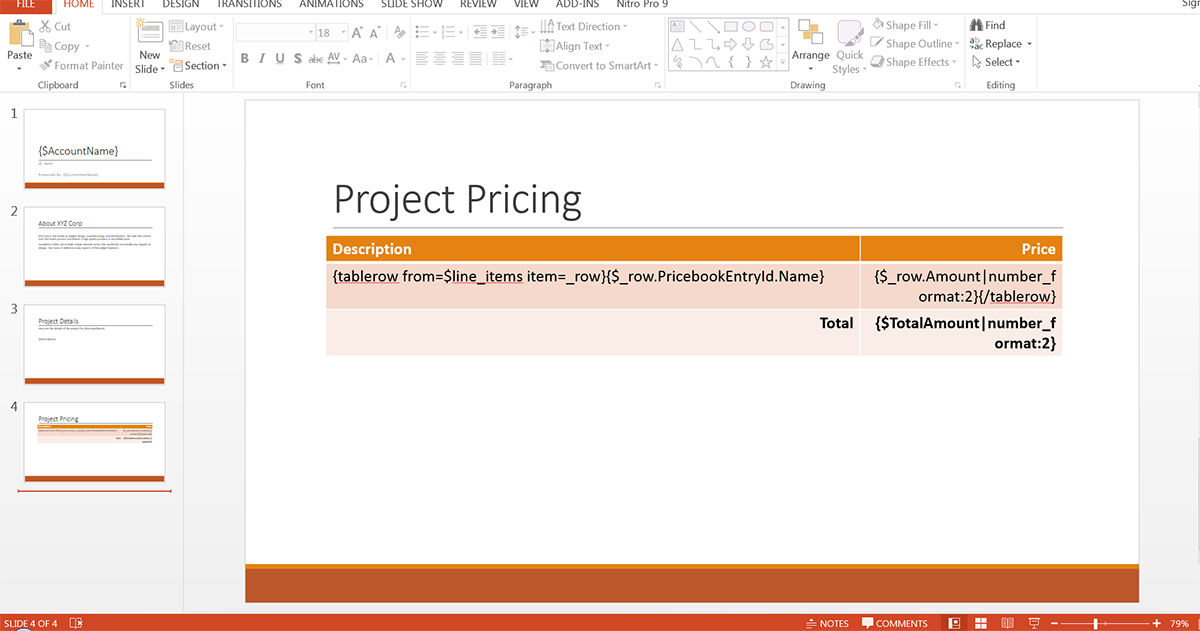
Our first step is going to be to setup our presentation template in PowerPoint. We’re going to take our presentation and add merge fields like {$AccountName}, {$Description}, etc. These merge fields are going to be where the data from Salesforce will go. You can only use letters, numbers, and underscores in these merge fields (no spaces).
Here’s what our presentation template looks like:

In order to add our pricing table to the presentation, we are going to “loop” through the list of line items on the opportunity. Here’s what our pricing table looks like:
Once you have the presentation template all finished, it’s time to upload it to Formstack Documents. From the Documents page in Formstack Documents, click the New Document button and then type in a name (like “Customer Presentation”). On the next step, you’re going to choose Office Document as the type and then you’ll pick the file form your computer.
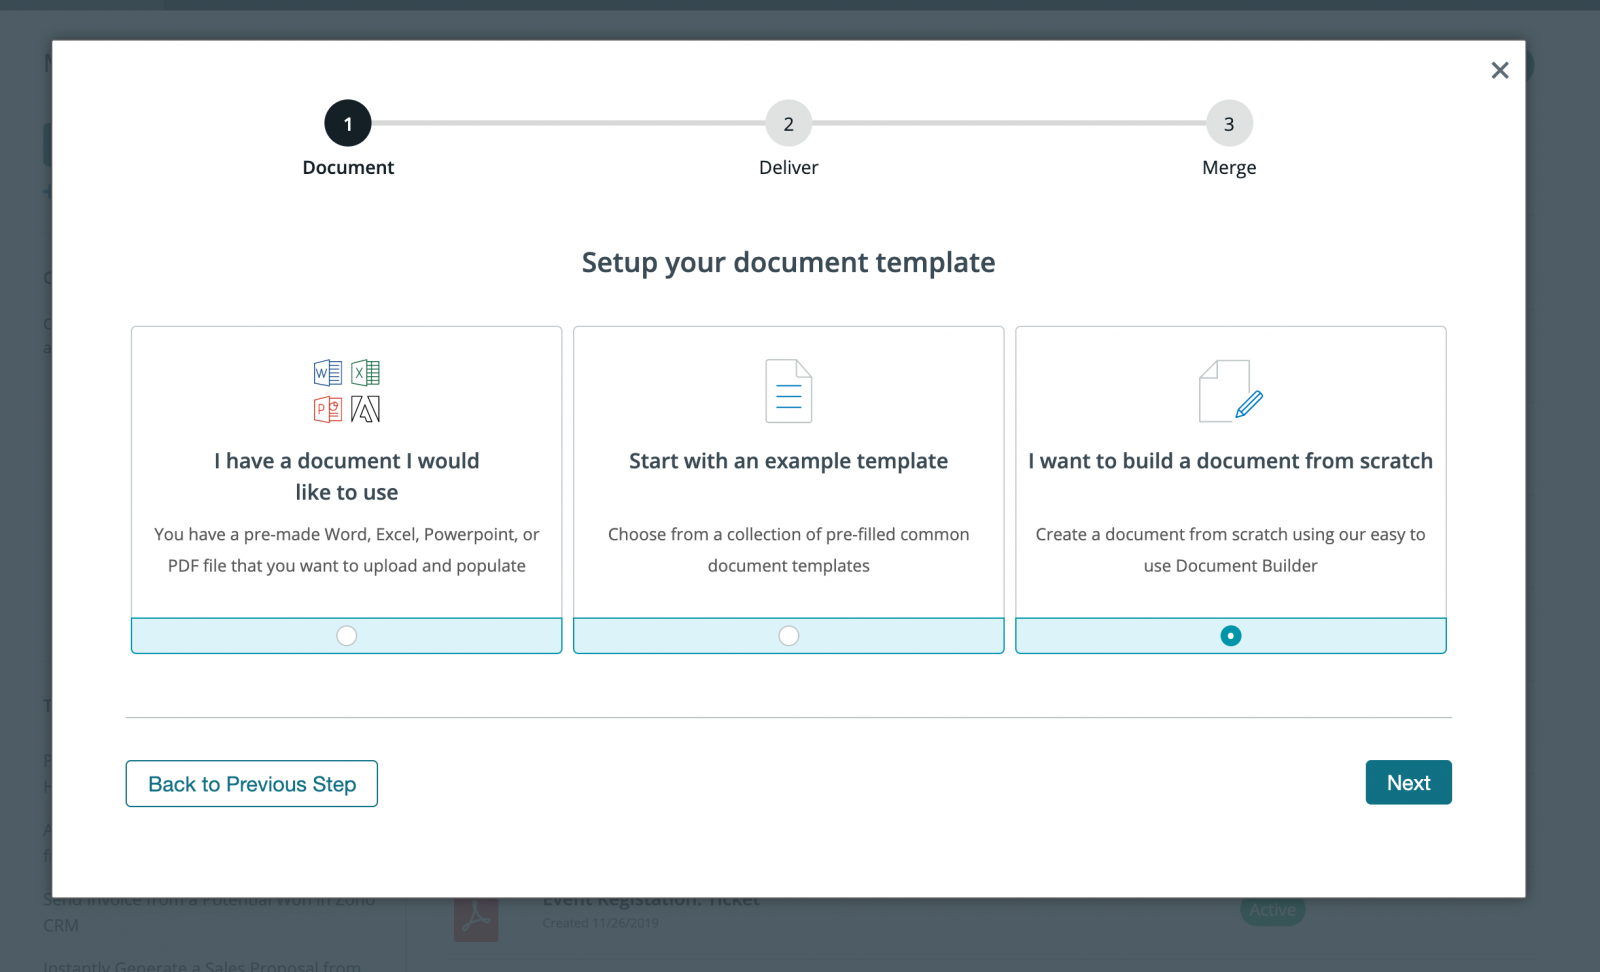
After you’ve got the document uploaded to Formstack Documents, you’ll be taken to the Settings tab where you can update the document output type (PowerPoint or PDF), change the file name, and many other settings. We’re going to change the file name to include the name of the account.
Our last step in Formstack Documents is going to be setting up the email delivery of the document to go to the current user in Salesforce that is generating the presentation. From the Deliver tab, click the Edit button next to the email delivery, then for the To address, pick <> from the merge field dropdown. In the box, type in {$EmailTo}. This generates a new merge field that we’ll be able to map inside Salesforce.
Great work! We’re now ready to setup the integration inside Salesforce. If you haven’t already, please install the Formstack Documents managed package from the AppExchange.
From the Formstack Documents Mappings page in Salesforce, click the New Formstack Documents Mapping button. You’ll need to give the mapping a Name, then you’ll be asked to choose the Salesforce object. Go ahead and pick the Opportunity object from the dropdown. Then pick the presentation document you just setup from the Formstack Documents Document dropdown.
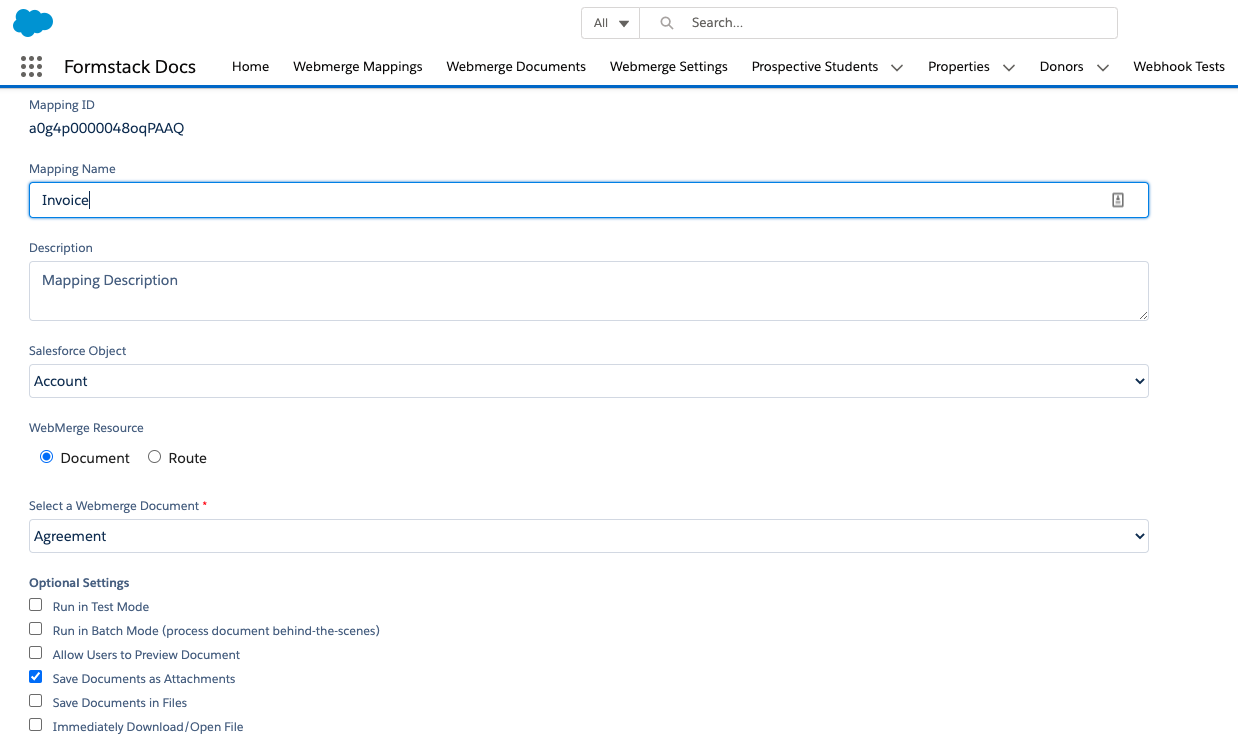
After you click the Save and Next button, you’ll be taken to a page where you can edit the mapping and setup the field mapping. At the top of the page you’ll see the same settings you just completed, so skip down to the Field Mapping section.
In this Field Mapping section, you’ll see each of your merge fields that you setup in your presentation. For each of those fields, you’ll need to choose the corresponding Salesforce fields from the dropdown on the right.
Once you have all of the fields mapped, go ahead and save and activate the mapping. This will make it available for merging and ready for testing! To create a presentation, go to one of your Opportunities and then click the Formstack Documents button.
After you click the Formstack Documents button, you’ll be taken to a page to select the mapping that you want to merge. So go ahead and click the Presentation mapping you just setup (note: if you only have 1 mapping on the opportunity object it will automatically merge that mapping). This will send the opportunity data over the Formstack Documents and your presentation will be generated and emailed!
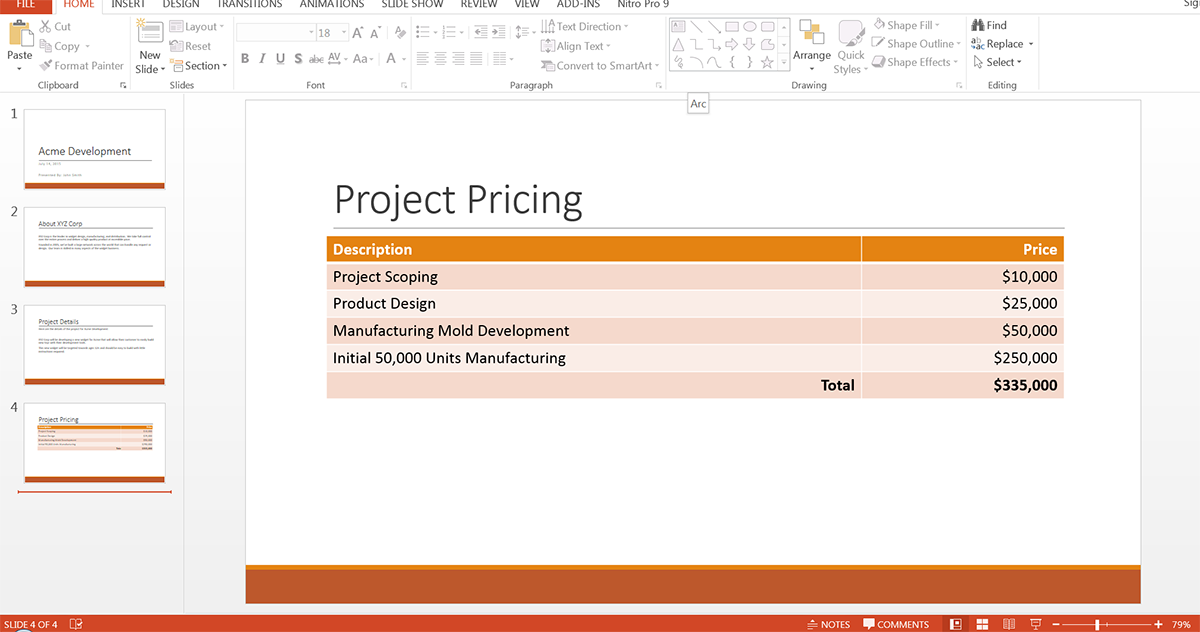
Here’s what our populated presentation looks like:
Now, you can generate presentations with the click of a button. Start a free trial today to see how Formstack Documents could simplify your sales workflows.

