


Managing the constant influx of rental and leasing applications is a time-consuming, document-heavy process. Property managers often sift through these documents by hand to ensure all fields have been completed while continuing to balance important duties such as meeting with clients and showing properties. To ensure everything is done accurately and in a timely manner, implementing time efficient processes is key.
Adding Formstack and Formstack Documents to your workflow allows your team to automate application submissions while ensuring that all required fields are completed.
With Formstack Documents, you can automate many steps of the rental process, such as leasing agreements, inspection reports, and other tenant information. For this example, we will show you how to automatically populate a rental or leasing agreement using Formstack Documents with Formstack.
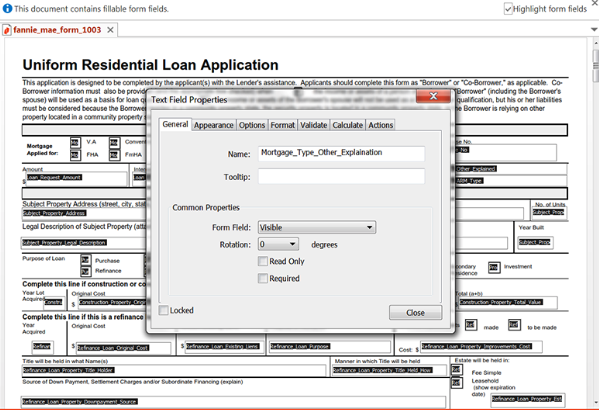
For the first step, you will need an application template. Using a fillable PDF, add form fields in the places where you want your data to automatically populate. Then, name the fields, making sure to exclude spaces and special characters.
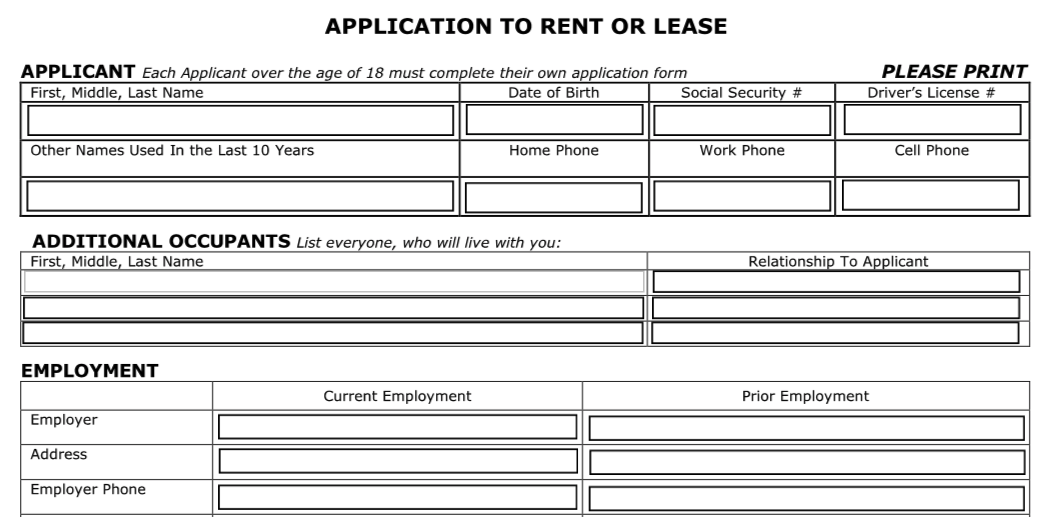
Here is the final PDF template:
Now that form fields have been added to the template, it’s time to upload it to Formstack Documents. To do this, navigate to the Documents page in Formstack Documents, click the New Document button, and title your document. Then, choose Fillable PDF as the document type and upload the file from your computer.

After uploading your PDF, you will be taken to the Settings tab, where you can make modifications such as adding a name to the merged file. For this example, we’re going to include the applicant’s name in the name of the merged file.
Now, we want the merged PDF to be automatically emailed to staff with the applicant’s name in the email. To prepare the email, navigate to the Deliver tab and click the Edit button under the default email delivery. Here you can update other email settings such as designating who on your staff will receive the email, if read receipts should be included, or if the email needs to be delayed.
Once email delivery is prepared, you are done with the setup process in Formstack Documents, and we’re ready to move on to the integration with Formstack.
Inside Formstack, find the form you want applicants to fill out and navigate to the Settings tab. There, you will navigate to the Integration Hub, find Formstack Documents, and add the Formstack Documents integration to your form.
After entering your Formstack Documents API Key and Secret (both of which can be created under Account > API Access inside Formstack Documents), Formstack will load a list of the documents in your Formstack Documents account. From here, you will select our Rental Application.
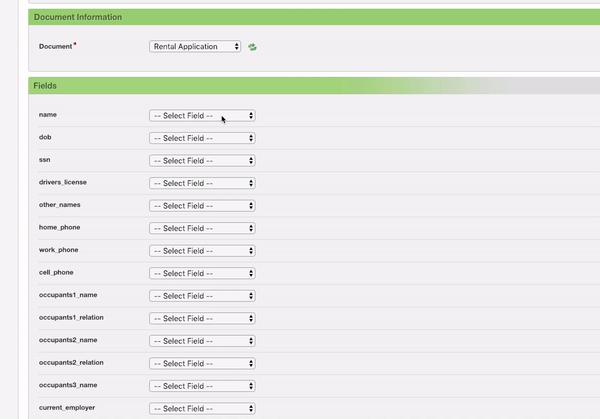
Formstack will then load a list of possible merge fields into your document. For each merge field, you will need to select the corresponding form field from the dropdown menu. This will tell Formstack how to send the form data over to Formstack Documents to correctly populate the document.
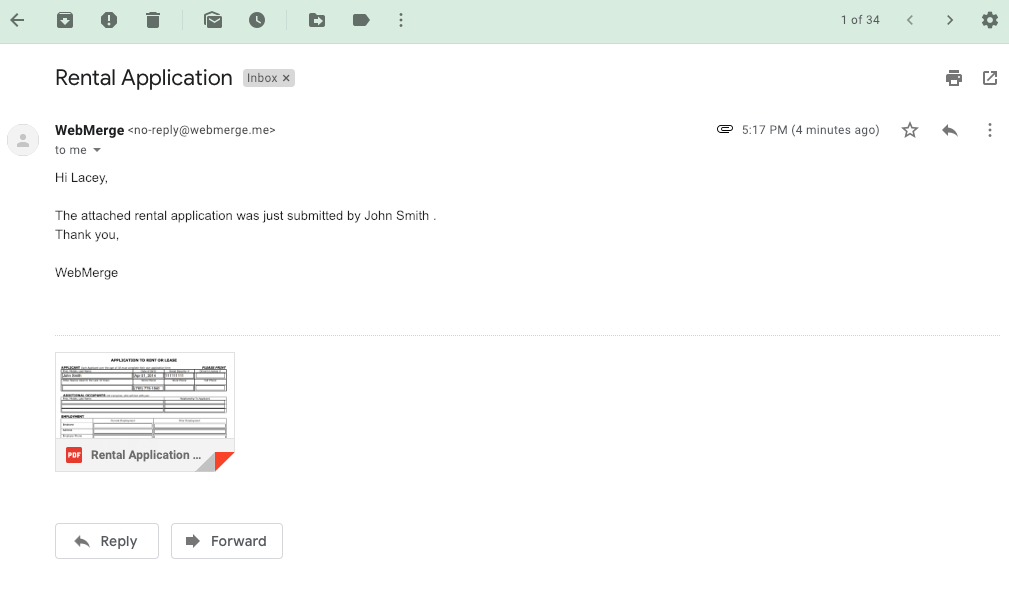
Once you have matched up all of the fields in Formstack, the setup process is complete, and you’re ready to send your Formstack form out to applicants! When applicants submit their information, Formstack will send that data over to Formstack Documents, and the PDF will automatically be populated. The designated staff member will then receive an email with the populated information that will look something like this:
All done! Now you can easily streamline the collection of rental applications with Formstack and Formstack Documents. Following the steps above, you can automatically populate data submitted via your Formstack forms into all kinds of documents. Check out the video below to learn more about leveling up your document generation process with Formstack Documents.

