


Pipedrive houses a lot of the data your sales team needs to close deals, follow-up leads, and be successful and efficient. But putting that data to work in quotes, proposals, and invoices requires your staff to waste hours of time. Are you tired of manually updating your Word docs and PDFs with data from your Pipedrive CRM? We have a solution for you.
Integrating Formstack Documents with your Pipedrive CRM streamlines your sales workflow with automated document generation, making it quick and easy to create many of the documents needed by your team.
In this example, we’re going to show you how to automatically populate a sales presentation when the status of a deal is changed to Won in Pipedrive. This presentation will then be automatically emailed directly to our contact for review.
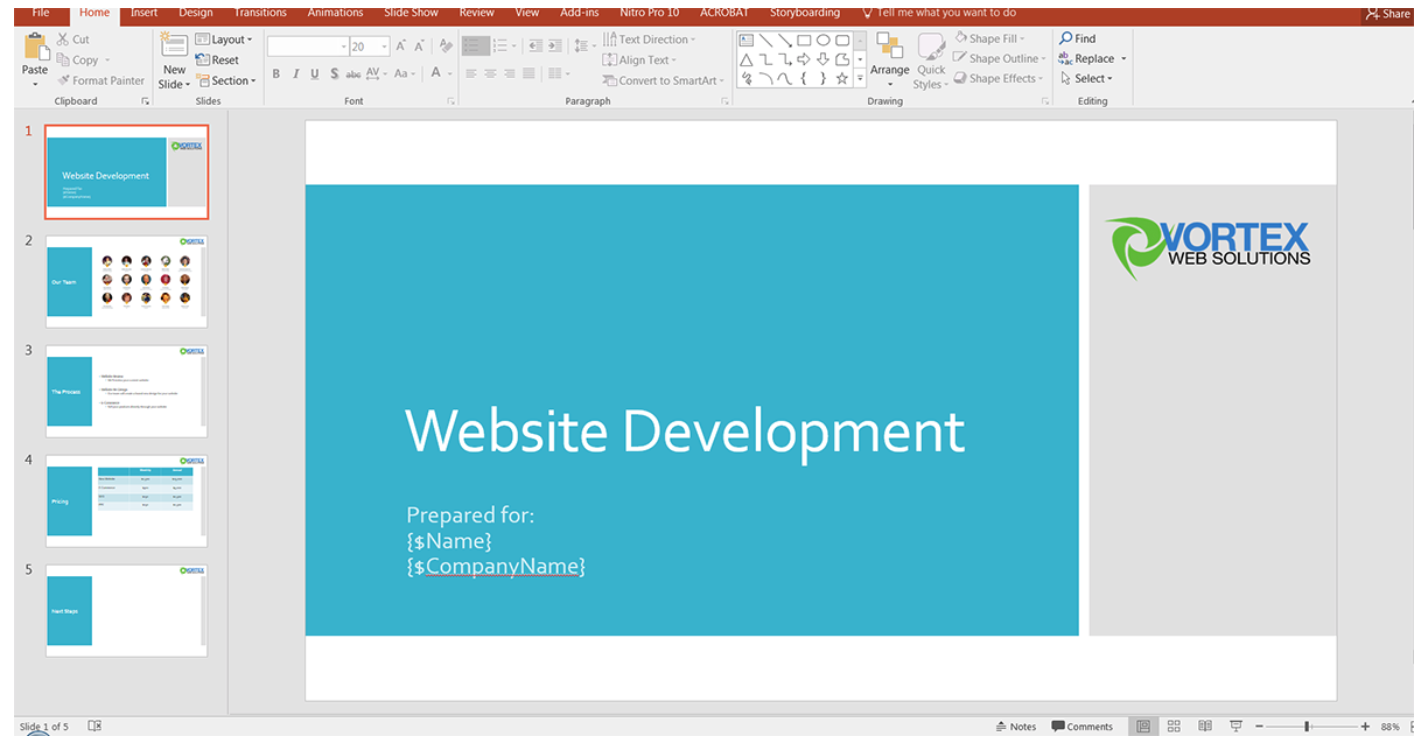
To get started, we’re going to set up our presentation template using a PowerPoint document. Inside PowerPoint, we’re going to put together all of our slides like normal, but for the spots that we want to insert our contact’s information, we’re going to use merge fields like {$Name}, {$Email}, etc. You can name these merge fields anything you’d like, but they shouldn't have any spaces or special characters.
Here’s what our presentation template looks like:
Once we have our template finished, we need to upload it to Formstack Documents. From the Documents tab in Formstack Documents, click the New Document button and enter a title for your template. On the next step, choose Office Document and your document type, then select the Powerpoint presentation from your computer.
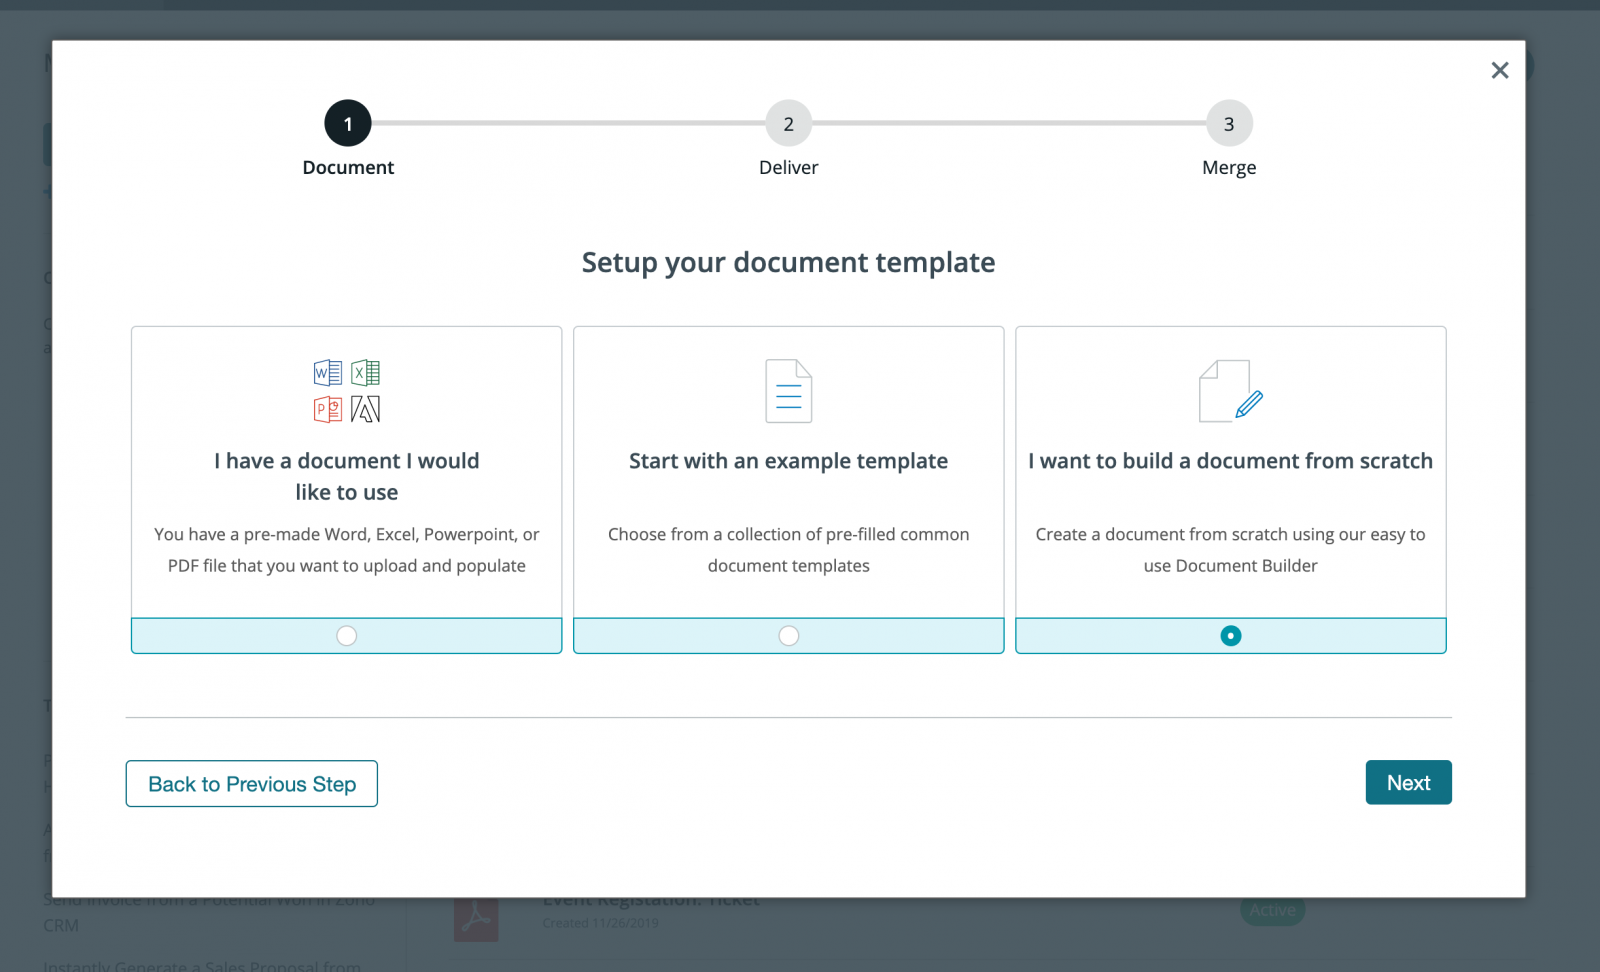
After you’ve uploaded your template, you’ll be given an option to customize how your presentation is delivered once it is merged.
Now you can create your document! You’ll be taken to the Settings page, where you can modify various options like file name and file type output. For this example, we’re going to use Formstack Documents for PDF document generation and have a PDF version of our file sent to our client.
Next, set up the delivery of your document so that the merged presentation is automatically sent to our contact. On the Deliver tab, click the Edit button under the default email delivery.
For the “To” address, choose the merge field for the contact’s email address. If you don’t have a merge field in your document for the email address, choose <> from the dropdown and enter something like {$Email}.
Feel free to edit any of the other settings, then save.
Once you have saved your email delivery, you’re done with the setup process inside Formstack Documents and you’re ready to setup the integration with Pipedrive using Webhooks.
You’ll need to grab the Merge URL for your presentation as it will be a part of the Webhook URL for Pipedrive. Under the Merge tab, you can find your Merge URL.
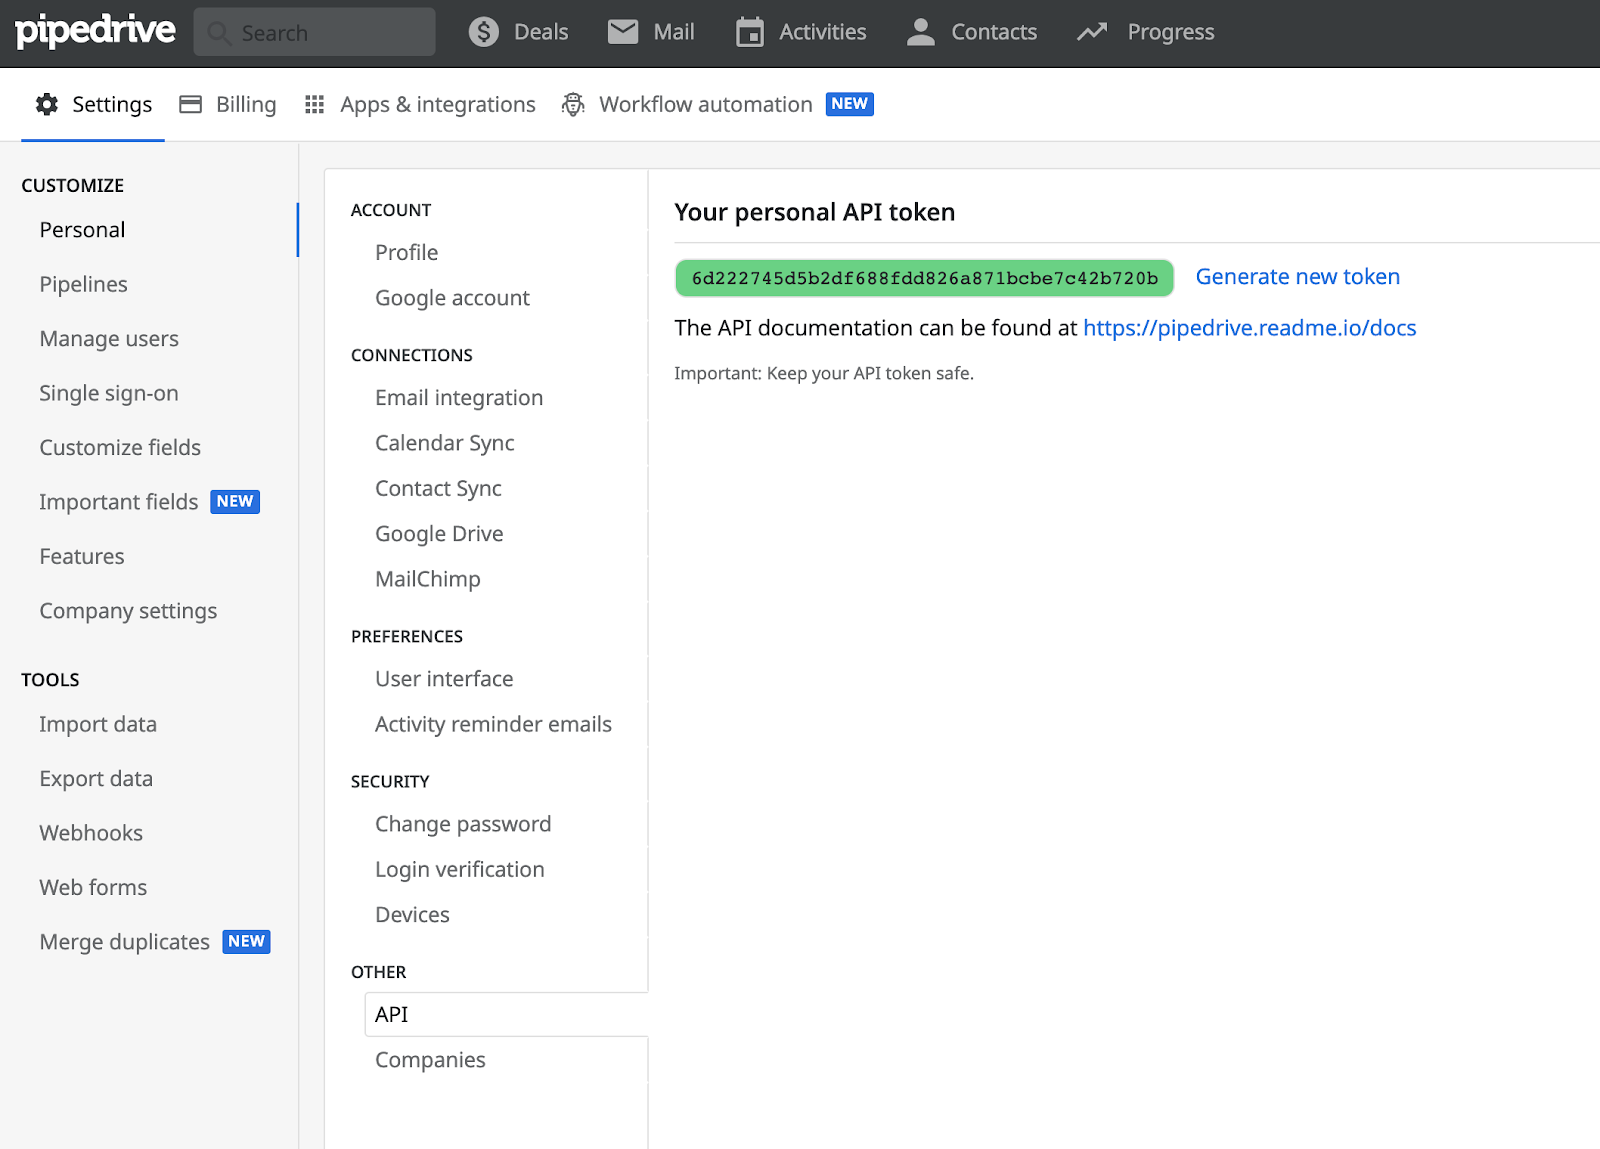
We’ll also need our Pipedrive API Key. You can find your Pipedrive API key in your Pipedrive by navigating to the Settings tab and selecting API under the Other tab on the left hand side.
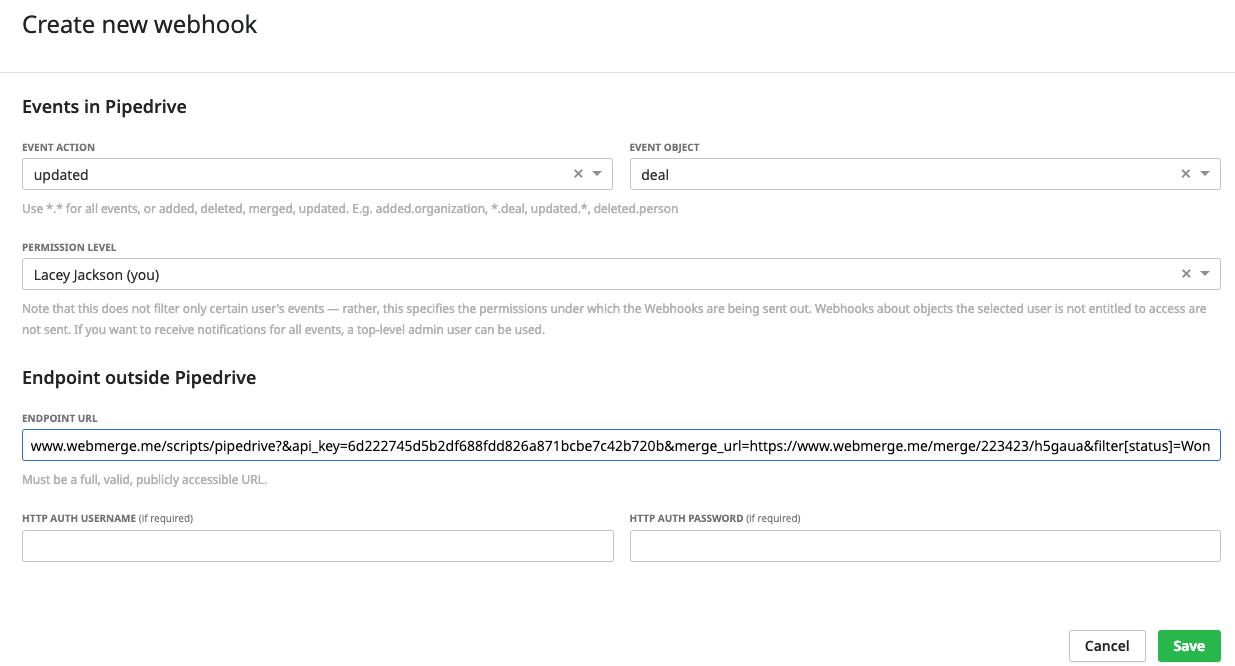
Now, we’re ready to setup the Webhook URL for Pipedrive. We’re going to use this Webhook URL builder: https://www.webmerge.me/scripts/pipedrive
Once you’ve created your Webhook URL, login to Pipedrive, navigate to the Settings tab, and select Webhooks. We’re going to create New Webhook and enter the Webhook URL that was generated. For the Event Action, select updated and for Event Object select deal.
Now that you’ve set up your Webhook, you’re ready to send data over to Formstack Documents. Open up one of your deals and then update the deal to trigger the merge by changing your deal status to Won. This will send data over to Formstack Documents and you can see that data on the Overview tab of your document.
Now when you login to Formstack Documents and navigate to the Overview tab, you should see a recent merge. Click the View Data button next to your recent merge to view the data you’re receiving from Pipedrive. Now, when you click on the name of the field, you can see the merge field to use in your Field Map (or document).

Congrats, you’re all done! Now you can use Formstack Documents for all of your Pipedrive marketing automation needs including sales presentations. Formstack Documents and Pipedrive make a great team for PDF document generation. You can now instantly populate all kinds of documents with data from Pipedrive.
Can you think of any other ways you could use Formstack Documents to simplify your paperwork processes? Start automating documents from you CRM today with a free trial from Formstack Documents!

