Imagine your average site visitor.
Maybe they found a blog on your site after a Google search or are looking for software that integrates with their favorite tools. Let’s say you were able to collect their data through a webinar registration form, but they didn’t attend the webinar and you haven’t had contact with them in the last few months.
How do you re-engage those leads?
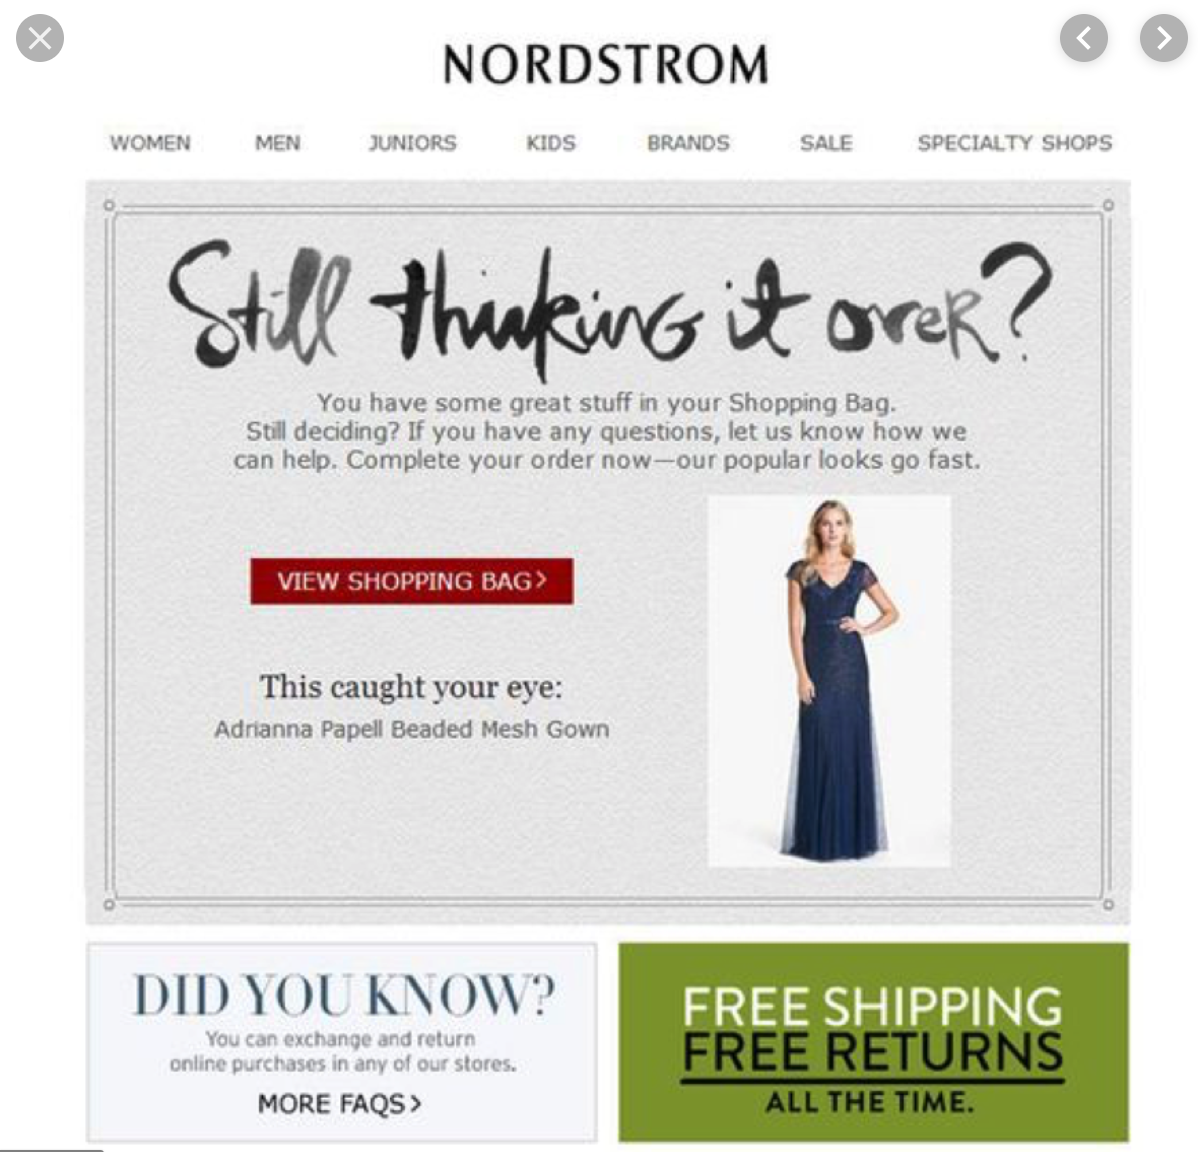
It’s no secret that the vast majority of visitors to your site won’t convert on their first visit. Retargeting is an inexpensive, but effective way to re-engage site visitors and leads to move them down the sales funnel. There are lots of ways to carry out retargeting campaigns. For instance, email is a really popular retargeting tool for ecommerce sites. When you’re shopping at Nordstrom and abandon your cart, you might receive an email similar to this:
Today, we’re going to show you how to set up this process using Forms for Salesforce and Mailchimp. In this example, we’ll be retargeting leads who signed up for a webinar, but did not attend using an automated email campaign.
We want to make it super easy to send out a mass campaign, but we also want our forms to be as easy as possible to complete. So, we’re going to add the Dynamic Prefill feature to our Salesforce form. Dynamic Prefill lets you pull information from Salesforce to populate forms for your customers. The setup process is quick and easy, so you’ll be adding prefill to all sorts of forms in no time!
Dynamic Prefill is more than simply pre-populating forms. If you haven’t engaged with the leads on your list in a while, their information may need to be updated on their Salesforce record. Dynamic Prefill is bi-directional. You’re pulling information out to populate your form, but as your customers hit submit, their responses are being sent back to Salesforce to update their record. Now, customers can review information, update outdated details, and self manage their data.
Read More: Top 4 Ways to Use Dynamic Prefill in Salesforce
Step 1: Update your Lead Object.
With Forms for Salesforce, you don’t just add general fields into your form. With our drag-and-drop builder, you’ll add actual Salesforce fields to create your form, each with its own input type already defined in your Salesforce configuration. So, to kick off our retargeting campaign, we’ll need to update our Lead Object.
Within your Lead Object, you need to have a couple of fields set up. If you haven’t already, make sure all of your Lead Objects have a “Contact” field. This field will help with personalizing and automating your emails. Next, you’ll need to create a Retargeting Object to pull the fields you want to include on your retargeting form. For this example, we’re going to include three fields.
#1 Checkbox: Are you interested in receiving a link to the webinar you missed?
#2 Checkbox: Are you interested in signing up for our monthly newsletter?
#3 Checkbox: How would you rate your experience with our product?
#4 Text Box: Do you have any additional feedback for us?
Step 2: Build your form.
Next, login to Salesforce, and select Create New Form. This is where we’ll create the feedback survey to send out to clients. For this example, we’re making our Primary Object “Lead,” but you can follow this process to prefill any data collection form for your clients using other Primary Objects. Add a Related Object, and select the Retargeting Object you built in the last step.
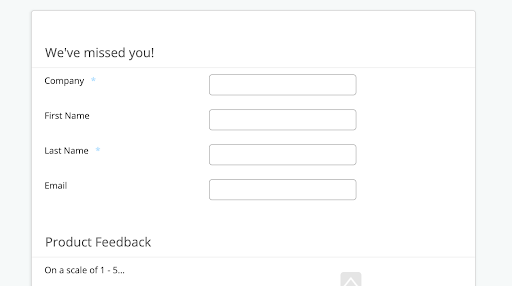
We’re going to set up our survey to prefill contact information for our leads. For this example, our survey looks like this:
Step 3: Establish your list of contacts.
Navigate back to your Salesforce org.
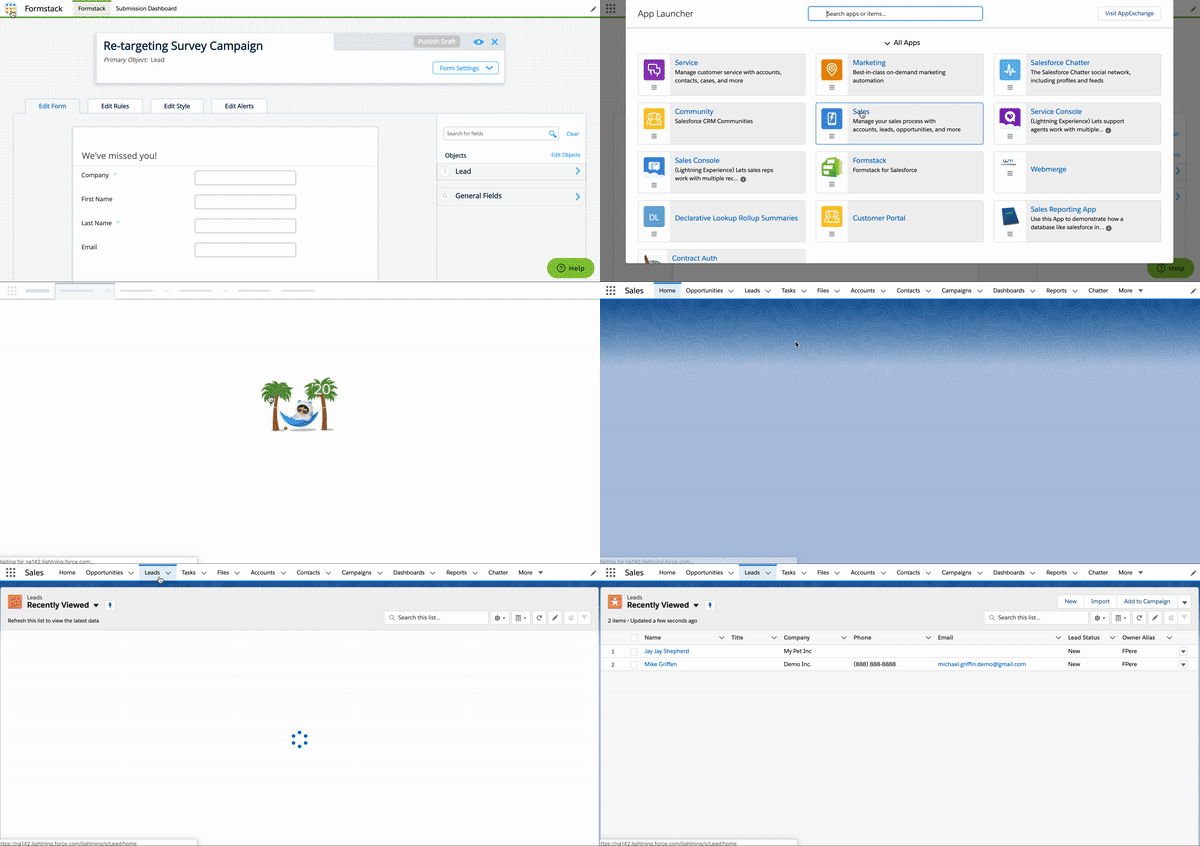
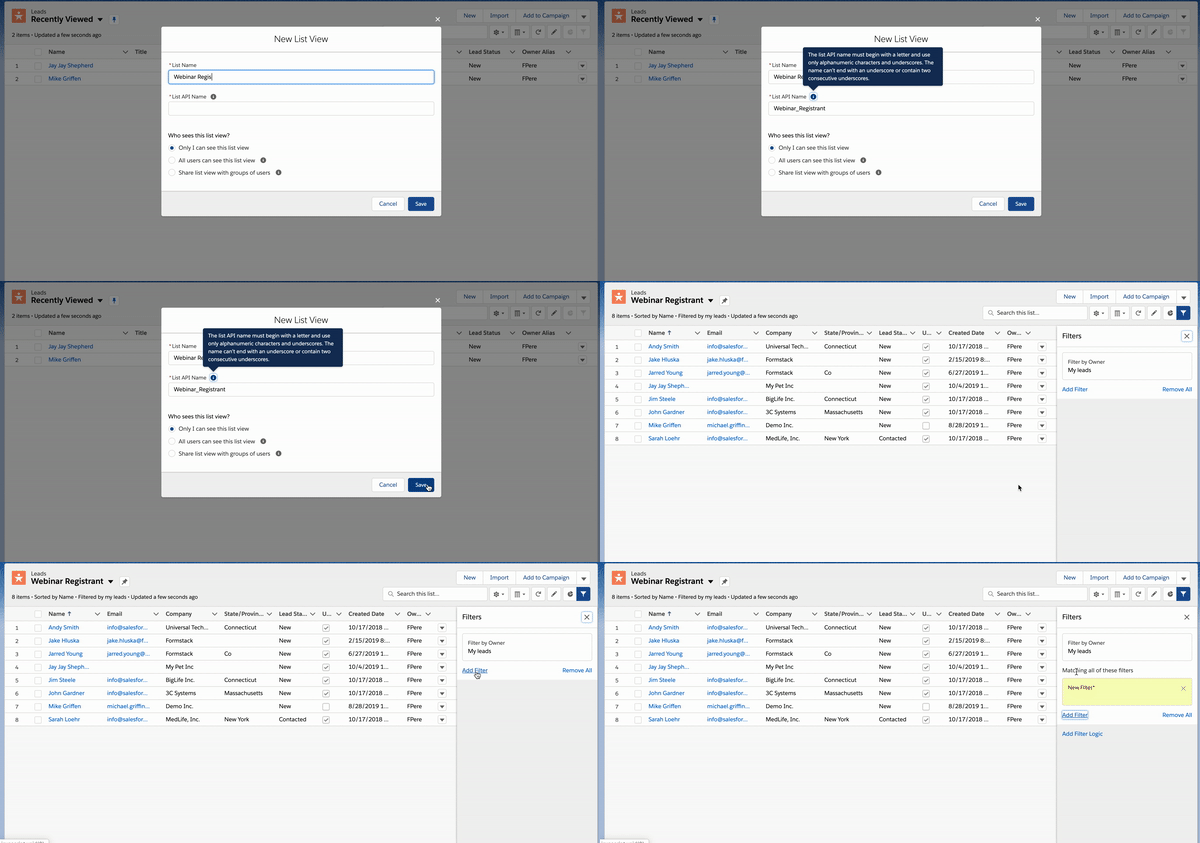
Next, you need to create a list of the leads you want to target with this email campaign inside your Salesforce org. For this example, we’re creating a list of all webinar registrants and filtering it so we can only see registrants who didn’t attend.
Step 3: Connect to Mailchimp.
Once you’re on the publish page, you’ll see the option to enable Dynamic Prefill. Switch it on. Then, navigate to the Export Links tab. There, we can set our audience by choosing the “Select a set of records” option. Scroll down to the list you created and download the CSV file.
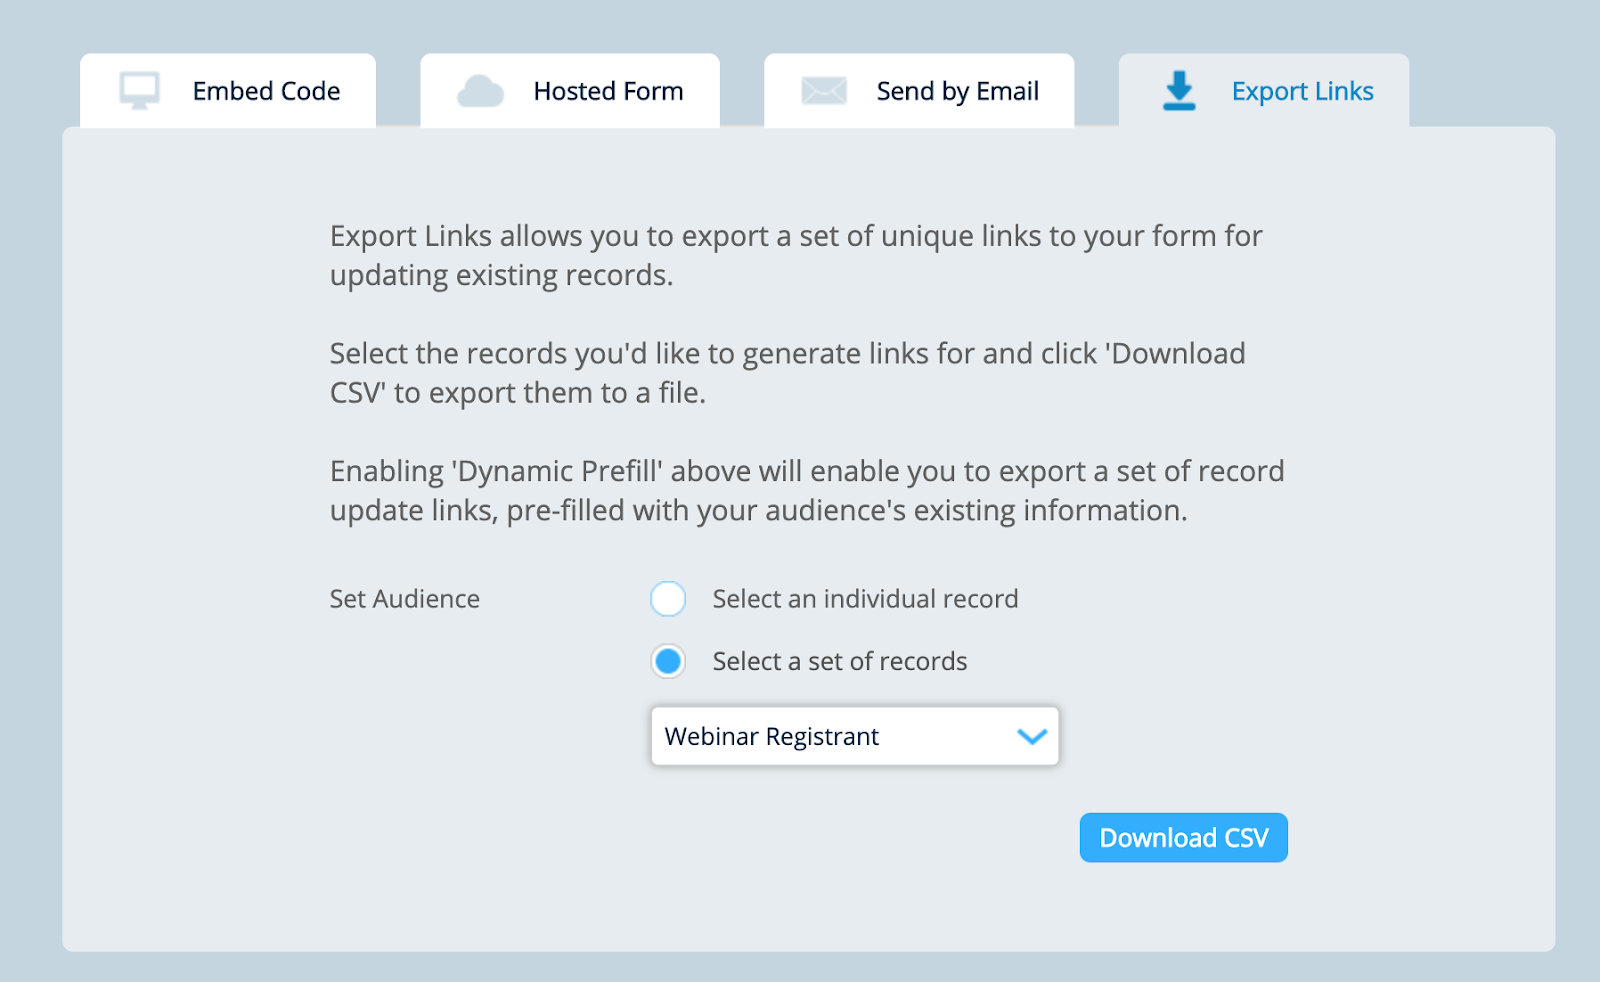
When you review your CSV file, you’ll notice there is a column full of URL links. This is how Forms for Salesforce / MailChimp will decipher which specific record to pull and update data on.

Navigate to your MailChimp account, and create a list. Under Settings, we’ll update our fields and labels. The default labels should cover most of what we’ll need, but we’ll need to add a field to for the link generated on our CSV file. Select “Add A Field” and choose the “website” option.
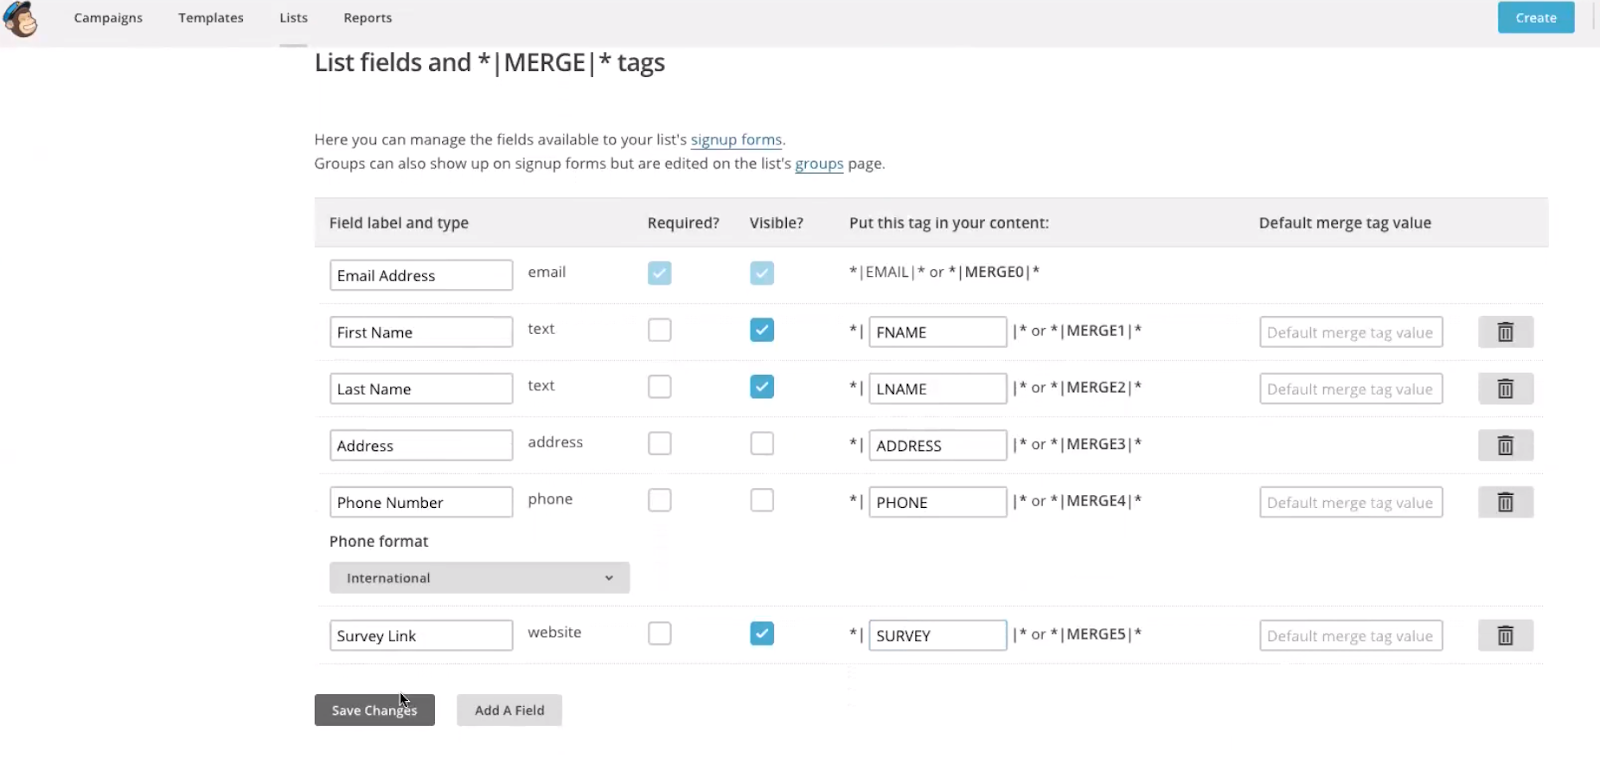
Finally, we’ll add our contacts by importing the CSV file we downloaded from Formstack. Once we’ve matched all of the CSV columns to fields in MailChimp, we’re ready to send out our campaign!
You’re all done and ready to start retargeting leads! However, if you have any issues or questions about building forms or adding contact lists to MailChimp, don’t hesitate to reach out to our Customer Support team. They’ll be happy to assist.


