


Building professional documents can be a pain. Editing in Microsoft Word is rarely intuitive, using Adobe to create fillable PDFs is time-consuming, and repeatedly typing legal jargon causes errors. If you’re pulling your hair out worrying about professional document design, think about how your readers feel. No one wants to read through unnecessarily long, dry documents—especially if there are typos or the style isn’t standardized.
When it comes to the pain of boring documents, we get it. So we’d like to show you how to make a document look professional by adding images. Formstack Documents makes it easy to add logos, graphs, and charts so you can cut excessive text or emphasize your content with images. You have the option to add images using our document builder or embed images sent over in your Merge Data.
Note: If you’re looking for a tutorial on how to add signatures to your documents using eSignature services like DocuSign, Adobe Sign, HelloSign, etc., check out this support article.
1. The Document Builder
The document builder makes it really easy to add images, tables, etc. to your documents using the top toolbar. Using the highlighted array of icons, you can add photos, update formatting, build tables, and more. The built in prompts help you to navigate the builder with ease.
2. The Image Placeholder Method
Because of the way Microsoft Office files are designed, using Merge Data to embed dynamic images takes a couple extra steps. So we’re going to walk you through how you can embed a dynamic image (signature, uploaded picture, logo, graph, etc) into your Word DOCX documents.
To get started, you will need to embed an image in your document as a placeholder for where you want the final image to go. We’ve built a handy dandy image generator link to help you get started. You’ll want to update the highlighted sections of the link to match the dimensions and file type of the image you’d like to add to your document.
For example, if you’re trying to add a company logo to your document and you know your logo is a 300 X 100 JPEG file, you’d update the URL to look like this:
https://www.webmerge.me/images/image.php?width=300&height=300&type=jpeg
It is important to note that you must use a placeholder with the same file format (JPEG or PNG) as the final image.
When you navigate to the URL, it will load an image. Simply copy the image and paste it into your Word document. You can use this image generator link to create image placeholders for charts, graphs, logos, and signatures that have been saved as JPEG or PNG files. You can add your placeholder image to any place in your template document. We’ve even added image placeholders to our templates to help you get started and further customize your documents.
Note: If you are inserting more than one image in your document, you'll need to make sure you use different images as the placeholders. If not, Word will treat them as the same image. If you are using our image generator, simply add a pixel to the width or height of the image, and that will do the trick!
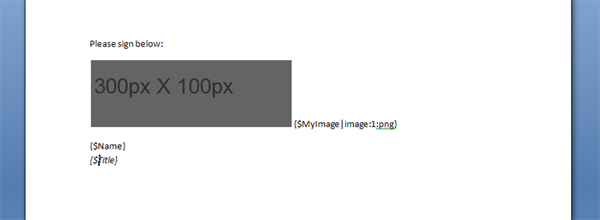
Once you’ve added your placeholder image to your template, you’ll need to set up the variable placeholder, or tag, for your image. You can put this placeholder anywhere in your document. It is simply used to map the image URL to the image element in your document. For the most part, a tag is very similar to the other merge fields in your document, but it has a little more information. Below is an example tag for the image:
{$CompanyLogo|image:1:jpeg}
In the above example, the image name is “CompanyLogo,” and the “|” indicates options after.
In Word documents, each image is stored using a numerical identifier. In the above tag, the “1” in the image indicates that identifier. To determine what number your image is, add &images=1 to the end of the URL when you are on the Manage File tab. This page will show you all the images in your document.
Finally, the “jpeg” in the tag represents the image file type (possible values: png or jpeg).

3. The Image Tag Method
The document builder method and the placeholder image method are great ways to improve your professional documents with images, but there is one final way to update your documents with dynamic images. If you want to loop through several images, we have a great way for you to add an image to your document using the following tag:
{$image|insert_image:width:height:max_width(optional):max_height(optional)}
If you’re trying to insert a series of graph images into your document, you might add the following set of tags to your document.
{$Chart1|insert_image:400:400}
{$Chart2|insert_image:400:400}
{$Chart3|insert_image:400:400}
To break down this tag, $Chart1 is the title of your merge field, and your image is a square with a width of 400 and a height of 400 (you can change these to create the correct size image). You place this tag in the spot that you want your image inserted, and it will be replaced with your image when the document is merged.
Note: If you want to automatically size the height to keep proportions, you can use a "0" for the height like this:
{$image|insert_image:300:0}
If you'd like to set a maximum height for your image, you use a tag like this:
{$image|insert_image:300:0:0:200}
You’re all set! Now you can embed logos, signatures, graphs, charts, and other images into your document. Start automating your professional documents today with a free trial of Formstack Documents .

