


Freshbooks is one of the leading accounting solutions on the market and they do a great job of managing your invoices and expenses. You can keep track of all of your customers and send invoices in minutes. But what if you want to create a customized invoice or send a receipt to your customer when you receive payment? Your options are very limited.
With Formstack Documents, you can create a fully customized invoices to send to your customers, or automatically send receipts once your receive their payment. For this example, we're going to show you how to generate a receipt when you receive a new Payment in Freshbooks.
To start generating customer payment receipts from Freshbooks, you will need:
5 Steps to Set Up Your Automated Receipt
Step 1: Create your receipt template.
To get started, let's create the receipt template in Formstack Documents. We're going to add our logo, details about the customer, and the specifics of the invoice/payment. Here's what we have setup:
Step 2: Set up your receipt delivery.
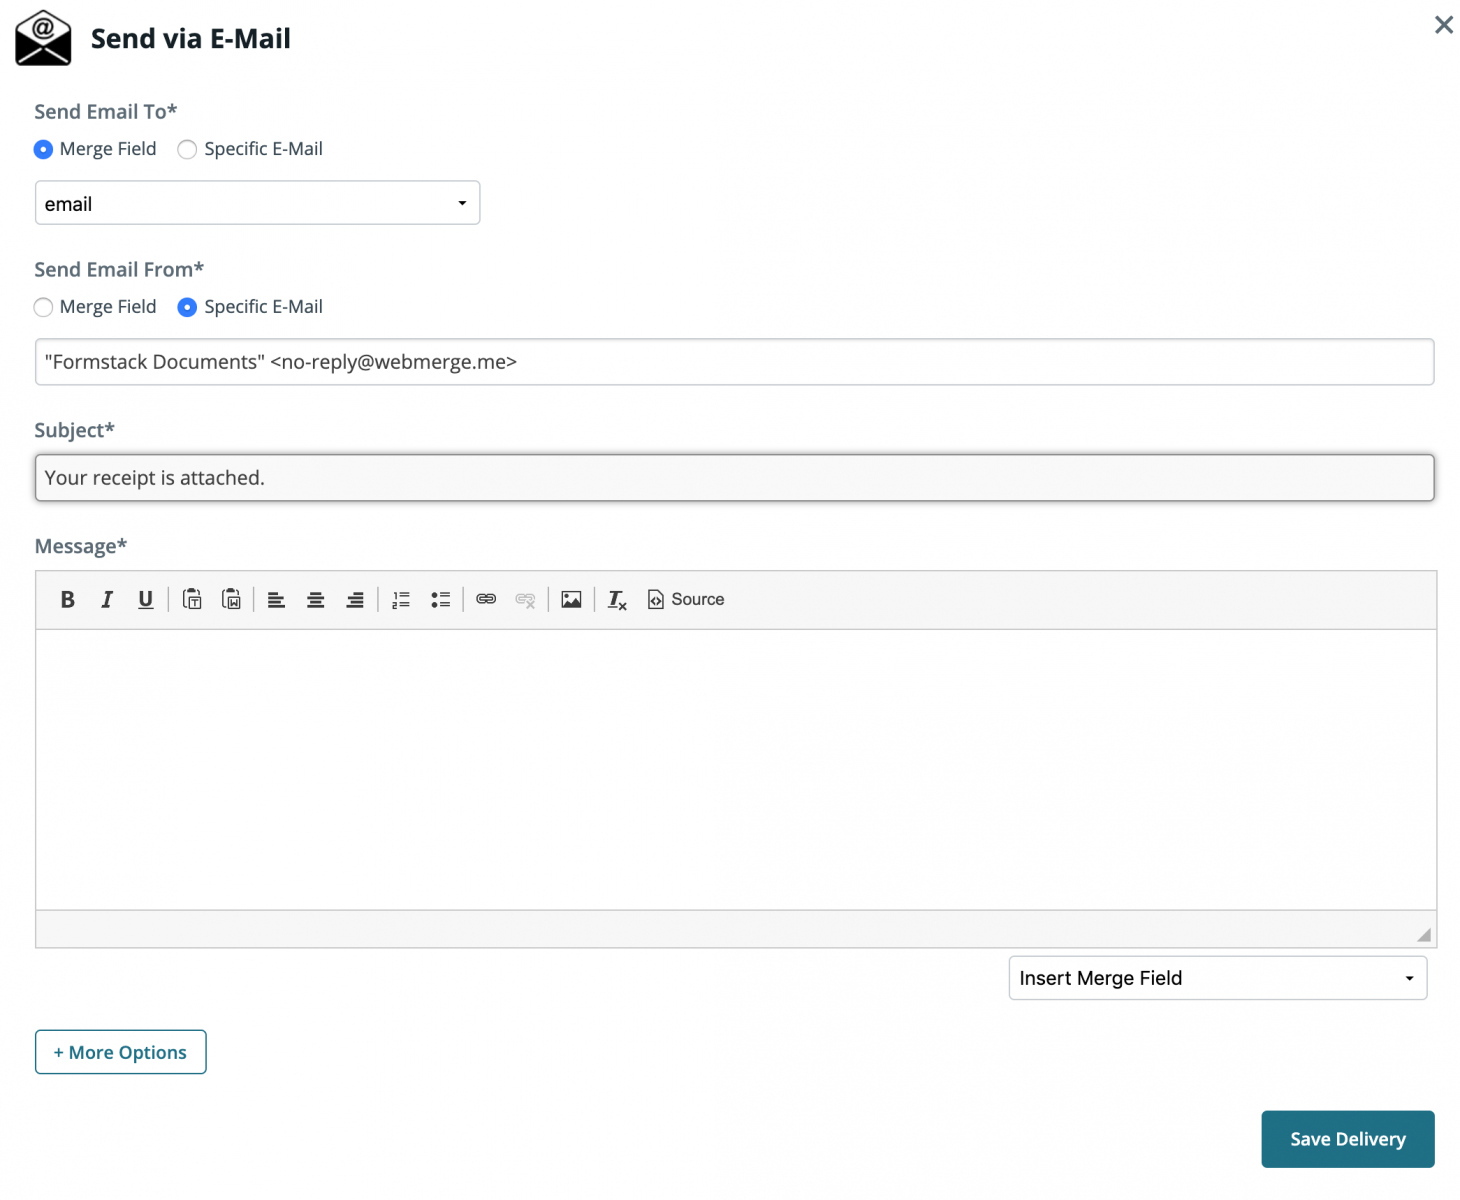
Next, we want the receipt to be delivered directly to the customer, so we need to jump over to the Delivery tab in Formstack Documents. Update the To address to be the email address for the customer. If you aren't including an email address on the receipt, simply choose <> from the dropdown and enter {$EmailAddress} into the box. This will add it as a merge field when integrating with Zapier. If you want a copy of the invoice as well, click More Options and add your email address under the BCC option.
Step 3: Turn on your Zap.
Now that we have our delivery setup, let's jump over to Zapier, and setup a new Zap. This Zap will automatically send payment information over to Formstack Documents when a new payment is recorded in Freshbooks.
Step 4: Map your fields.
Once you have selected Freshbooks as the trigger and Formstack Documents as the action, it will ask you to select your account for each. Then, it will load a list of your documents. Select the receipt template you just created, and a list of your merge fields will be loaded below. Your next step will be to match the merge fields with the corresponding Freshbooks Payment fields.
Now, you're ready to test! Zapier allows you to run a test during the setup. Go ahead and follow the instructions, and an example payment will be sent to Formstack Documents. Here's what our sample receipt looked like:
It's that easy? Can you think of any other ways you can use Formstack Documents to automate your accounting processes? Think of the hours that you can save! Start saving time with Formstack Documents today by starting a free trial.

