


Working for a nonprofit organization can be an amazing experience. But worrying about tasks like tracking donations, filing taxes, and recruiting volunteers can make day-to-day work stressful. How can you free up more time spent on administrative tasks so you can focus on achieving the goals of your organization?
Every nonprofit needs to send out receipts for the donations they’ve received, and donors need these receipts to complete their taxes. This can be a very tedious, time-consuming task. But we have a solution. With Formstack Documents, you can automatically generate donation receipts each time a donation is made.
In this example, we’re going to show you how you can use Formstack Documents to generate a tax receipt right from your Salesforce org. Salesforce is a great way to track all your donors and their donations. Plus, every time you save a donation, Formstack Documents will automatically populate an invoice and email it to your donor!
To get started, log in to Salesforce and head over to the App Launcher. Select Formstack Documents.
Our first step will be setting up our donation receipt template. We’re going to use a Microsoft Word document as our template. Inside our document, we are going to add merge tags where we want data from Salesforce to be added. These merge tags are just text in the document (like any other text that you type) and look like this: {$FirstName}, {$Email}, etc. You can use letters, numbers, and underscores, but you can’t use special characters or spaces.
Learn More: Check out our full video tutorial on adding Merge Fields to your documents.
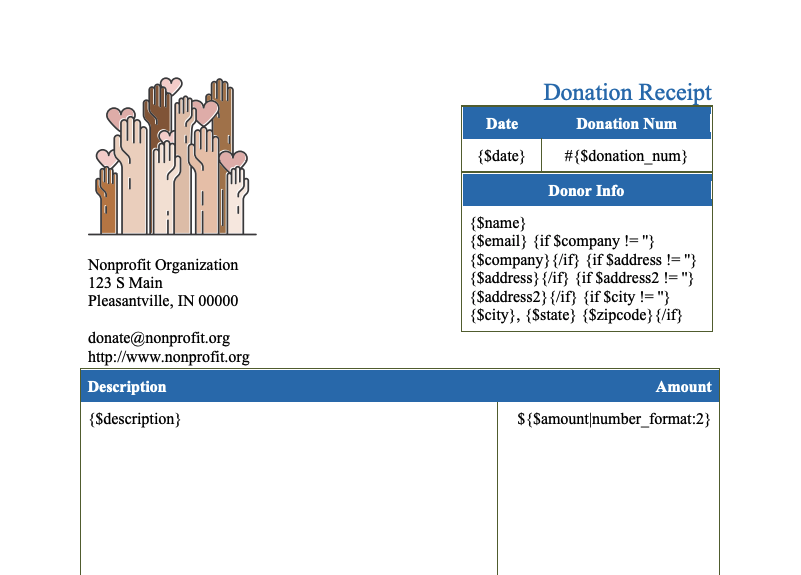
Here’s what our donation tax receipt template looks like:
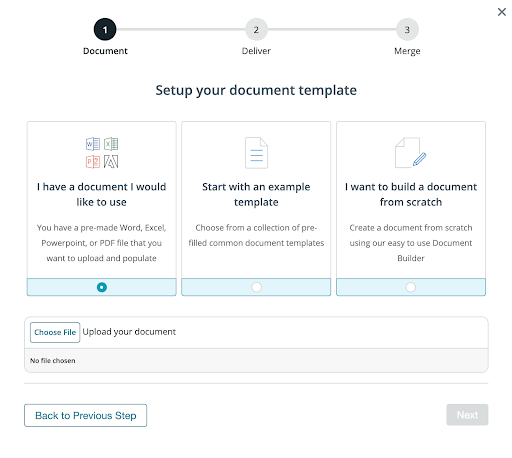
Once we’re happy with our template, we can upload it to Formstack Documents. From the Documents tab, select New Document. Give your document a name and choose to upload your pre-built template.
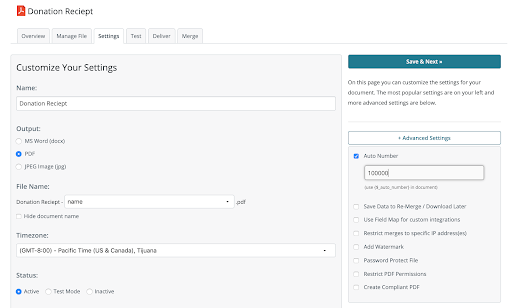
After you’ve uploaded your document and selected your delivery method, navigate to Settings. Here, you can update settings like the name of the document, the type of document you want to generate, and the name of the file that is generated. We’re going to use the current date as part of our merged file name, and we’re going to turn on the Auto Number feature under Advanced Settings.
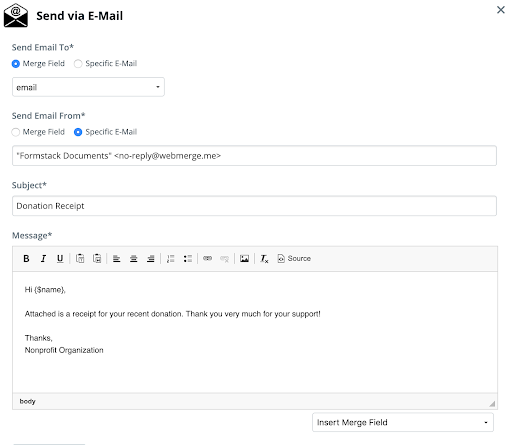
Next, we’re going to set up our email delivery so that our donor receives the receipt directly to their inbox. Head over to the Deliver tab. There, Formstack Documents has prepared an email for us. Select edit. First, we’re going to change who we’re sending the email to. We’ll use a merge field and select email field from the dropdown.
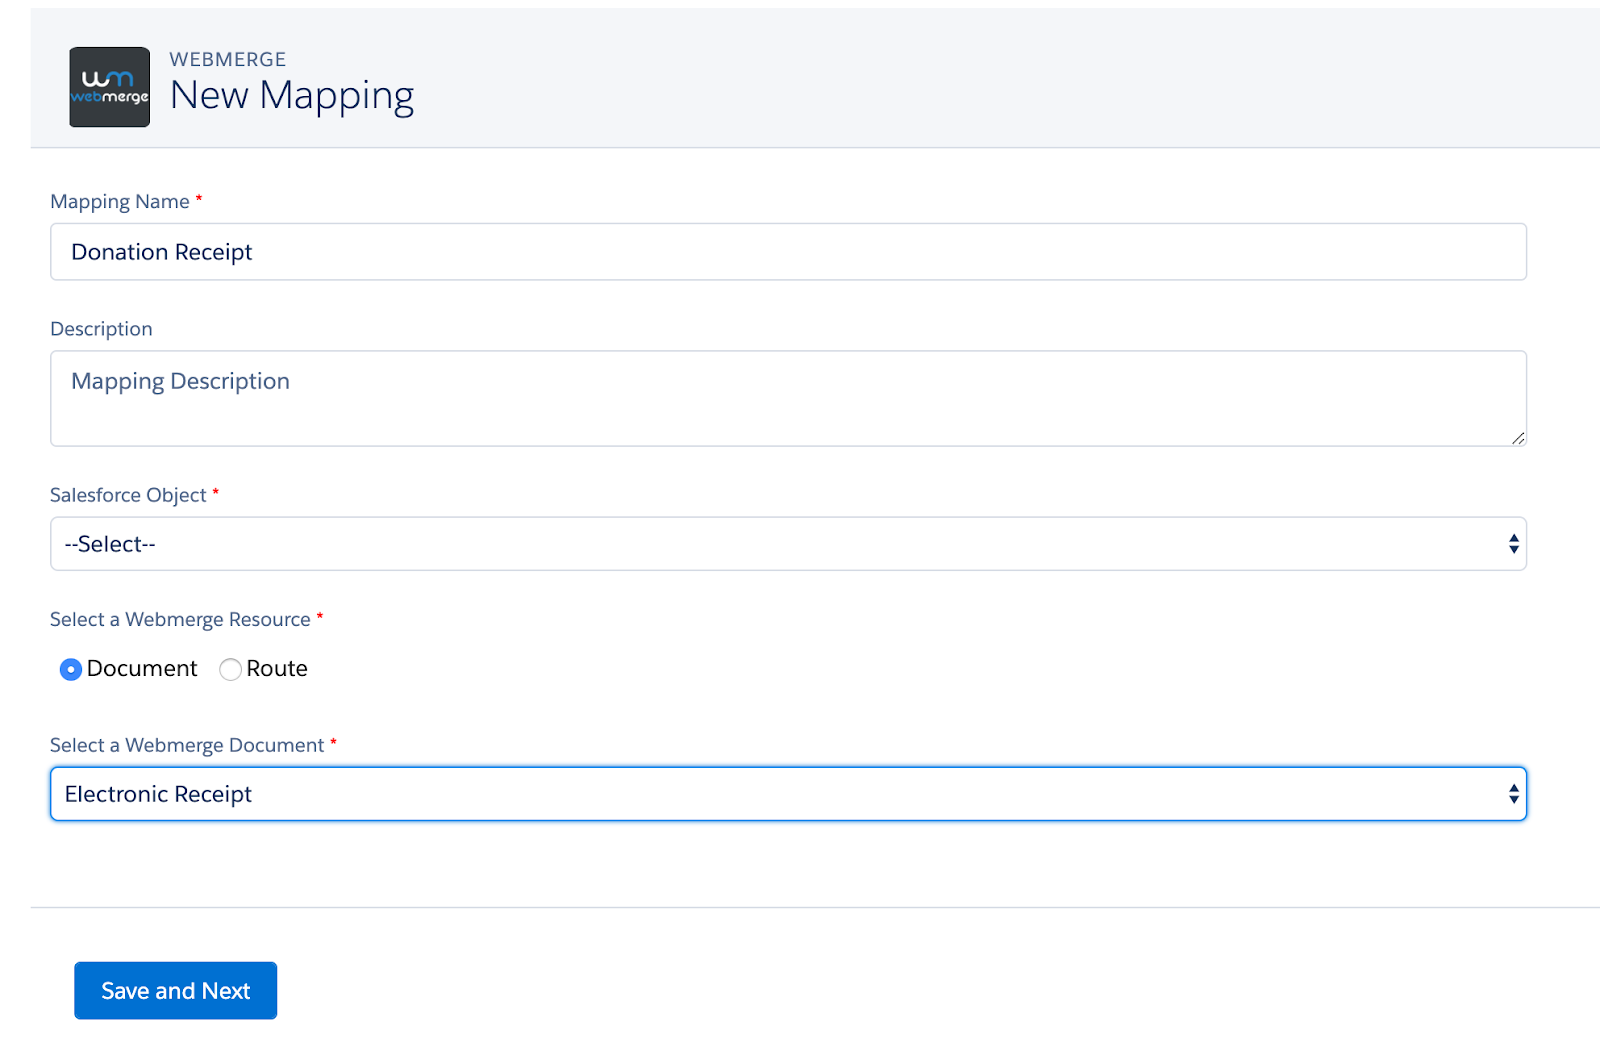
Now, let’s jump over to the Mappings tab. A mapping is the integration piece that tells Salesforce how to send the data over to Formstack Documents so that the document is generated with the information in the correct spots on the template. Select New Mapping.
Name your mapping and choose the Salesforce Object that you’ll want to use as the Primary Object. In our case, we’re going to use a Custom Object called Donations. Then, you’ll want to select the Formstack Documents file you just set up. Click Save and Next.
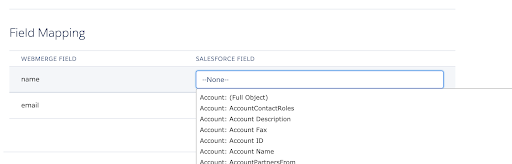
Next, we’ll focus on the Field Mapping section. On the left, you’ll see a list of the merge fields in your document, and on the right, you’ll see a dropdown of all the available Salesforce fields. For each merge field, pick the corresponding Salesforce field.
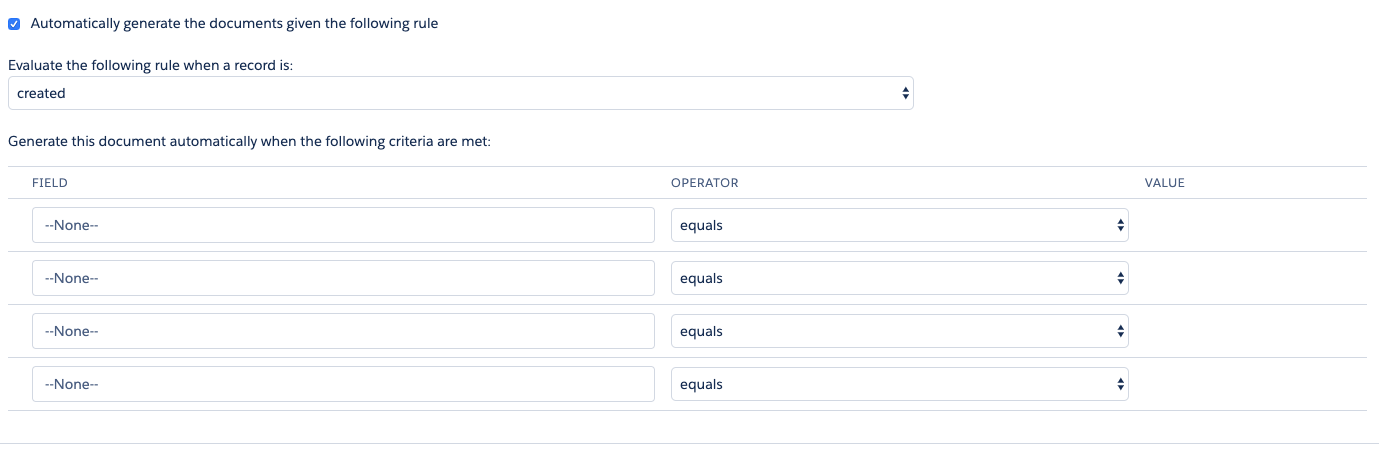
In order to generate this document automatically, we need to add a trigger. At the bottom of the page, check the box that says Automatically generate the documents given the following rule. Click that checkbox, and you’ll see settings appear. Choose the option to evaluate the rules when the record is created.
You’re done! Save and activate to turn on your mapping. Now, it is time to run a test. Go to your Donation Object and add a new donation. Your donation receipt will be generated and emailed within minutes!
Now, each time a donation is saved in Salesforce, you’ll automatically be generating and sending a tax receipt to the donor and saving hours each month. What are you going to do with all that extra time in your day?
If you are looking for more ways to incorporate Salesforce within your organization, check out our webinar on Salesforce. It will highlight some features of Salesforce and how you can use it.

